Print
Miffy Cake Recipe
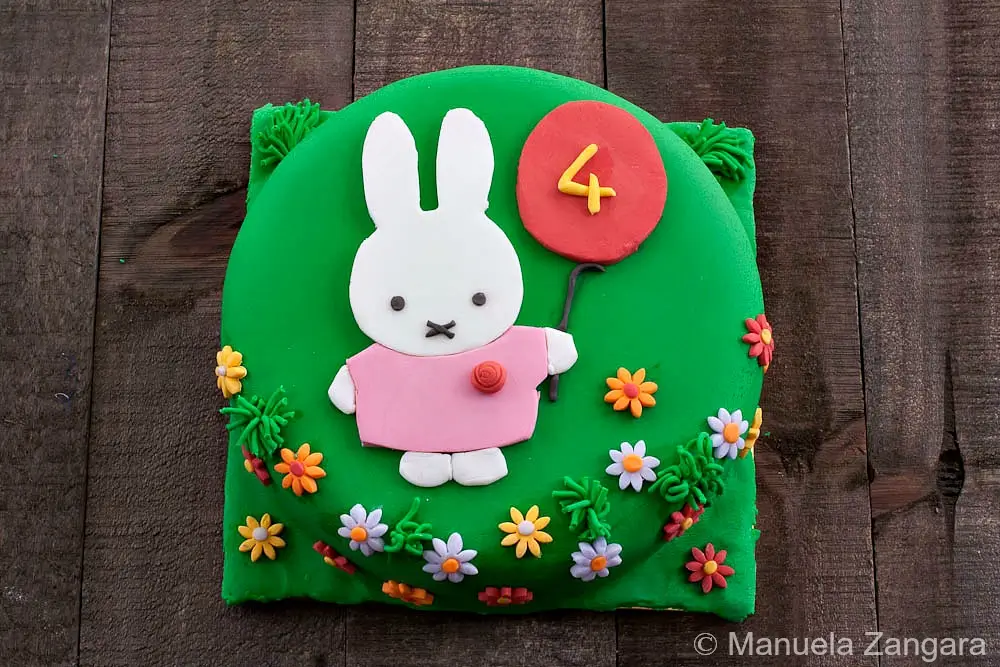
Miffy Cake cuteness is hard to resist and easier to make than it looks. Bake it for your next party and enjoy the smiles it brings to everyone around.
Prep Time: 2 hours
Cook Time: 50 minutes
Total Time: 2 hours 50 minutes
Ingredients
- yoghurt cake
- coloured fondant
- icing – for crumb coating
- icing sugar/cornstarch
Instructions
Cake Preparation
-
Bake the yoghurt cake. This can be done in advance, and the cake can be frozen until ready to assemble.
Fondant Preparation
-
Colour all the fondant needed for the decorations. Dip a toothpick into the gel colour, rub it onto the fondant, then knead until the colour is evenly combined.
-
Prepare the fondant decorations about 3 to 4 days before the party. Keep the fondant well wrapped and stored in a dry place to prevent it from hardening.
Making the Stencils
-
To create Miffy, prepare custom stencils. Print the desired image and gather clean cardboard, transfer paper, a pen, and a sharp craft knife or precision blade.
-
Place the transfer paper between the image and the cardboard, then trace the outline with a pen to transfer the design. Cut out all the individual pieces. This method can also be used for making cookie stencils.
Cake Assembly and Decoration
-
Assemble the cake the day before the party. Prepare icing for the crumb coat, using an icing recipe that is slightly less dense, so it spreads smoothly and is easy to apply.
-
Remove the two yoghurt cakes from the freezer and level them while still frozen, using a sharp serrated knife.
-
Spread a layer of icing on one cake and place the second cake on top. Choose the smoothest and flattest surface for the top of the cake, often the bottom of one of the cakes, as this makes icing and decorating easier.
-
Apply the crumb coat while the cakes are still frozen, starting from the top and then moving to the sides. Use a cake spatula to smooth the surface as much as possible. Once fully covered, place the cake in the fridge to set. This helps the fondant look smooth and prevents crumbs from showing through.
-
Once the icing has dried, transfer the cake onto a cake board and secure it to the base with a small amount of icing.
-
Roll out the green fondant and cover the cake. Smooth it with a fondant smoother, then trim away the excess.
-
Using a small amount of water, attach the prepared decorations and create Miffy using the stencils.
-
Use a clean garlic press to create the grass, then shape the flowers with cookie cutters and attach them to the cake to finish the decoration.