Print
Doraemon Cake
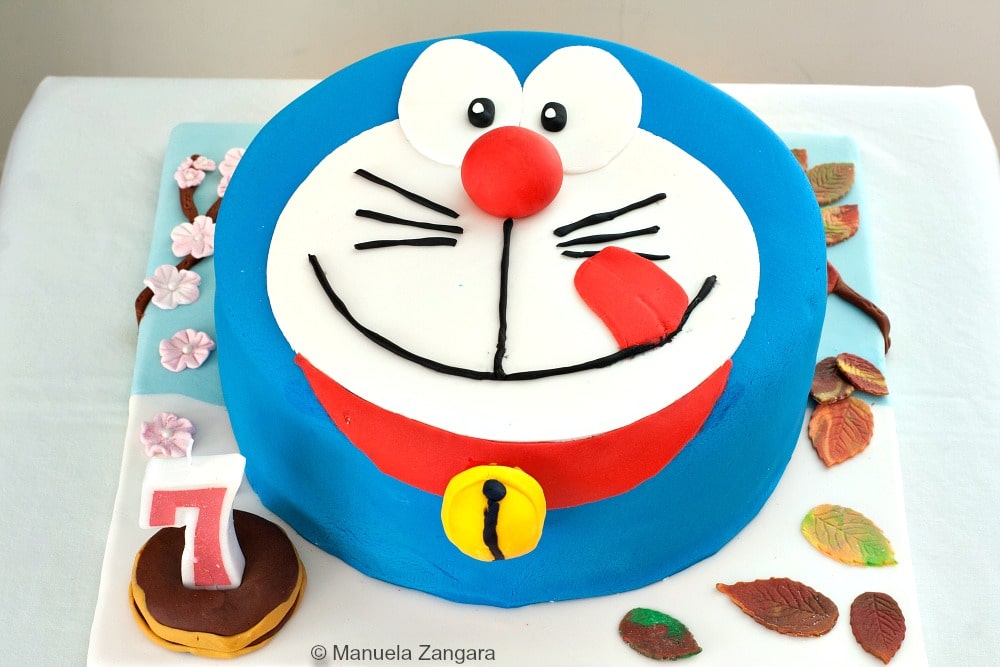
A tutorial on how to make a Doraemon Cake with fondant for your kid's birthday party!
Servings 15
Ingredients
- 2 Yogurt Cakes baked in 1x23 cm – 9 inches and 2x10 cm – 4 inches round pans
- White and coloured Fondant
- Edible glue
- Sugar pearls
- Gel colours
- Icing for crumb coating
- Icing Sugar/corn starch
Instructions
Cake
-
Start by baking the cake. I made 2 yogurt cakes and froze them.
-
Then colour all the fondant you are going to need. Dip a toothpick in the gel colour and then rub it onto the piece of fondant you want to colour. Then knead until uniformily combined. Alternatively, you can purchase coloured fondant and just use what you need.
Decorations
-
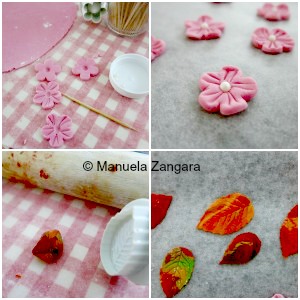
Make the flowers using a cookie cutter. Use a toothpick to make them look more real and add a sugar pearl in the centre. Keep aside to dry.
-
Make the leaves using a cookie cutter. To make them look like autumn leaves, mix different shades and colours together. Keep aside to dry.
-
Make the bell using yellow and black fondant. Insert a couple of toothpick in it – this will help you to stick it to the cake, so it doesn’t fall. Keep aside to dry.
Assembling
-
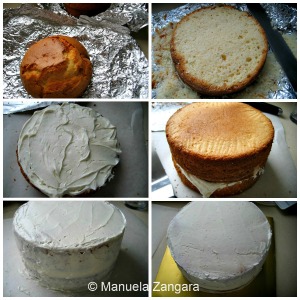
The day before the party I assembled the cake. I made some icing for the crumb coating (you can use your favourite icing recipe, just make sure that it is a little less dense as it needs to be smooth and you should be able to apply it easily). I took the 2 yogurt cakes out of the freezer and levelled them while still frozen with a sharp serrated knife.
-
I covered a cake board with fondant (I used white and light blue for the sky) and I kept it to dry/harden (it’s best to do this the previous day, so when you put the cake on the board, it will not sink in).
-
To crumb coat the cake, I put a layer of icing on top of one cake and topped it with the other cake. Make sure to choose the smoothest and flattest of the cake surfaces for the cake top (it is very likely going to be the bottom of one of the cakes), this will make it easier to ice and decorate the cake. Then I crumb coated it with icing. Start from the top, then do the sides. Use a cake spatula to make sure the surface of the cake is as smooth as possible. Then put it in the fridge to harden. This coating will make the fondant top look smooth and it will ensure that no crumbs will be visible through it.
-
When hard, I put some icing in the centre of the cake board and put the crumb coated cake on it.
-
Then roll out the blue fondant and cover the cake with it. Smooth it with a fondant smoother and cut out the excess.
-
To make Doraemon’s face, I made my own stencils. It is quite easy, all you need is a printed image of what you want to make, some clean cardboard, some transfer paper, a pen and a sharp exacto knife. Put the transfer paper between the image and the cardboard and transfer the image onto the cardboard by tracing the outline with a pen. Cut out all the single pieces. I always use this method when I have to make my own stencils (also for making cookies), so I can virtually make ANYTHING I fancy!
-
Then apply all the fondant pieces on the cake securing them with some water and/or edible glue/toothpicks.

-
I made 2 “trees” to stick the cherry blossoms of one side and the autumn leaves on the other.
-
I also made a fondant Dorayaki (Doraemon’s favourite food!) to stick the candle in it.
-
And there you have your Doraemon Cake!