

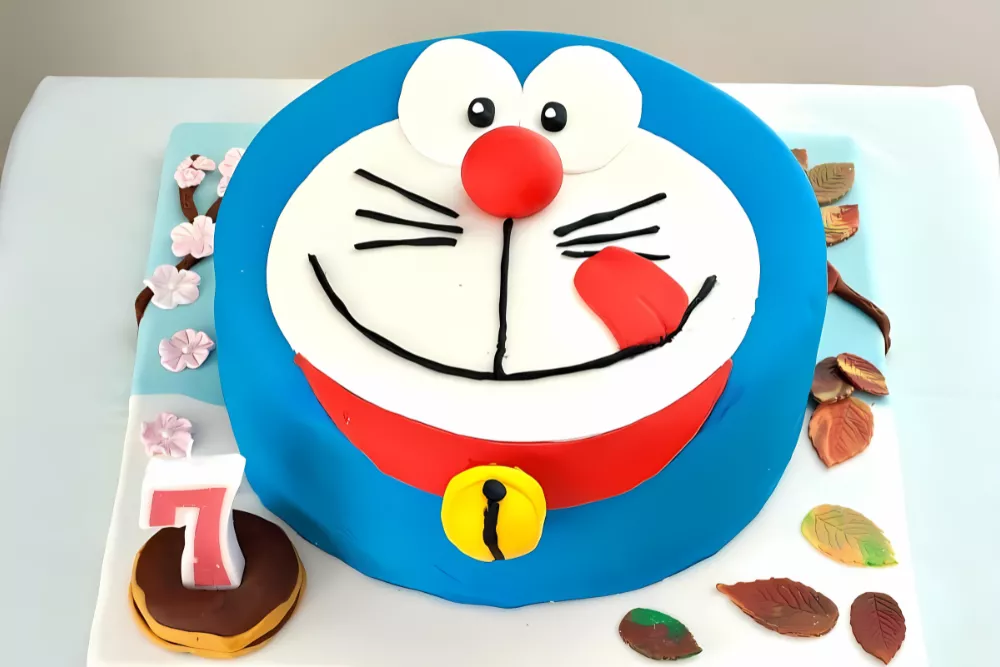
Surprise your little one with a Doraemon Cake that’s fun to make, easy to decorate, and made with soft sponge layers covered in colourful fondant that brings joy to every celebration.
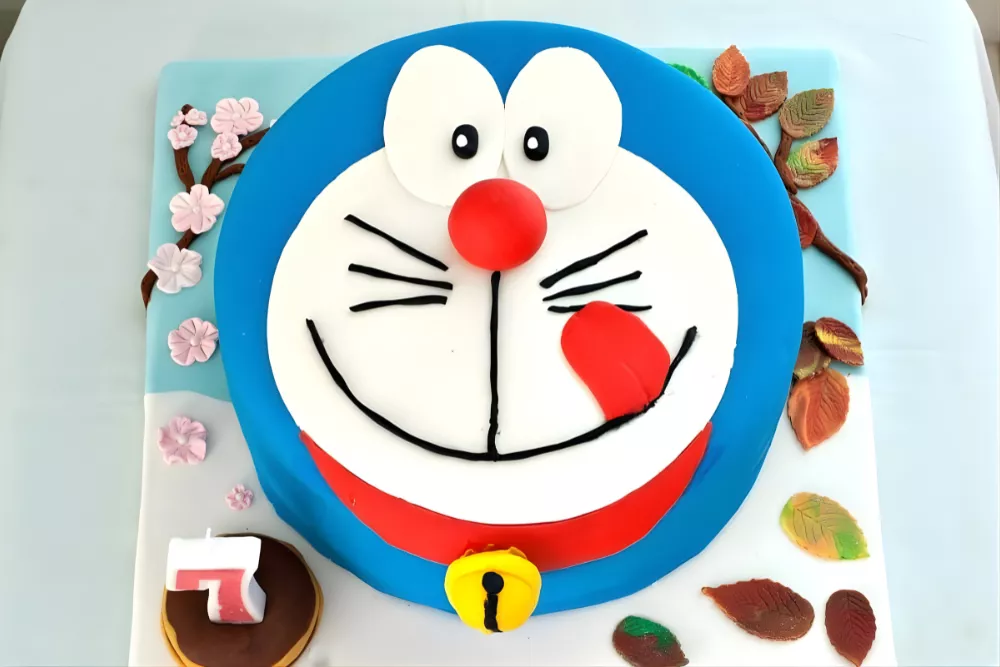
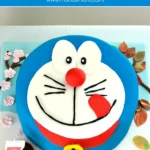
When my youngest turned seven on the 1st of December, she asked for a Japanese-themed birthday with a Doraemon cake. Her love for Doraemon started during our trip to Japan a few years ago, and as someone who grew up watching the same anime, I couldn’t resist saying yes.
I haven’t been baking much from scratch lately, but this was something I really wanted to do. Doraemon’s round face is perfect for a cake, and once I started planning, I realised it was easier than it looked to shape him out of fondant.
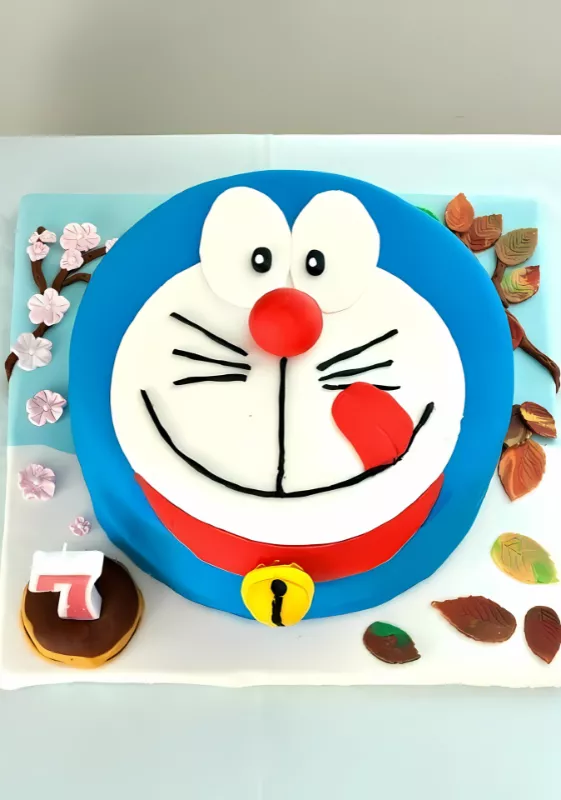
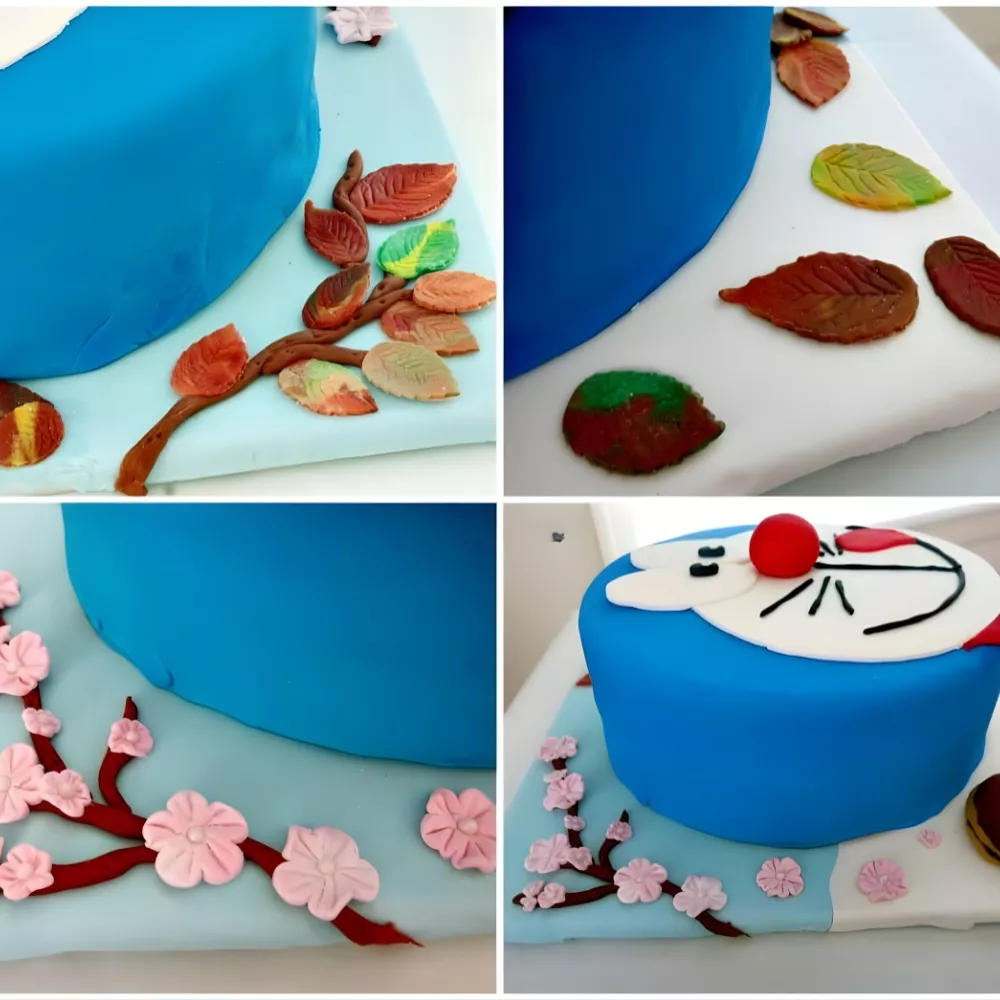
To make it more special, I decorated the cake board with two fondant trees, one with cherry blossoms for spring and the other with colourful autumn leaves. I also made a small fondant Dorayaki, Doraemon’s favourite snack, to hold the candle. My daughter’s smile when she saw the cake made it all worth it!
Why Kids Can’t Get Enough of Doraemon Cake
- Doraemon’s familiar face instantly adds joy and excitement to any birthday.
- Bright colours and simple shapes make decorating fun for little helpers.
- Parents who love creating themed cakes find the process surprisingly easy.
Key Ingredients for Doraemon Cake
Yoghurt Cake
A light yet sturdy base that holds its shape under fondant. Yoghurt cake stays moist, easy to level, and has a gentle flavour that pairs well with any filling or icing.
Fondant
White fondant forms the base for all the decorations. I coloured mine with gel colours, but you can also buy ready-coloured packs for convenience. It’s smooth, flexible, and ideal for covering cakes and shaping Doraemon’s face.
Gel Colours
Gel-based colours blend easily into fondant without making it sticky. I used blue for Doraemon’s face, red for the nose and collar, yellow for the bell, and a touch of black for outlining details.
Find the complete list with measurements in the recipe card below.
How to Make Doraemon Cake
Cake
Step 1: For the base, I used two yoghurt cakes I’d baked earlier and kept frozen.
Step 2: Colour the fondant you’ll need. Dip a toothpick in the gel colour and rub it onto the fondant, then knead until evenly blended. Alternatively, use pre-coloured fondant and take only what you need.
Decorations
Step 1: Cut out the flowers with a cookie cutter. Add texture using a toothpick for a more natural look, place a sugar pearl in each centre, and leave them to dry.
Step 2: Shape the leaves with a cutter. To give them an autumn feel, mix a few shades of fondant before cutting. Leave them to dry.
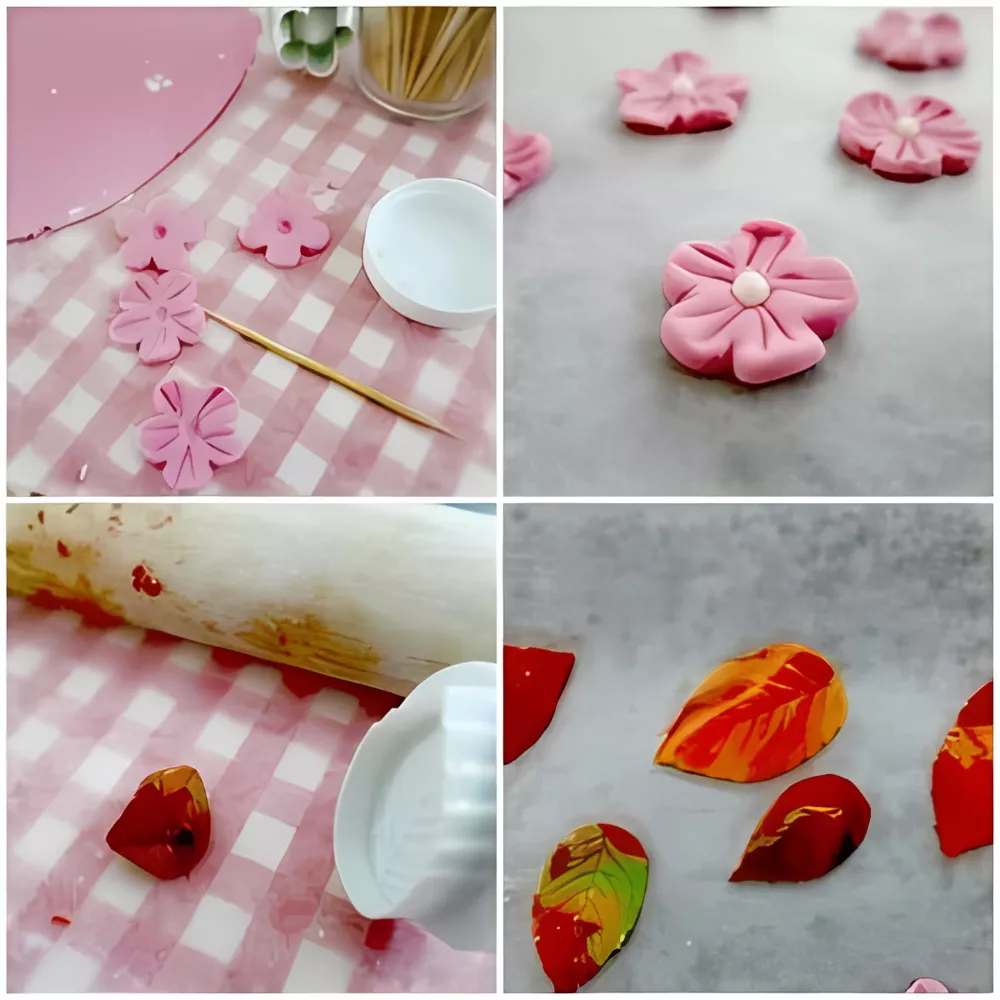
Step 3: Form a small bell from yellow and black fondant. Insert a couple of toothpicks underneath so it can be fixed to the cake later, then set aside to dry.
Assembling
Step 1: The day before the party, assemble the cake. Prepare icing for the crumb coat using your favourite recipe, but make it slightly softer so it spreads smoothly. Take the two yoghurt cakes from the freezer and level them while still frozen using a sharp serrated knife.
Step 2: Cover a cake board with fondant (I used white and light blue for the sky) and leave it to dry and harden. It’s best to do this the previous day so the cake won’t sink into it later.
Step 3: To crumb-coat the cake, spread a layer of icing on one cake and place the second on top. Choose the smoothest, flattest surface for the top, usually the bottom of one of the cakes, to make decorating easier. Cover the entire cake with icing, starting from the top and then the sides. Smooth the surface with a cake spatula and refrigerate until firm. This layer helps the fondant sit evenly and prevents crumbs from showing through.
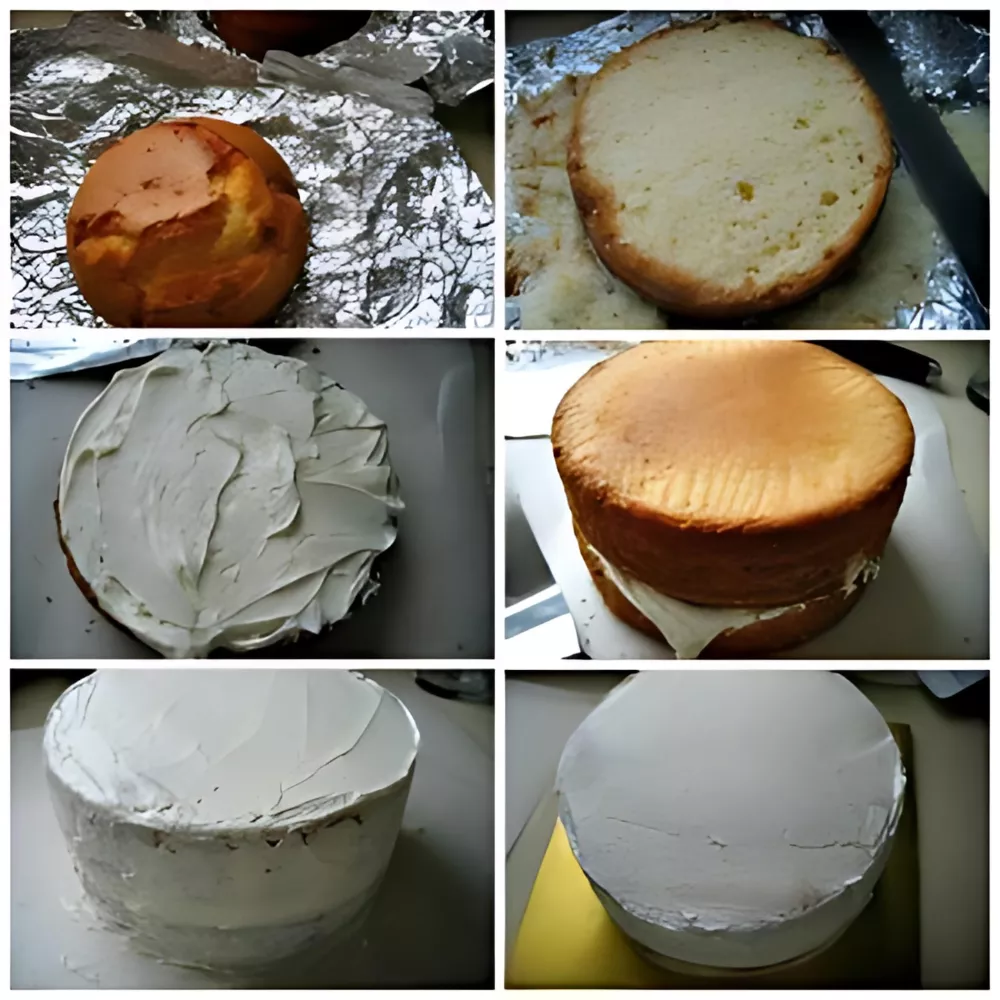
Step 4: Once the cake has set, add icing to the centre of the board and place the crumb-coated cake on top.
Step 5: Roll out the blue fondant and cover the cake. Smooth it with a fondant smoother and trim any excess.
Final Details
Step 1: To create Doraemon’s face, print the image you want to copy and gather clean cardboard, transfer paper, a pen, and a sharp craft knife. Place the transfer paper between the image and the cardboard, trace the outline with a pen, and cut out the pieces. I often use this method to make my own stencils, even for cookies, as it lets me create almost any design.
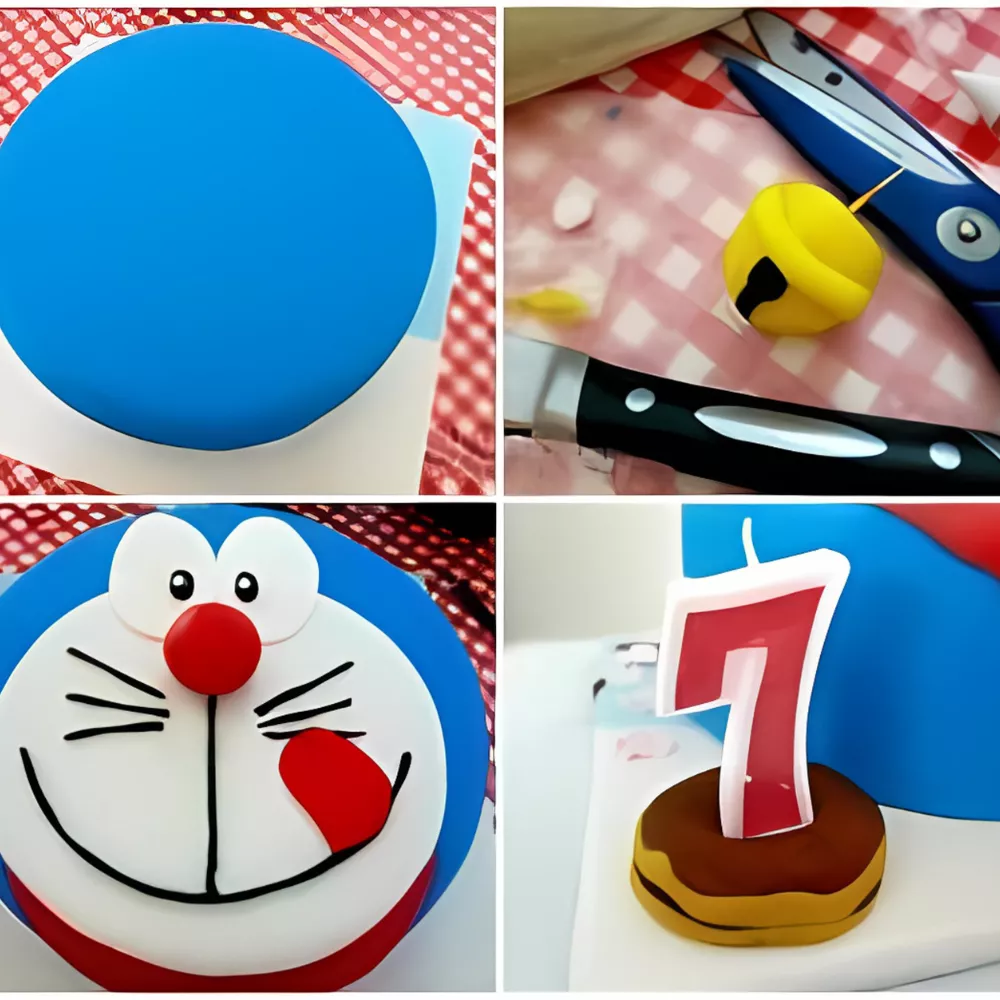
Step 2: Attach the fondant pieces to the cake using a little water, edible glue, or toothpicks. Then, make two fondant trees, one for the cherry blossoms and the other for the autumn leaves, and place them on opposite sides of the cake board.
Step 3: Shape a fondant Dorayaki, Doraemon’s favourite treat, and use it to hold the birthday candle.
Step 4: Finish by displaying your Doraemon Cake on the decorated board.
Frequently Asked Questions
Yes, any firm cake, such as sponge, butter, or Madeira works well. Avoid very soft cakes, as they can stretch or tear once covered with fondant.
Use a high-quality fondant that’s smooth and easy to roll. I usually choose brands made for covering cakes rather than modelling, as they give a cleaner surface and better flexibility.
Use concentrated gel colours and add a small amount at a time. The colour deepens as you knead, so it’s better to build slowly rather than adding too much at once.
Apply a thin, even crumb coat and chill the cake before covering. Once the fondant is on, use two smoothers at opposite sides and press gently around the edges to create a clean, sharp finish.
Extra Help from the Kitchen
Use Short Bursts in the Microwave to Soften Fondant – When fondant feels too firm to knead, warm it for a few seconds at a time. It becomes smooth and easier to shape without cracking.
Polish Fondant with a Bit of Shortening – A small amount rubbed over the surface gives a clean, even finish and removes any white dust from icing sugar.
Handle Gel Colours with Gloves – A tiny drop stains quickly, so wearing gloves keeps your hands clean while colouring fondant.
Work on a Cool Surface – Fondant softens fast in warm conditions. A marble board or cool countertop helps it stay firm and easy to roll.
Variations and Twists
Use Chocolate Cake Instead of Yoghurt Cake – Replace the yoghurt cake with a chocolate version for a richer flavour. It’s sturdy enough for stacking and fondant, and makes the cake more indulgent.
Try Homemade Fondant – If you prefer everything from scratch, make fondant using marshmallows or gelatine. It turns out soft, smooth, and easy to colour, perfect for shaping Doraemon’s features.
Experiment with Fillings – Spread a thin layer of ganache, buttercream, or even lemon icing between the cake layers before crumb coating. It adds flavour and helps keep the sponge moist.
Make Mini Doraemon Cupcakes – Turn the same idea into cupcakes using smaller fondant decorations. They’re fun to make, simple to serve, and ideal for kids’ parties.
Storage and Shelf Life
Store Doraemon Birthday Cake in a cool, dry place away from direct sunlight. Use a covered cake box or an airtight container to protect it from dust and humidity while keeping the fondant smooth. Avoid refrigeration, as moisture can cause the fondant to soften or turn sticky.
Wrap leftover slices tightly in cling film or place them in an airtight container at room temperature for up to 3 days. For longer storage, freeze undecorated cake layers for up to 2 months. Wrap each layer in cling film and foil, then thaw overnight before assembling or serving.
More Themed Cakes and Cupcakes to Try
Doraemon Cake
Surprise your little one with a Doraemon Cake that’s fun to make, easy to decorate, and made with soft sponge layers covered in colourful fondant that brings joy to every celebration.
Ingredients
- 2 yoghurt cakes – baked in 1 × 23 cm – 9 inch and 2 × 10 cm – 4 inch round pans
- White and coloured fondant
- Edible glue
- Sugar pearls
- Gel colours
- Icing for crumb coating
- Icing sugar or corn starch – for dusting
Instructions
Cake
-
For the base, I used two yoghurt cakes I’d baked earlier and kept frozen.
-
Colour the fondant you’ll need. Dip a toothpick in the gel colour and rub it onto the fondant, then knead until evenly blended. Alternatively, use pre-coloured fondant and take only what you need.
Decorations
-
Cut out the flowers with a cookie cutter. Add texture using a toothpick for a more natural look, place a sugar pearl in each centre, and leave them to dry.
-
Shape the leaves with a cutter. To give them an autumn feel, mix a few shades of fondant before cutting. Leave them to dry.
-
Form a small bell from yellow and black fondant. Insert a couple of toothpicks underneath so it can be fixed to the cake later, then set aside to dry.
Assembling
-
The day before the party, assemble the cake. Prepare icing for the crumb coat using your favourite recipe, but make it slightly softer so it spreads smoothly. Take the two yoghurt cakes from the freezer and level them while still frozen using a sharp serrated knife.
-
Cover a cake board with fondant (I used white and light blue for the sky) and leave it to dry and harden. It’s best to do this the previous day so the cake won’t sink into it later.
-
To crumb-coat the cake, spread a layer of icing on one cake and place the second on top. Choose the smoothest, flattest surface for the top, usually the bottom of one of the cakes, to make decorating easier. Cover the entire cake with icing, starting from the top and then the sides. Smooth the surface with a cake spatula and refrigerate until firm. This layer helps the fondant sit evenly and prevents crumbs from showing through.
-
Once the cake has set, add icing to the centre of the board and place the crumb-coated cake on top.
-
Roll out the blue fondant and cover the cake. Smooth it with a fondant smoother and trim any excess.
Final Details
-
To create Doraemon’s face, print the image you want to copy and gather clean cardboard, transfer paper, a pen, and a sharp craft knife. Place the transfer paper between the image and the cardboard, trace the outline with a pen, and cut out the pieces. I often use this method to make my own stencils, even for cookies, as it lets me create almost any design.
-
Attach the fondant pieces to the cake using a little water, edible glue, or toothpicks. Then, make two fondant trees, one for the cherry blossoms and the other for the autumn leaves, and place them on opposite sides of the cake board.
-
Shape a fondant Dorayaki, Doraemon’s favourite treat, and use it to hold the birthday candle.
-
Finish by displaying your Doraemon Cake on the decorated board.
Recipe Notes
I made the decorations and covered the board the day before to save time on assembly day.

Love travelling as much as cooking?
Many of the recipes I share are inspired by places I’ve visited around the world. On Travel with Manu you’ll find destination guides, itineraries and travel inspiration to help you plan your next adventure.











I love Doraemon! That is the cutest cake ever!