Print
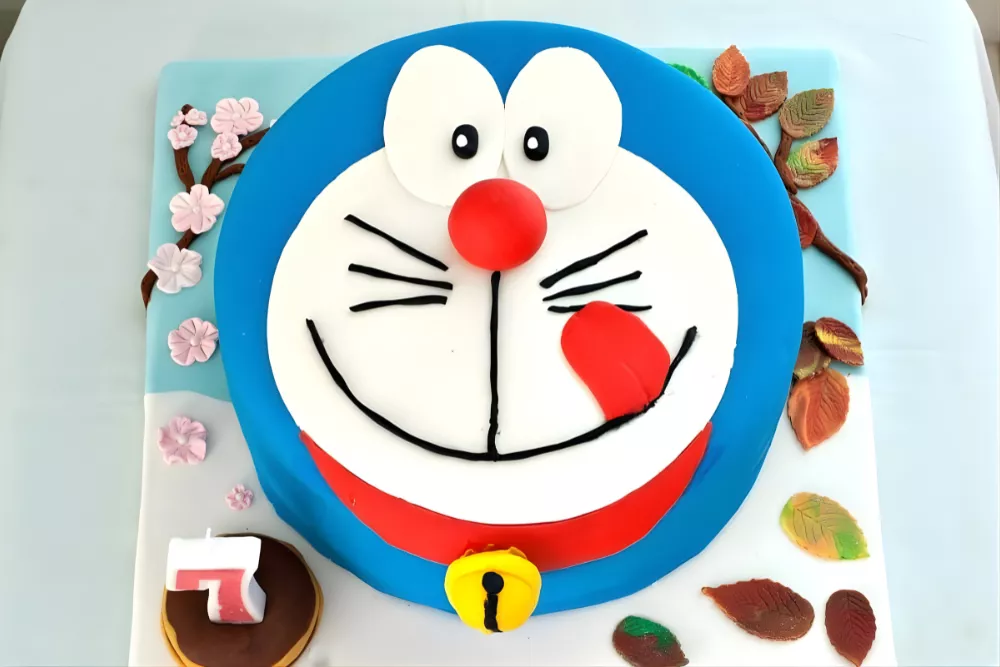
Doraemon Cake
Surprise your little one with a Doraemon Cake that’s fun to make, easy to decorate, and made with soft sponge layers covered in colourful fondant that brings joy to every celebration.
Prep Time: 4 hours
Resting Time 1 day
Total Time: 1 day 4 hours
Servings: 15
Ingredients
- 2 yoghurt cakes – baked in 1 × 23 cm – 9 inch and 2 × 10 cm – 4 inch round pans
- White and coloured fondant
- Edible glue
- Sugar pearls
- Gel colours
- Icing for crumb coating
- Icing sugar or corn starch – for dusting
Instructions
Cake
-
For the base, I used two yoghurt cakes I’d baked earlier and kept frozen.
-
Colour the fondant you’ll need. Dip a toothpick in the gel colour and rub it onto the fondant, then knead until evenly blended. Alternatively, use pre-coloured fondant and take only what you need.
Decorations
-
Cut out the flowers with a cookie cutter. Add texture using a toothpick for a more natural look, place a sugar pearl in each centre, and leave them to dry.
-
Shape the leaves with a cutter. To give them an autumn feel, mix a few shades of fondant before cutting. Leave them to dry.
-
Form a small bell from yellow and black fondant. Insert a couple of toothpicks underneath so it can be fixed to the cake later, then set aside to dry.
Assembling
-
The day before the party, assemble the cake. Prepare icing for the crumb coat using your favourite recipe, but make it slightly softer so it spreads smoothly. Take the two yoghurt cakes from the freezer and level them while still frozen using a sharp serrated knife.
-
Cover a cake board with fondant (I used white and light blue for the sky) and leave it to dry and harden. It’s best to do this the previous day so the cake won’t sink into it later.
-
To crumb-coat the cake, spread a layer of icing on one cake and place the second on top. Choose the smoothest, flattest surface for the top, usually the bottom of one of the cakes, to make decorating easier. Cover the entire cake with icing, starting from the top and then the sides. Smooth the surface with a cake spatula and refrigerate until firm. This layer helps the fondant sit evenly and prevents crumbs from showing through.
-
Once the cake has set, add icing to the centre of the board and place the crumb-coated cake on top.
-
Roll out the blue fondant and cover the cake. Smooth it with a fondant smoother and trim any excess.
Final Details
-
To create Doraemon’s face, print the image you want to copy and gather clean cardboard, transfer paper, a pen, and a sharp craft knife. Place the transfer paper between the image and the cardboard, trace the outline with a pen, and cut out the pieces. I often use this method to make my own stencils, even for cookies, as it lets me create almost any design.
-
Attach the fondant pieces to the cake using a little water, edible glue, or toothpicks. Then, make two fondant trees, one for the cherry blossoms and the other for the autumn leaves, and place them on opposite sides of the cake board.
-
Shape a fondant Dorayaki, Doraemon’s favourite treat, and use it to hold the birthday candle.
-
Finish by displaying your Doraemon Cake on the decorated board.
Recipe Notes
I made the decorations and covered the board the day before to save time on assembly day.