Print
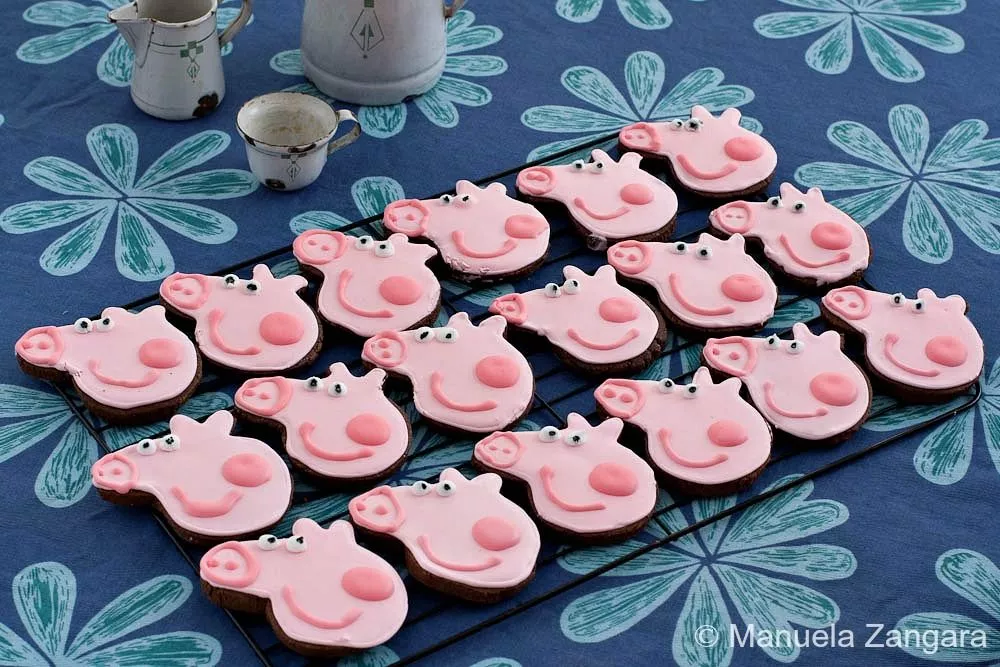
Peppa Pig Chocolate Cookies
Peppa Pig Chocolate Cookies are playful piggy delights. The chocolatey dough and cheerful icing always bring giggles to the kitchen and make baking feel like a muddy-puddle moment children love.
Prep Time: 30 minutes
Cook Time: 12 minutes
Total Time: 42 minutes
Servings: 25
Ingredients
- 75 g – 2.65 oz. sugar
- 75 g – 2.65 oz. butter – at room temperature
- 1 egg
- 1½ tbsp milk
- 225 g – 8 oz. flour
- 25 g – 0.9 oz. cocoa powder
- Royal Icing
- Food colouring
Instructions
-
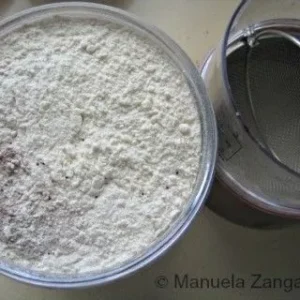
Sift the flour and cocoa powder together and set aside.
-
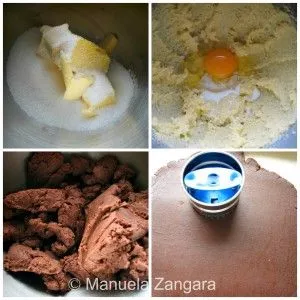
Cream the butter and sugar in the bowl of an electric mixer with a paddle attachment on low to medium speed. Mix until well incorporated.
-
Add the egg and milk and mix well. Add the sifted flour and cocoa powder to the bowl and mix again. The dough is ready when it clumps around the paddle attachment.
-
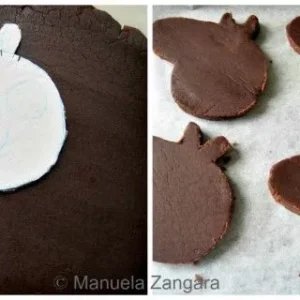
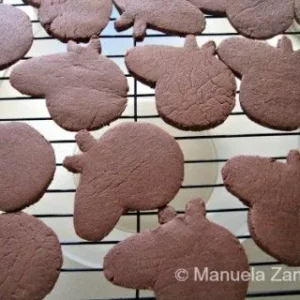
Roll the dough into a 6 mm – 1/4 inch thick sheet and cut out the cookies using a cardboard stencil. To make a stencil, print the image you want to use, place transfer paper between the image and clean cardboard, and trace the outline with a pen. Cut out the shape with a sharp exacto knife.
-
Place the cookies on a baking tray lined with baking paper and bake in a preheated oven at 180°C – 355°F for 10 to 12 minutes.
-
Let the cookies cool on the baking tray for a few minutes, then transfer them to a wire rack to cool completely.
-
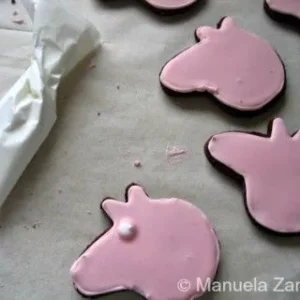
Prepare the Royal Icing and divide it into 3 bowls. Keep one white (1 tbsp) and colour the other two pink with food colouring, making one slightly darker (3 tbsp) than the other.
-
When the cookies have cooled completely, decorate them with the icing. Outline each shape with a very thin line of light pink icing, then fill it in (“flooding”) with the same colour. Some bakers prefer a thinner icing for flooding, but using the same thicker icing works for both outlining and flooding. If tools are limited (for example, only one #2 tip), keeping icing types to a minimum is practical. Homemade piping bags can also be made with baking paper.
-
After flooding, allow the cookies to dry slightly. Add details with the darker pink icing and make the eyes with white icing. Use a toothpick dipped in black food colouring to create the pupils.
-
Let the cookies set completely before serving.