
Manu’s Menu

Authentic Italian Home Cooking & More

  • Home
  • About
    • About me
    • About this site
    • About my photography
    • Privacy and Disclosure Policy
  • Recipes
    • Visual Archive
    • Regional Italian Recipes
  • Books
    • The Cool Side of Summer
    • Manu’s Christmas Menus
    • MsM’s Mobile App
  • Work With Me
    • Affiliate Sign-Up
    • Featured On
  • Out & About
    • Africa
      • South Africa 2019
    • Americas
      • Mexico, Guatemala, Honduras and Belize
      • CHILE AND ARGENTINA 2018
    • Asia
      • India
      • Japan 2015
      • Japan 2017
      • Japan 2018
      • Singapore
    • Europe
      • Slovenia and Croatia 2019
      • Italy 2019
    • Oceania
      • French Polynesia (Tahiti) 2017
      • French Polynesia (Tahiti)
      • New Caledonia
      • New Zealand
      • South Island – New Zealand Guide
  • Blogging Tips
    • Blogging Platform
    • Web Hosting
    • Technology Tips
    • Food Photography
    • Increasing Traffic to your Blog
    • Links
      • MsM in Your Kitchen
      • Events
        • 150 years of the Unification of Italy
        • Olio, Erbe e Fantasia – LILT
  • Tips
    • Techniques
      • Pasta and Gnocchi
      • Pizza and Other Doughs
      • Sauces and Other Basics
      • Decorations
    • Cake and Cookie decoration
      • Cake & Marshmallow Pops
        • Flowery Cake Pops
        • Hello Kitty Cake Pops
        • Dorothy the Dinosaur Cake Pops
        • Christmas Tree Cake Pops
        • Sea Marshmallow Pops
      • Fondant Cakes
        • Moo Cake
        • South Pole Cake
        • Lola Cake
        • Hello Kitty Yogurt Cake
        • Dorothy the Dinosaur Cake
        • The Little Mermaid Yogurt Cake
        • The Little Mermaid Fondant Cake
        • Sweet Sushi Mini Fondant Cakes
        • Peppa Pig Cake
        • Tinkerbell Cake
        • Miffy Cake
        • Olaf Yogurt Cake
        • Frozen Cake
      • Sugar Cookies
        • Heart Sugar Cookies
        • Dorothy the Dinosaur Sugar Cookies
        • Christmas Tree Ornament Sugar Cookies
      • Eggless Sugar Cookies
        • Chinese New Year Cookies
        • St. Patrick’s Day Cookies
      • Shortbread Cookies
        • Shortbread and Chocolate Hearts
        • Baby Shower Shortbread Cookies
        • Flounder Shortbread Cookie Pops
      • Easy Chocolate Cookies
    • Conversion Tables
    • Gift Ideas
      • Christmas 2010
      • Christmas 2011
      • Christmas 2012
      • Christmas 2013
      • Christmas 2014
      • Christmas 2015
    • Ingredients
    • Where I Shop for Italian Food in Sydney
  • Contact
You are here: Home / Recipes / Desserts / Peppa Pig Chocolate Cookies

Peppa Pig Chocolate Cookies

December 13, 2012 Last updated on October 23, 2025 By Manu 18 Comments

Jump to Recipe Print Recipe

Peppa Pig Chocolate Cookies are playful piggy delights. The chocolatey dough and cheerful icing always bring giggles to the kitchen and make baking feel like a muddy-puddle moment children love.
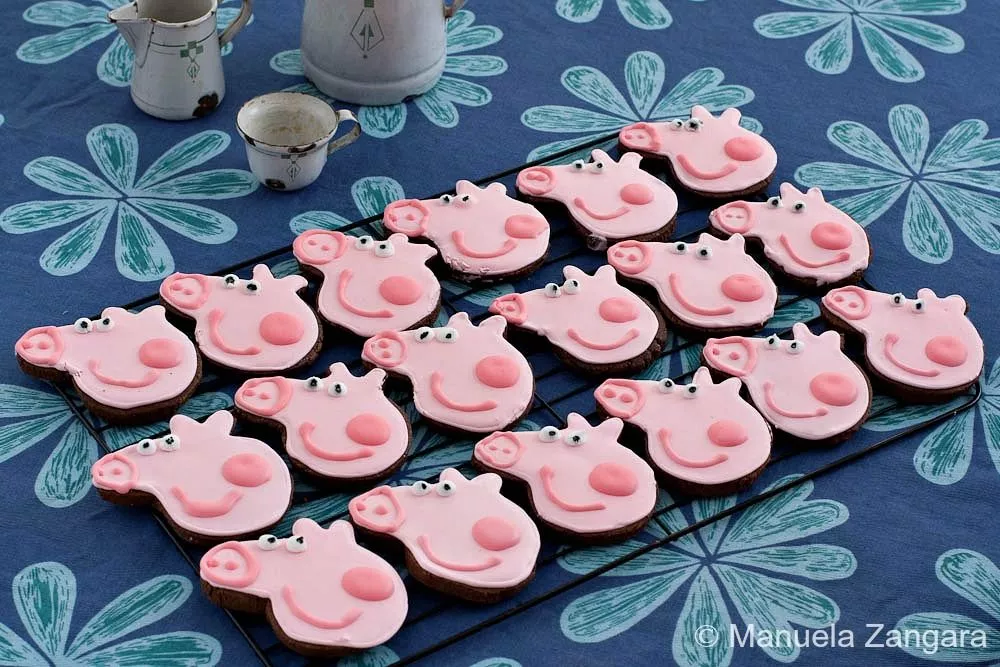
A full tray of decorated Peppa Pig Chocolate Cookies displayed on a patterned tablecloth.

I made these cookies for my daughter’s 3rd birthday party. The theme was Peppa Pig, so I prepared a whole table of themed treats, including Peppa Pig Chocolate and Vanilla Cupcakes, Pizza Piggy Buns, Muddy Puddle Cups, a Peppa Pig Cake, and these Peppa Pig Chocolate Cookies.

The cookies were a real success. They disappeared quickly, and the children loved them. I used my Chocolate Cookie Swap recipe, and it worked so well with the sweetness of the icing. This dough holds its shape in the oven, which makes it very reliable. You can cut the cookies ahead of time and freeze them already shaped. When you are ready to bake, place them straight in the oven and then decorate.

Key Ingredients for These Chocolate Cookies

Butter

Brings richness to the dough and makes the cookies tender. I prefer using it at room temperature so it creams smoothly.

Sugar

Sweetens the dough and balances the cocoa. Fine sugar blends easily into the butter for a smooth start.

Cocoa Powder

Adds the chocolate flavour and the dark colour that makes these biscuits so moreish. Good cocoa makes all the difference.

Royal Icing

Used for decorating Peppa’s face. It sets firm, making the details neat and fun to create. My daughters always loved helping with this step.

Find the complete list with measurements in the recipe card below.

How to Make Peppa Pig Chocolate Cookies

Step 1: Sift the flour and cocoa powder together and set aside.

Step 2: Cream the butter and sugar in the bowl of an electric mixer with a paddle attachment on low to medium speed. Mix until well incorporated.

Step 3: Add the egg and milk and mix well. Add the sifted flour and cocoa powder to the bowl and mix again. The dough is ready when it clumps around the paddle attachment.

Step 4: Roll the dough into a 6 mm – 1/4 inch thick sheet and cut out the cookies using a cardboard stencil. To make a stencil, print the image you want to use, place transfer paper between the image and clean cardboard, and trace the outline with a pen. Cut out the shape with a sharp exacto knife.

Step 5: Place the cookies on a baking tray lined with baking paper and bake in a preheated oven at 180°C – 355°F for 10 to 12 minutes.

Step 6: Let the cookies cool on the baking tray for a few minutes, then transfer them to a wire rack to cool completely.

Step 7: Prepare the Royal Icing and divide it into 3 bowls. Keep one white (1 tbsp) and colour the other two pink with food colouring, making one slightly darker (3 tbsp) than the other.

Step 8: When the cookies have cooled completely, decorate them with the icing. Outline each shape with a very thin line of light pink icing, then fill it in (“flooding”) with the same colour. Some bakers prefer a thinner icing for flooding, but using the same thicker icing works for both outlining and flooding. If tools are limited (for example, only one #2 tip), keeping icing types to a minimum is practical. Homemade piping bags can also be made with baking paper.

Step 9: After flooding, allow the cookies to dry slightly. Add details with the darker pink icing and make the eyes with white icing. Use a toothpick dipped in black food colouring to create the pupils.

Step 10: Let the cookies set completely before serving.
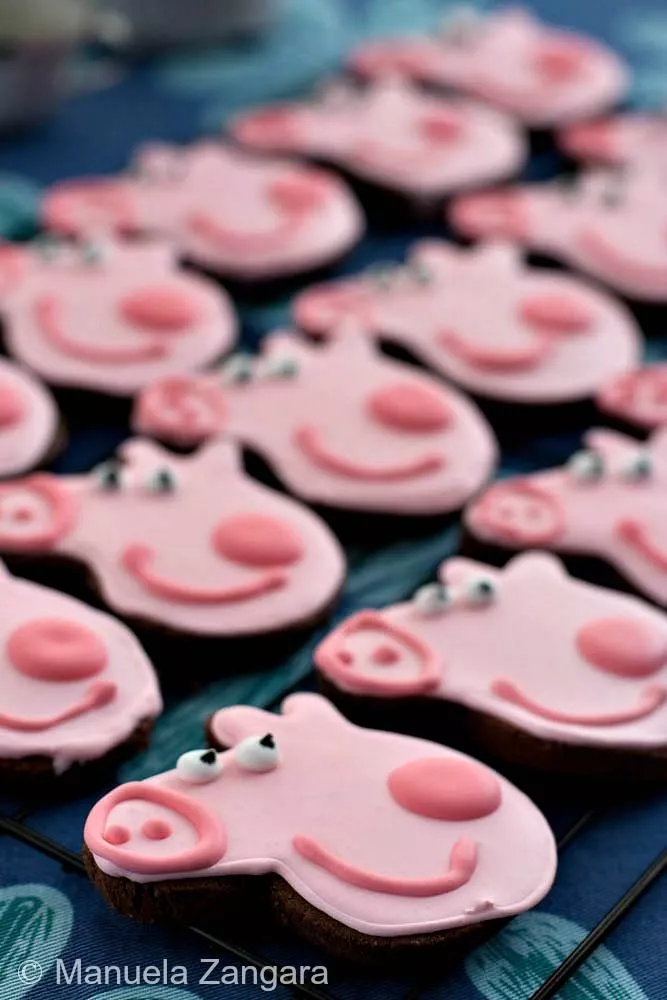
A tray of decorated Peppa Pig Chocolate Cookies with pink royal icing and playful faces.

Frequently Asked Questions

Can I use buttercream instead of royal icing?

Royal icing sets hard, which makes stacking and storing easier. Buttercream won’t hold as well, but you can use it if you plan to eat them right away.

Do I need a special cookie cutter?

No. A cardboard stencil works very well. Simply trace the Peppa Pig shape onto clean cardboard, cut it out, and use it to guide your knife when shaping the dough.

Can I use an electric hand mixer instead of a stand mixer?

Yes. Creaming the butter and sugar with a hand mixer works fine. If you don’t have one, mixing with a wooden spoon will also do the job with a little extra effort.

Extra Help from the Kitchen

Chill the Dough Before Rolling – A short rest in the fridge makes the dough easier to handle and helps keep the cookie shapes sharp in the oven.

Roll Between Sheets of Baking Paper – Placing the dough between two sheets prevents sticking and keeps the surface smooth without extra flour.

Cut Shapes Quickly – Once rolled, cut the cookies right away. Warmer dough can stretch and distort the shapes.

Use a Toothpick for Details – A simple toothpick dipped in food colouring is an easy way to make tiny features like pupils or smile lines.

Variations and Twists

Experiment with Whole Wheat Flour – All-purpose flour works best, yet mixing in a small portion of whole wheat flour adds a nutty taste and a slightly denser texture.

Choose Dutch-Processed Cocoa – Natural cocoa brings a lighter flavour, but Dutch-processed cocoa will deepen both the taste and the colour of the cookies.

Decorate with Fondant Instead of Royal Icing – Royal icing sets firm and makes neat details, but fondant can be rolled and cut for a smoother, quicker option.

Storage and Shelf Life

Peppa Pig Chocolate Cookies keep well for 5-7 days in an airtight container at room temperature.

To prepare ahead, the unbaked dough can be cut into shapes and frozen for up to 3 months. Bake straight from frozen without defrosting, adding 1–2 minutes to the baking time. Decorated cookies can be layered with baking paper to protect the icing. These cookies are best enjoyed at room temperature.

Serving Suggestions

These cookies are perfect for children’s parties and themed celebrations. They can be arranged on a tray as part of a dessert table, wrapped individually in clear bags for party favours, or offered alongside a simple drink like milk or tea. They also make a fun activity at playdates, as children can decorate their own cookies.

Whimsical Bakes and Party Ideas

  • Peppa Pig Chocolate and Vanilla Cupcakes
  • Pizza Piggy Buns
  • Muddy Puddle Cups
  • Playful Kitten Cake
  • Kitty Cat Doughnuts
A full tray of decorated Peppa Pig Chocolate Cookies displayed on a patterned tablecloth.
5 from 1 vote
Print

Peppa Pig Chocolate Cookies

Peppa Pig Chocolate Cookies are playful piggy delights. The chocolatey dough and cheerful icing always bring giggles to the kitchen and make baking feel like a muddy-puddle moment children love.

Course: Cookies
Cuisine: International
Prep Time: 30 minutes
Cook Time: 12 minutes
Total Time: 42 minutes
Servings: 25
Author: Recipe adapted from “Cioccolato” – Jacqueline Bellefontaine – 1998 Parragon, London & Manuela Zangara

Ingredients

  • 75 g – 2.65 oz. sugar
  • 75 g – 2.65 oz. butter – at room temperature
  • 1 egg
  • 1½ tbsp milk
  • 225 g – 8 oz. flour
  • 25 g – 0.9 oz. cocoa powder
  • Royal Icing
  • Food colouring

Instructions

  1. Sift the flour and cocoa powder together and set aside.
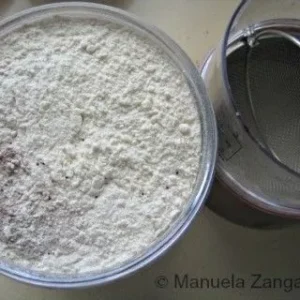
    A bowl of sifted flour and cocoa powder with a sieve beside it.
  2. Cream the butter and sugar in the bowl of an electric mixer with a paddle attachment on low to medium speed. Mix until well incorporated.
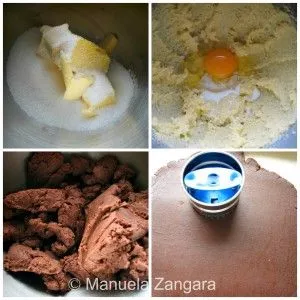
    Butter, sugar, and egg mixture shown alongside chocolate dough.
  3. Add the egg and milk and mix well. Add the sifted flour and cocoa powder to the bowl and mix again. The dough is ready when it clumps around the paddle attachment.
  4. Roll the dough into a 6 mm – 1/4 inch thick sheet and cut out the cookies using a cardboard stencil. To make a stencil, print the image you want to use, place transfer paper between the image and clean cardboard, and trace the outline with a pen. Cut out the shape with a sharp exacto knife.
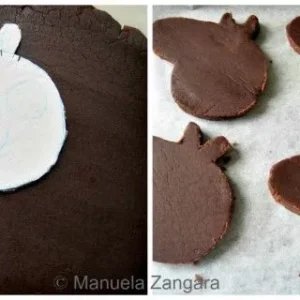
    Dough rolled flat with a cardboard stencil used to cut Peppa Pig cookie shapes.
  5. Place the cookies on a baking tray lined with baking paper and bake in a preheated oven at 180°C – 355°F for 10 to 12 minutes.
  6. Let the cookies cool on the baking tray for a few minutes, then transfer them to a wire rack to cool completely.
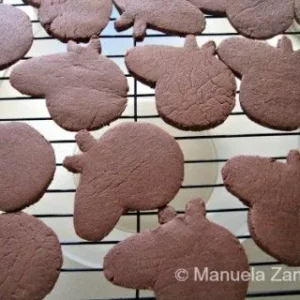
    Freshly baked Peppa Pig shaped chocolate cookies cooling on a wire rack, undecorated.
  7. Prepare the Royal Icing and divide it into 3 bowls. Keep one white (1 tbsp) and colour the other two pink with food colouring, making one slightly darker (3 tbsp) than the other.

  8. When the cookies have cooled completely, decorate them with the icing. Outline each shape with a very thin line of light pink icing, then fill it in (“flooding”) with the same colour. Some bakers prefer a thinner icing for flooding, but using the same thicker icing works for both outlining and flooding. If tools are limited (for example, only one #2 tip), keeping icing types to a minimum is practical. Homemade piping bags can also be made with baking paper.
  9. After flooding, allow the cookies to dry slightly. Add details with the darker pink icing and make the eyes with white icing. Use a toothpick dipped in black food colouring to create the pupils.
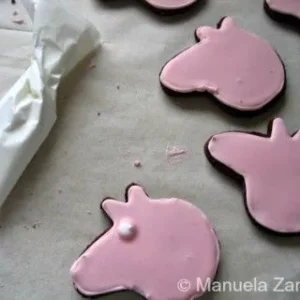
    Peppa Pig cookie with pink icing base, a dot of white icing added for the eye.
  10. Let the cookies set completely before serving.

Filed Under: Baking, Birthday, Breakfast, Cake and Cookie Decorating, Cookies, Desserts, Finger food, Snack, Special Occasions, Tea Time Tagged With: bake, baking, birthday, breakfast, children, chocolate, cocoa, cookies, decorating, decoration, dessert, glaze, icing, kids, party, Peppa Pig, royal icing, special occasion, sweets, tea time

« CHOCOLATE COOKIES WITH ORANGE AND MINT GLAZE
Shepherd’s Pie »

Comments

  1. Ree says

    May 16, 2019 at 2:38 am

    Do you put the cardboard cut out on the cookie dough and cut around with a knife? Need to make these for my daughter’s b’day but don’t have a peppa pig cutter

    Reply
    • Manu says

      May 16, 2019 at 7:47 am

      Yes! That’s exactly how I do it! 🙂

      Reply
  2. Danni says

    September 18, 2014 at 8:34 pm

    Is it plain flour or self raising flour?

    Reply
    • Manu says

      September 18, 2014 at 8:40 pm

      Hi Danni. It’s plain flour. 🙂

      Reply
  3. Vicky Bawden says

    February 13, 2014 at 5:17 pm

    Can you make them vanilla and leave out chocolate? If so how does the reciepe need to be altered

    Thanks vicky

    Reply
    • Manu says

      February 13, 2014 at 7:45 pm

      Sure. Just skip the cocoa powder and substitute it with an extra tablespoon of flour and add 1/2 teaspoon of vanilla extract. 🙂

      Reply
  4. natasha says

    April 30, 2013 at 5:05 am

    omg you have just saved me!!! my 3 year old little boy is peppa and george obsessed and wants a peppa and george birthday!! with a new baby on the way in 2 weeks and his birthday 3 weeks after, these are perfect!!! will have one happy little Rowan!!!

    Reply
  5. Samantha says

    April 26, 2013 at 3:05 pm

    Thank you

    I’m going to attempt to make Peppa and her cat and zebra friend

    Wish me luck

    Reply
  6. Samantha says

    April 25, 2013 at 8:53 pm

    Love the idea of these cookies, can I make and ice them in advance?? How many days will they keep fresh for??

    Reply
    • Manu says

      April 25, 2013 at 9:11 pm

      Hi Samantha! I always make them at least 2 or 3 days in advance, so they dry well. When they are dry, put them in an airtight container and you should be fine! 🙂

      Reply
  7. Anita Dimitrovich says

    February 15, 2013 at 3:35 pm

    Hi,
    Ok so was up till 11pm last night icing 65 of these..
    My icing began to get runny and I wasn’t happy
    With the colour of my darker pink icing, but despite all
    that my 4 year old miss was wrapped!!
    Thanks again for posting the recipe!!
    Anita

    Reply
  8. Anita Dimitrovich says

    January 22, 2013 at 5:14 pm

    Hi, First of all thankyou soooo much for posting the gorgeous peppa pig cookie recipe.
    I will be making them for my daughters birthday.
    Just one question, I dont have a mixer with a paddle attachement. Can I just use a wooden spoon and mix it myself? Or is there something else you suggest?
    Cheers

    Reply
    • Manu says

      January 22, 2013 at 5:19 pm

      So glad you like them! You can surely mix them with a wooden spoon and knead them by hand! 🙂
      Let me know how you go and Happy Birthday to your daughter!!! 🙂

      Reply
  9. Tabatha Gulyas says

    December 24, 2012 at 2:46 am

    Cute cookies and such a nice idea for a birthday. Thanks for sharing this idea and I wonder if there are other forms you can use for this recipe. It is perfect for children’s parties and baby showers.

    Reply
  10. Chung-Ah | Damn Delicious says

    December 15, 2012 at 10:24 am

    These are just too stinking cute! I actually don’t really know who Peppa Pig is but my little niece and her family lived in London for a year and when they came back, they were all about Peppa Pig. Can’t wait to show this to them!

    Reply
  11. Eva Taylor says

    December 15, 2012 at 5:46 am

    Absolutely adorable.

    Reply
  12. Mi Vida en un Dulce says

    December 14, 2012 at 9:43 am

    Oh Manu, so great cookies. And congratulations for your girl birthday.

    Reply
  13. Parsley Sage says

    December 13, 2012 at 11:22 pm

    So cool, Manu!!

    Reply
5 from 1 vote

Leave a Reply Cancel reply

Your email address will not be published. Required fields are marked *

Recipe Rating:


Welcome to Manu’s Menu!

Hi! I am Manu, the author of Manu's Menu. I was born and brought up in Italy and my blog can show you how to create authentic Italian food in your own home! Read More…

  • Email
  • Facebook
  • Instagram
  • LinkedIn
  • Pinterest
  • RSS
  • Twitter
  • YouTube

HOMEMADE PASTA MADE SIMPLE – THE BOOK. CLICK TO BUY IT FROM AMAZON NOW!

Homemade Pasta Made Simple

Archives

Categories

  • Email
  • Facebook
  • Flickr
  • Instagram
  • LinkedIn
  • Pinterest
  • RSS
  • Twitter

Video Recipe: Orecchiette with Crudaiola Sauce

https://www.youtube.com/watch?v=QqSyzFElbRY
foodgawker bowls-150x150
tastespotting150
Tasteologie badge
Pasta & Gnocchi

The Cool Side of Summer e-Book – Click to buy it now! On SALE for only $9.99!

The Cool Side of Summer e-Book

MsM’S EBOOK – CLICK TO BUY IT NOW!

MsM’S EBOOK – CLICK TO BUY IT NOW!
Community Table Contributor Badge
Sunday Supper Movement

manusmenu

Food blogger, cookbook author, food photographer & stylist.

A batch of homemade flaxseed crackers is always ha A batch of homemade flaxseed crackers is always handy to have in the kitchen.

They're crisp, easy to store, and pair well with dips, soft cheeses, fresh vegetables, or your favourite toppings whenever you need a quick snack.

#flaxseedcrackers #mealprep #healthysnacks #homemade #manu #manusmenu
Creamy goat cheese, crunchy pistachios, and a driz Creamy goat cheese, crunchy pistachios, and a drizzle of honey 🍯

The combination of creamy, sweet, and crunchy textures makes this such an easy appetiser to put together when you want something simple but a little different.

Serve with crusty bread or your favourite crackers and enjoy. 

#pistachios #HoneyDrizzle #sharingplatter #manusmenu
After sharing the scrambled eggs and tomato toast After sharing the scrambled eggs and tomato toast recently, I thought it would be a good time to highlight one of my favourite herb blends 🌿

Herbes de Provence is a traditional French herb blend usually made with herbs such as thyme, rosemary, oregano, and savoury.

It's a simple way to add extra flavour to everyday ingredients and works especially well with eggs, tomatoes, roasted vegetables, potatoes, chicken, and soups.

Have you used Herbes de Provence before?

#herbesdeprovence #frenchcooking #mediterraneanfood #herbblends #manu #manusmenu
Scrambled eggs with tomato on toast is one of thos Scrambled eggs with tomato on toast is one of those simple meals that always works 🍅

Warm, savoury, filling, and made with ingredients most people already have at home.

#scrambledeggs #QuickMeals #breakfastideas #homemademeals #manu #manusmenu
This calamari risotto turned out creamy, rich, and This calamari risotto turned out creamy, rich, and so satisfying 🍚

Made as a low FODMAP recipe, it’s a homemade seafood dinner option that feels filling and easier to enjoy for those with sensitive stomachs or lower FODMAP dietary needs.

 #lowfodmap #calamaririsotto #seafoodrecipes #homemademeals #manu #manusmenu
Pumpkin has a naturally gentle sweetness, which is Pumpkin has a naturally gentle sweetness, which is why ingredients like ginger, coconut cream, herbs, curry paste, or lime work so well with it.

Those subtle layers of flavour help create soups that feel comforting, warming, and more rounded 💛

 #pumpkinsoup #thaifood #homemademeals #homemade #manusmenu
Smooth, creamy, and filled with delicious Thai-ins Smooth, creamy, and filled with delicious Thai-inspired flavours 🍲 This pumpkin soup makes such a lovely homemade dinner idea ✨

#PumpkinSoupRecipe #homemadefood #thaifood #manu #manusmenu
A sweet homemade treat for the person who made lif A sweet homemade treat for the person who made life sweeter first 💖
These chocolate date hearts are filled with soft dates, rich chocolate, and a little homemade love for Mother’s Day 🌷

 #mothersday #mothersdaygiftideas #datehearts #manusmenu
more stories beyond the menu ✈️ #MatchaMoments #t more stories beyond the menu ✈️

#MatchaMoments #travelreels #travelwithmanuela
A simple treat for Mother’s Day 🌸 These chocolate A simple treat for Mother’s Day 🌸

These chocolate covered dates pair perfectly with a warm cup of tea and make a lovely homemade gift or afternoon treat.

Simple, sweet, and easy to make at home.

#mothersday #chocolatecovereddates #HomemadeTreats #dessertideas #teatime #manusmenu
This iced chai is simple to make and perfect when This iced chai is simple to make and perfect when you want something calm and comforting.

Made with a few ingredients and warm spices, it’s a drink you can easily prepare at home without much effort.

Sometimes it’s the simple drinks that you keep coming back to. 💓

#icedchai #homedrinks #teatime #homemade #manu #manusmenu
Ever wondered why your iced matcha tastes differen Ever wondered why your iced matcha tastes different every time?

It’s not just about the ingredients. Small details like the quality of the matcha, how you sift it, and how you whisk it can completely change the result.

Even the texture and colour can tell you a lot before you even take a sip.

Once you start paying attention to these steps, it becomes much easier to get a smoother, more balanced matcha at home 🍵

 #matcha #icedmatcha #Matchalatte #JapaneseTea #manusmenu
Follow on Instagram

Privacy Policy

Copyright © 2011–© 2026 - Manu's Menu and Manuela Zangara. All rights reserved.
A full tray of decorated Peppa Pig Chocolate Cookies displayed on a patterned tablecloth.

Rate This Recipe

Your vote:


A rating is required
A name is required
An email is required

Recipe Ratings without Comment

Something went wrong. Please try again.
We use cookies to ensure that we give you the best experience on our website. If you continue to use this site we will assume that you are happy with it.