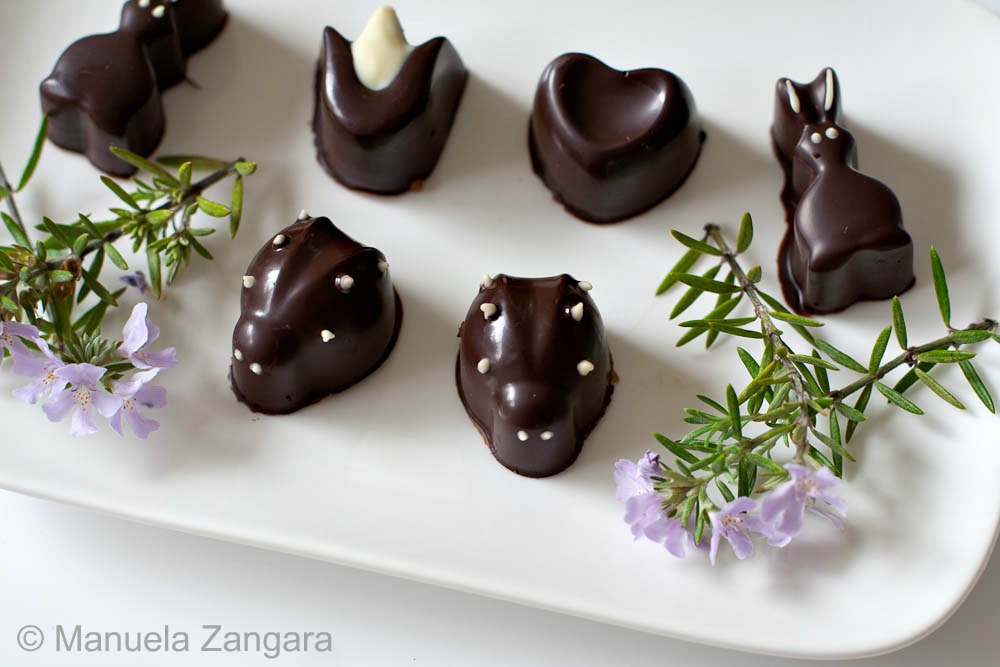
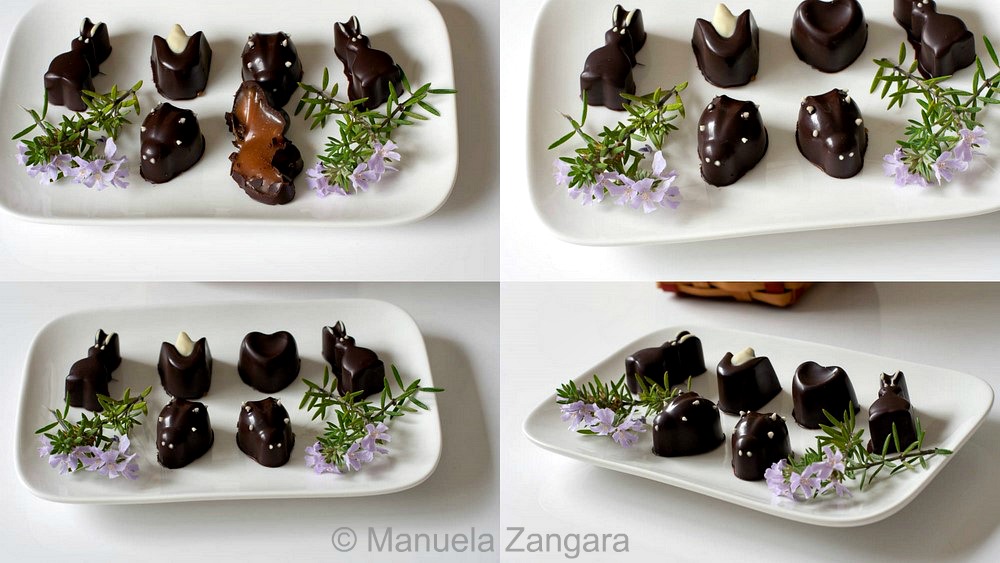
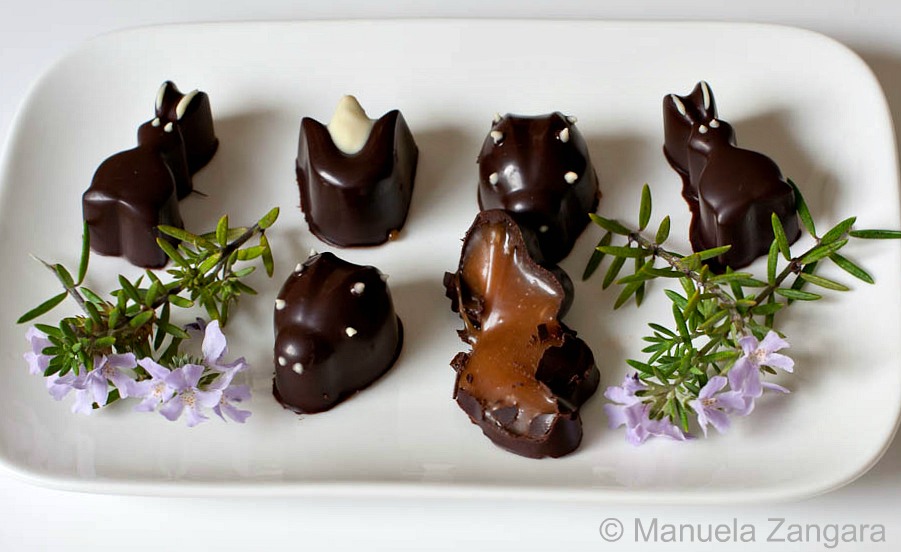
Today is Easter and Easter calls for chocolate, lots of chocolate! We will be having Easter eggs at home, but today I want to share with you the recipe for something else: chocolates filled with salted caramel! I love salted caramel and I still had some of the Blue Persian salt caramel sauce that I had made for the Pear Ice Cream. What better way to use it than to putting it inside home-made chocolates? And so I finally did something I had wanted to try for a long time but had always been afraid to: I tempered chocolate! I got myself a nice chocolate thermometer, did some research and tried it myself. Well guys… it worked! I was almost in disbelief! It wasn’t difficult, even though it did require a bit of time and lots of patience and stirring, but I couldn’t have been more satisfied with the result! The chocolates were beautiful and shiny! They looked like they had come out from a chocolaterie instead of my kitchen (well… they could have had neater borders)! I used some spring themed silicone moulds that my parents brought from Italy and I loved how cute they looked! I simply used dark chocolate and I decorated them with some white chocolate. Enjoy and Happy Easter to all my readers who celebrate it!
Recipe adapted from Adventures made from Scratch
Ingredients (quantities vary depending on the size of your moulds):
Dark chocolate (I used one with 70% cocoa)
Blue Persian Salt Caramel Sauce (click on the link for the recipe)
To temper dark chocolate
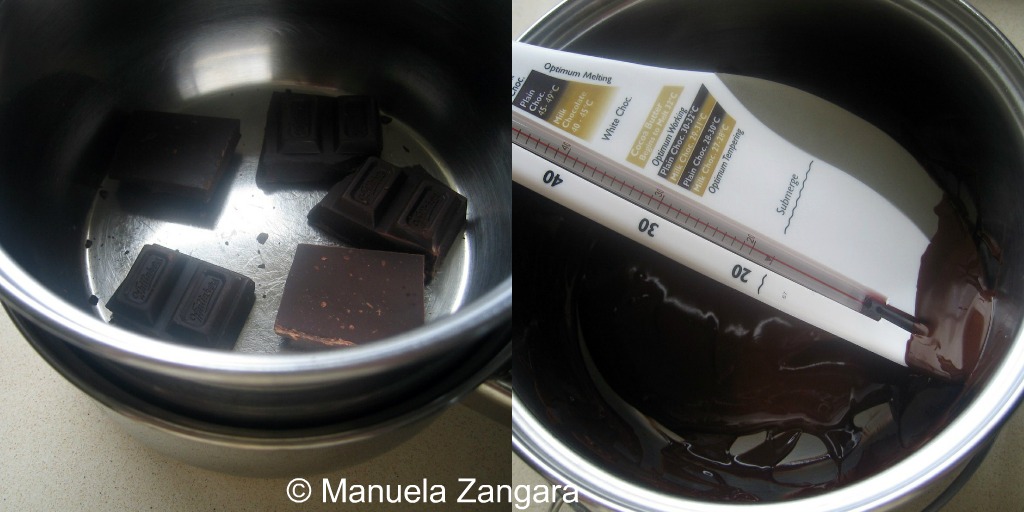
Break up the chocolate into small chunks. Melt 2/3 of the chocolate in a double boiler, stirring it with a rubber spatula, so that it melts evenly and very slowly. Use a chocolate thermometer and keep a close eye on the temperature of the melting chocolate. Once it reaches 45°C-50°C (113°F-122°F), remove it from the heat.
Now add small amounts of the remaining 1/3 chocolate chunks and stir in to melt. Continue to add small amounts of chocolate, stirring frequently, until you have brought the chocolate down to 27°C/80.6°F.
Put it back onto the double boiler and very slowly bring the temperature up to 32°C/89.6°F. This is the crucial stage so watch the thermometer carefully and do not let the temperature go over 32°C/89.6°F. The chocolate is now tempered and ready to use.
To make the chocolates
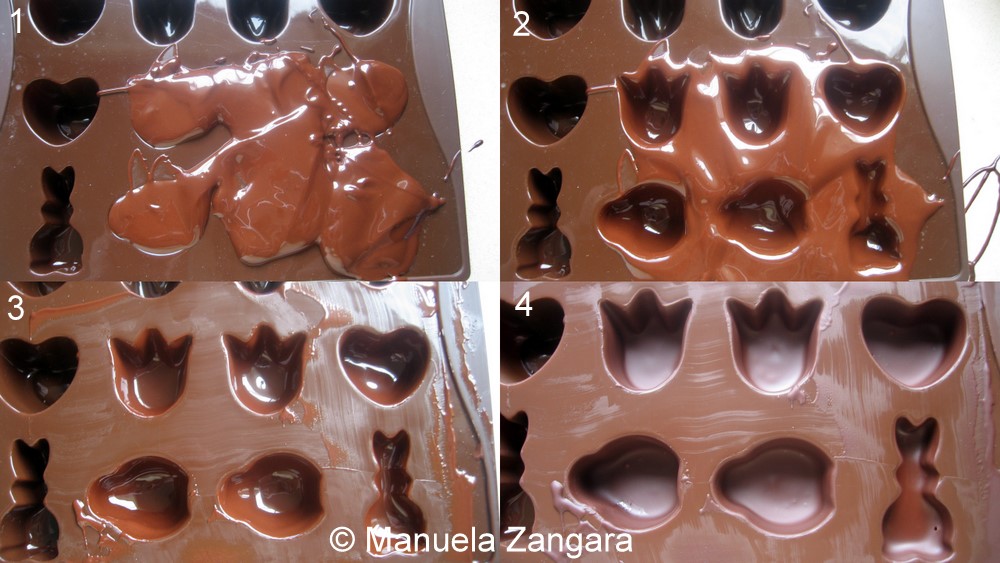
Pour the tempered chocolate into the moulds (1). Knock the mould against a hard surface to remove bubbles, then turn it upside down to let the excess drip out (2). Turn right side up again and drag a plastic scraper across so that the chocolate in between the wells is scraped off cleanly (3). Put the moulds in the fridge to set for 5-10 minutes (4).
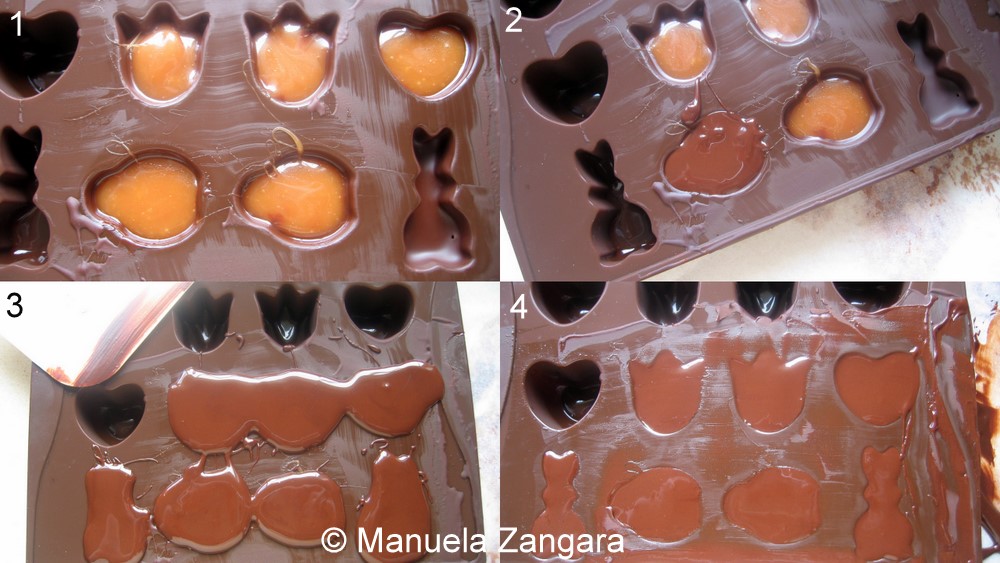
Now remove the moulds from the fridge and fill each of the chocolate coated moulds with caramel (1-2). Make sure you do not fill all the way to the top, as you will need some room for the chocolate. Place the moulds back in the fridge to set for another 5-10 minutes. Finish the moulds with a layer of chocolate (3), using the same method as before (4). Let them set in the fridge.
Once set, carefully unmould them and decorate them with some white chocolate (optional).









Yes I did miss this one, shame on me. These look fabulous!
These are so adorable. I love that you added caramel in them. Congrats for tempering. It is daunting to learn but so worth it. Your photos are incredible as always. Hope you had a lovely Easter.
Salted caramel has to be one of the best things ever. Covered in chocolate too? I can’t even contain myself!
Oooooh, these look to DIE for! I would inhale these right out of the mold! 😉
Manu they look so good. Lovely and shiny too, with old gold too!
They look great! You made amazing handmade chocolates!
These look wonderful and congratulations for making such wonderful chocolates. They’re so beautiful you should consider packaging them and selling them!
Happy Easter!
You made these chocolates??? OMG…as my son says you are a PRO…!!!