

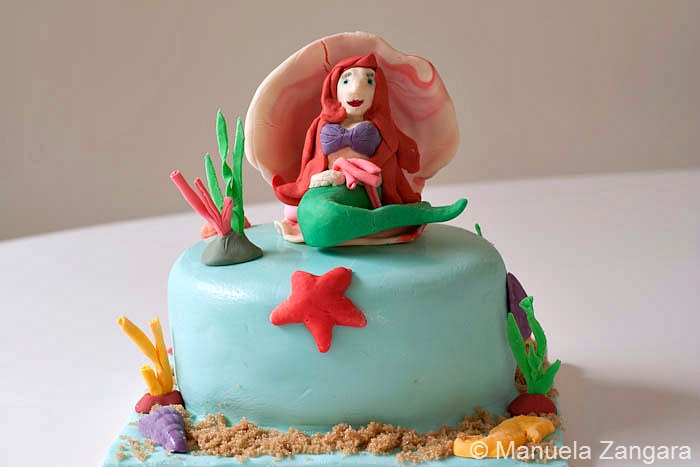
As I am sure you have noticed, my eldest daughter loves The Little Mermaid so she requested an “Ariel cake” for her 5th birthday party. I must admit, I was a bit worried about it as making a human form out of fondant is not as easy as making an animal… in fact, it could have come out better if only I had more time, but she was very happy with the result, so I won’t complain as that is all that mattered to me! Also, it was quite fun making the cake. I especially enjoyed making the coral and assembling the cake. Stay tuned for all the other Under the Sea themed party recipes that I will post in the next few days! For now I will leave you to my “Ariel cake”… enjoy!
Ingredients:
2 Yogurt Cakes (baked in a 16 cm – 6.3 inches round pan)
Coloured Fondant
Icing for crumb coating
Icing Sugar/corn starch
Brown Sugar
Start by baking the cake. I made 2 Yogurt Cakes and froze them.
Then colour all the fondant you are going to need. Dip a toothpick in the gel colour and then rub it onto the piece of fondant you want to colour. Then knead until uniformly combined. Alternatively, you can purchase coloured fondant and just use what you need. I coloured the fondant for the Ariel figurine and for the coral etc. but for the cake covering I bought a baby blue coloured fondant as I needed a lot more of it and colouring it all would have taken me a lot of time and effort.
You can start preparing the fondant for decorations about 3 or 4 days before the party.
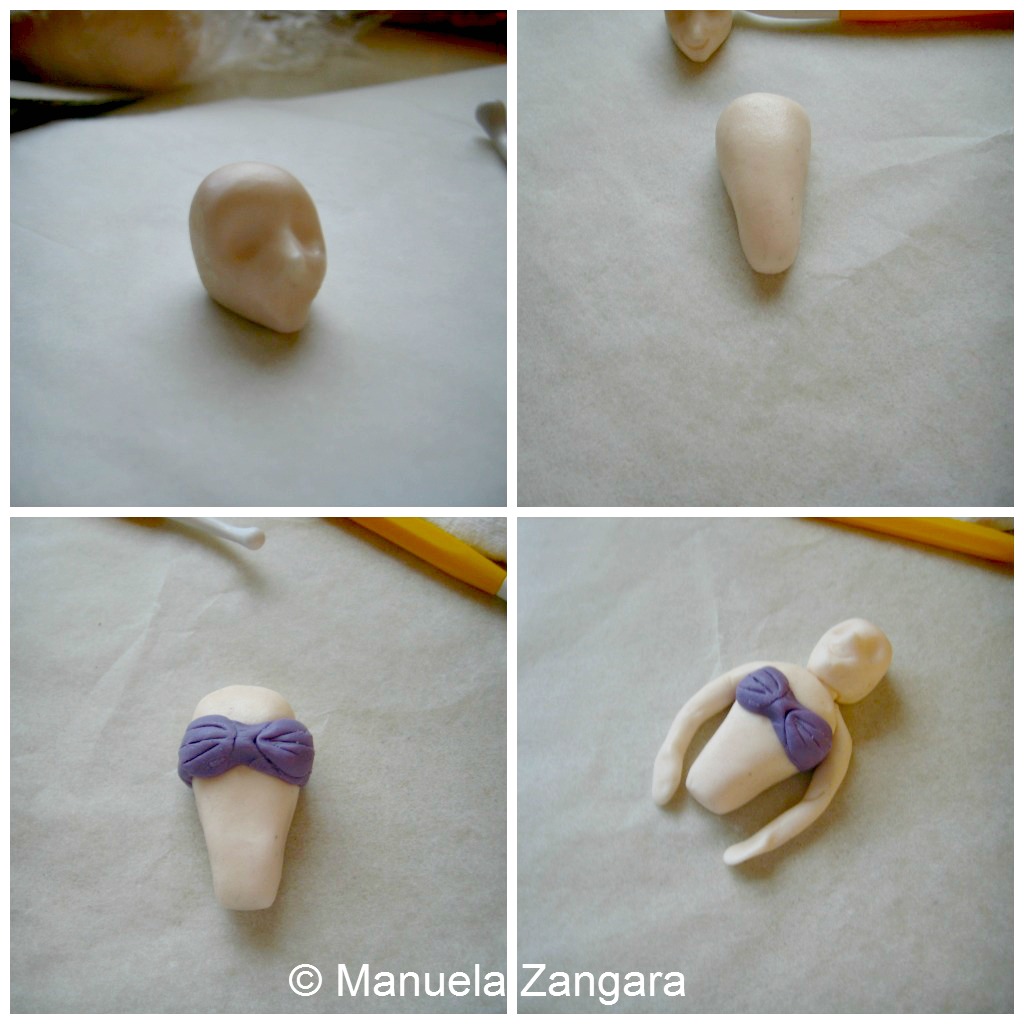
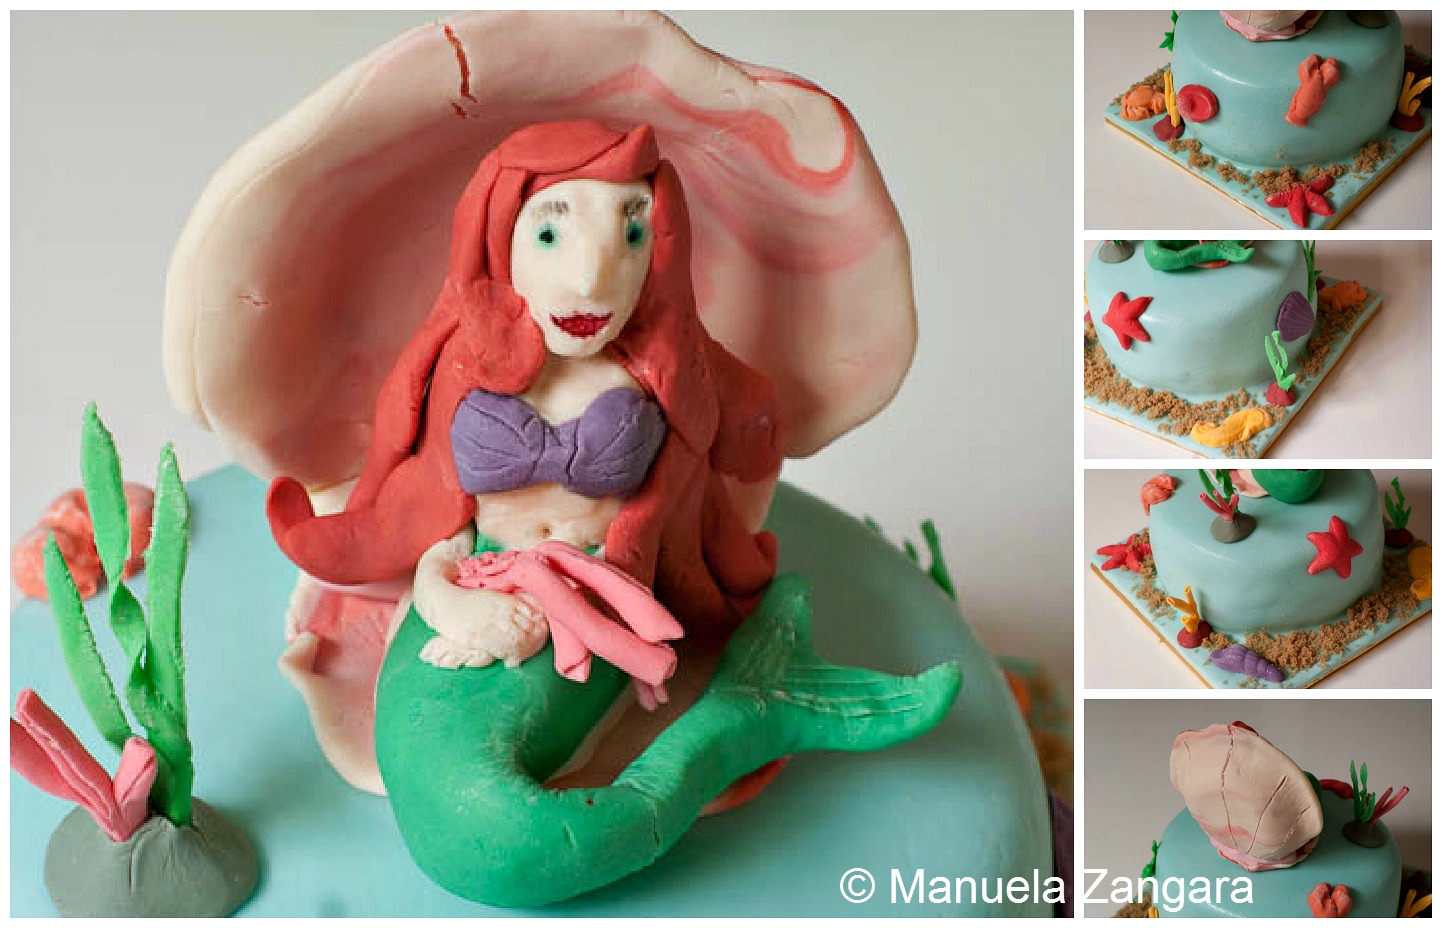
I started by making Ariel. I made her head by rolling a small ball. Pinch the nose out, and form the eye sockets, forehead, and cheekbones. Then, shape the chin and the mouth. Handle it with care so you don’t deform the head! To make the torso, roll a proportionate amount of fondant into a teardrop shape. Flatten out the small end to form the waist. The thicker part will be the shoulders. Then make the bikini with some purple fondant, shape it to look like shells and attach it to the torso with some water. To make the arms, roll 2 same sized balls. Then roll each ball into arms with one end thinner than the other. Bend the arm into whatever pose you like and then shape the wrist and hand. To make Ariel’s tail, roll some green dough into an elongated tear drop shape and make the fins at the end. You can bend the tail or leave it straight.
When all parts are half dry and can hold their shape, you can assemble them. I did not do this and assembled them straight away as I did not have a lot of time… but the figurine got somewhat squashed due to its own weight. So try not to skip this step like I did! Use some toothpicks and water or edible glue to stick all the pieces together. Let it dry and then make Ariel’s hair. You can draw her lips and eyes with some edible ink pens.
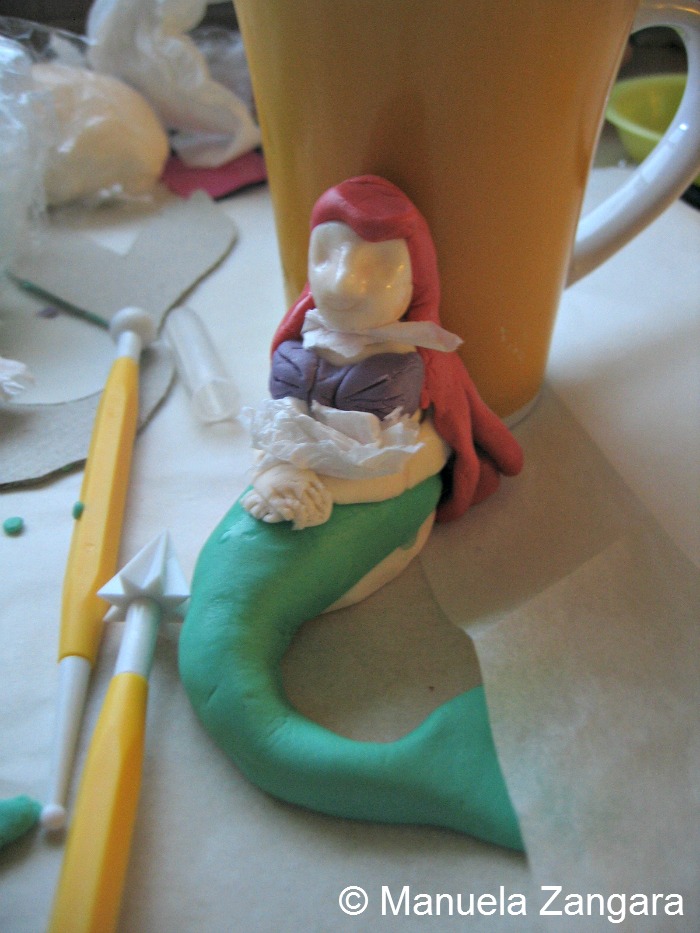
I also made a shell shaped throne with fondant for Ariel to sit on. I did this shaping it by hand and letting it dry on a small bowl so that it retained a shell shaped when dry.
I also made other sea creature decorations using a mould for chocolates that I had. To make the corals, simply roll your coloured fondant very thin, roll it and cut it in a coral shape, then attach it in bundles of 3 or more. For the algae, roll your green fondant very thin and then cut thin strips. I let these dry and then inserted them in some soft fondant to make them stand.
The day before the party I assembled the cake. I made some icing for the crumb coating (you can use your favourite icing recipe, just make sure that it is a little less dense as it needs to be smooth and you should be able to apply it easily). I took the 2 yogurt cakes out of the freezer and levelled them while still frozen with a sharp serrated knife.
I took a cake board, put some icing in the centre and put one of the 2 cakes on it. Then I put a layer of icing on the cake and topped it with the other cake. Make sure to choose the smoothest and flattest of the cake surfaces for the cake top (it is very likely going to be the bottom of one of the cakes), this will make it easier to ice and decorate the cake. Now you are ready to crumb coat it. You can do this while the cakes are still frozen and it is much easier this way. Start from the top, then do the sides. Use a cake spatula to make sure the surface of the cake is as smooth as possible. When the cake is all covered in icing, put it in the fridge to harden. This coating will make the fondant top look smooth and it will ensure that no crumbs will be visible through it.
NOTE: you can also crumb coat it first and then transfer it to the cake board.
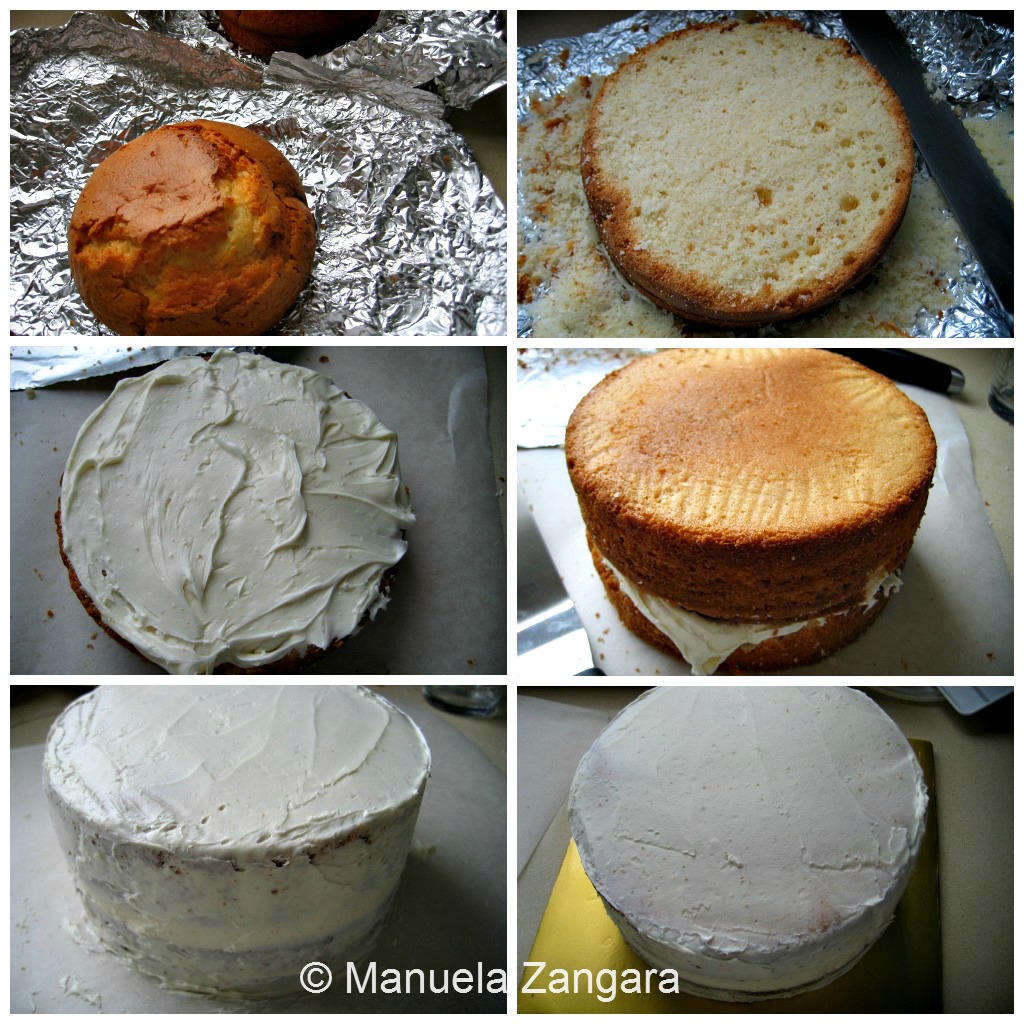
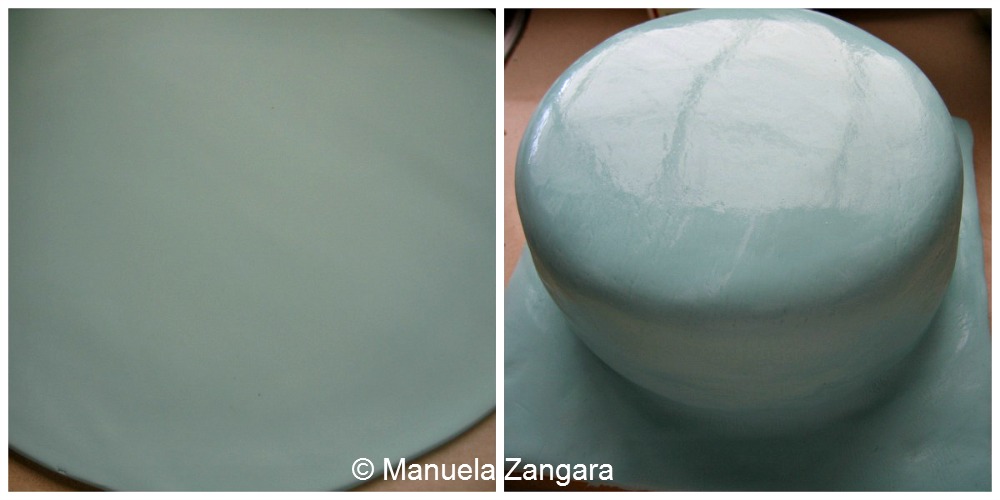
When the icing has dried, roll out the light blue fondant and cover the cake and board with it. Smooth it with a fondant smoother and cut out the excess.
I then applied all the decorations on the cake. I finished it of with some brown sugar to simulate the sand at the bottom and, of course, Ariel on the top!
The Little Mermaid Fondant Cake
Ingredients
- 2 Yogurt Cakes baked in a 16 cm – 6.3 inches round pan
- Coloured Fondant
- Icing for crumb coating
- Icing Sugar/corn starch
- Brown Sugar
Instructions
-
Start by baking the cake. I made 2 Yogurt Cakes and froze them.
-
Then colour all the fondant you are going to need. Dip a toothpick in the gel colour and then rub it onto the piece of fondant you want to colour. Then knead until uniformly combined. Alternatively, you can purchase coloured fondant and just use what you need. I coloured the fondant for the Ariel figurine and for the coral etc. but for the cake covering I bought a baby blue coloured fondant as I needed a lot more of it and colouring it all would have taken me a lot of time and effort.
-
You can start preparing the fondant for decorations about 3 or 4 days before the party.
-
I started by making Ariel. I made her head by rolling a small ball. Pinch the nose out, and form the eye sockets, forehead, and cheekbones. Then, shape the chin and the mouth. Handle it with care so you don’t deform the head! To make the torso, roll a proportionate amount of fondant into a teardrop shape. Flatten out the small end to form the waist. The thicker part will be the shoulders. Then make the bikini with some purple fondant, shape it to look like shells and attach it to the torso with some water. To make the arms, roll 2 same sized balls. Then roll each ball into arms with one end thinner than the other. Bend the arm into whatever pose you like and then shape the wrist and hand. To make Ariel’s tail, roll some green dough into an elongated tear drop shape and make the fins at the end. You can bend the tail or leave it straight.
-
When all parts are half dry and can hold their shape, you can assemble them. I did not do this and assembled them straight away as I did not have a lot of time… but the figurine got somewhat squashed due to its own weight. So try not to skip this step like I did! Use some toothpicks and water or edible glue to stick all the pieces together. Let it dry and then make Ariel’s hair. You can draw her lips and eyes with some edible ink pens.
-
I also made a shell shaped throne with fondant for Ariel to sit on. I did this shaping it by hand and letting it dry on a small bowl so that it retained a shell shaped when dry.
-
I also made other sea creature decorations using a mould for chocolates that I had. To make the corals, simply roll your coloured fondant very thin, roll it and cut it in a coral shape, then attach it in bundles of 3 or more. For the algae, roll your green fondant very thin and then cut thin strips. I let these dry and then inserted them in some soft fondant to make them stand.
-
The day before the party I assembled the cake. I made some icing for the crumb coating (you can use your favourite icing recipe, just make sure that it is a little less dense as it needs to be smooth and you should be able to apply it easily). I took the 2 yogurt cakes out of the freezer and levelled them while still frozen with a sharp serrated knife.
-
I took a cake board, put some icing in the centre and put one of the 2 cakes on it. Then I put a layer of icing on the cake and topped it with the other cake. Make sure to choose the smoothest and flattest of the cake surfaces for the cake top (it is very likely going to be the bottom of one of the cakes), this will make it easier to ice and decorate the cake. Now you are ready to crumb coat it. You can do this while the cakes are still frozen and it is much easier this way. Start from the top, then do the sides. Use a cake spatula to make sure the surface of the cake is as smooth as possible. When the cake is all covered in icing, put it in the fridge to harden. This coating will make the fondant top look smooth and it will ensure that no crumbs will be visible through it.
-
NOTE: you can also crumb coat it first and then transfer it to the cake board.
-
When the icing has dried, roll out the light blue fondant and cover the cake and board with it. Smooth it with a fondant smoother and cut out the excess.
-
I then applied all the decorations on the cake. I finished it of with some brown sugar to simulate the sand at the bottom and, of course, Ariel on the top!
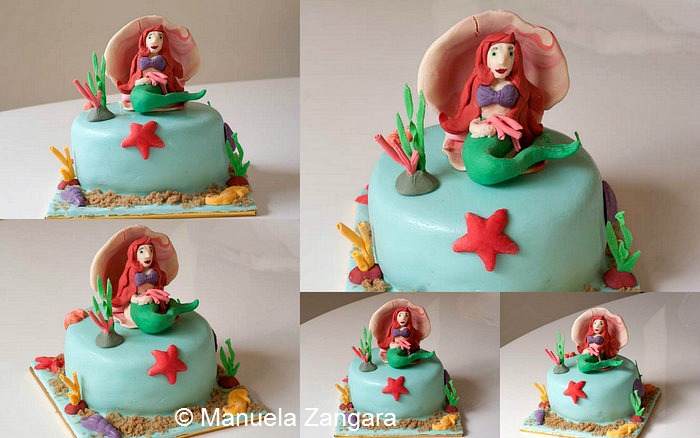
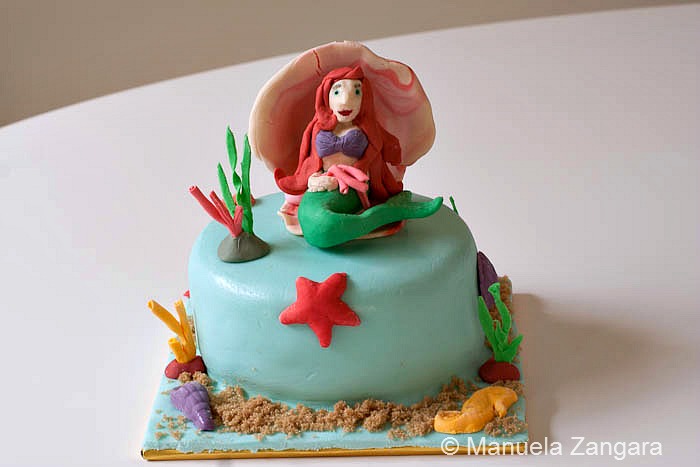
This was the final result:
Have you ever made a cake with fondant?

Love travelling as much as cooking?
Many of the recipes I share are inspired by places I’ve visited around the world. On Travel with Manu you’ll find destination guides, itineraries and travel inspiration to help you plan your next adventure.











Your cake decorating skills are impressive!