

Juicy chicken, a thick spiced marinade, and quick cooking give Chicken Tikka its rich taste and lightly charred finish. Serve it with naan, rice, or a simple chutney on the side.
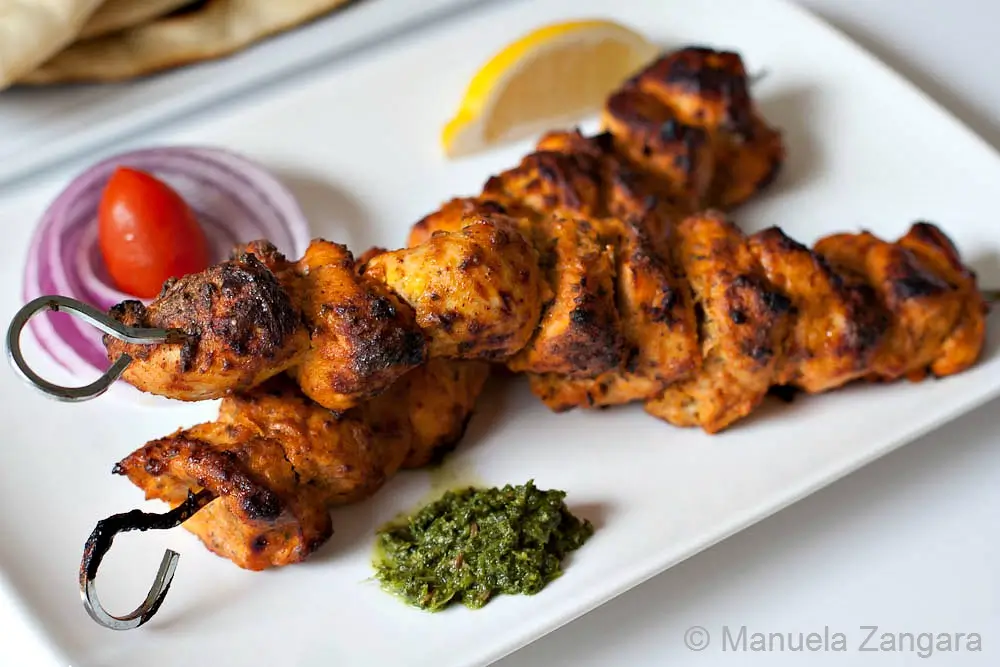
A little while ago, I shared the recipe for one of my favourite Indian appetisers, Seekh Kebab, and now I’d like to show you another meat dish I really enjoy.
Murgh tikka, or chicken tikka, is a very common dish in Indian restaurants around the world, and it works both as an appetiser and a main course. It is delicious on its own, but it also forms the base for other popular dishes such as Chicken Tikka Masala and Butter Chicken. So wouldn’t it be great to know how to make it at home?
This is a great dish to serve with hari chutney and a warm homemade naan or garlic naan. Enjoy!
Why We Love Murgh Tikka
- Travels well for potlucks or picnics, staying tender after reheating.
- Works well as a filling for wraps, sandwiches, or quick lunch boxes.
- Offers a lighter option compared to many sauced dishes while still feeling satisfying.
Key Ingredients for Chicken Tikka
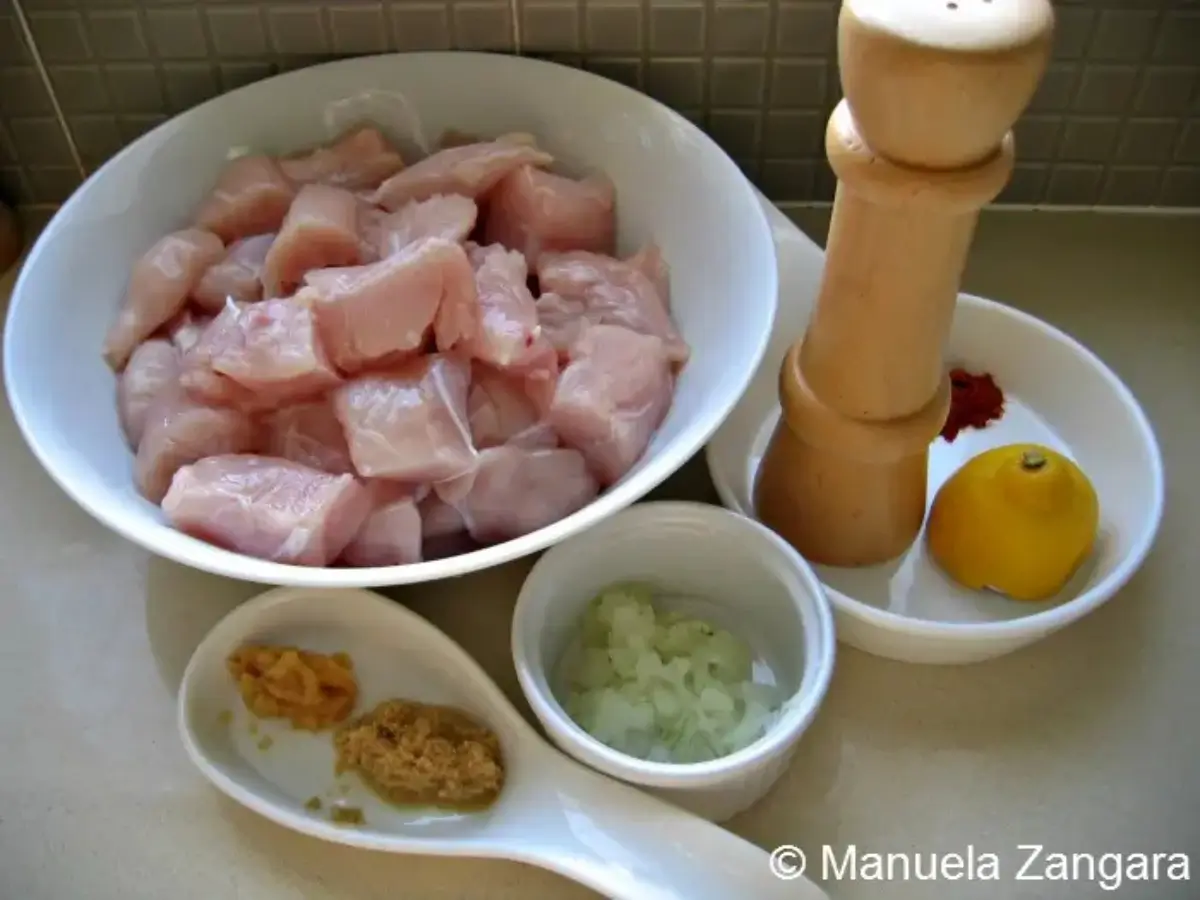
Chickpea Flour
Toasted gently with ajwain, chickpea flour adds body to the second marinade and creates a fuller, warmer flavour once cooked. Fresh chickpea flour smells clean and nutty, which makes a noticeable difference in the final taste.
Ginger and Garlic Pastes
The pastes blend easily with the yoghurt and coat the chicken evenly. Fresh paste offers a sharper, cleaner taste compared to jarred options.
Yoghurt
Keeps the chicken moist and tender as it cooks. Thick yoghurt works best since it clings to each piece and holds the spices in place. Its gentle acidity balances the heat from the red chilli powder.
Spices
Turmeric, red chilli powder, crushed ajwain, garam masala, black pepper, and kasuri methi work together to create warmth, colour, and gentle bitterness in the dish.
Saffron with Warm Milk
Adds colour and a soft aromatic note when mixed into the marinade. A small pinch is enough and blends smoothly with the yoghurt.
Find the complete list with measurements in the recipe card below.
How to Make Chicken Tikka
First Marinade
Step 1: Mix all the ingredients of the first marinade in a big bowl, add the cubed chicken, and mix well. Set it aside for about half an hour.

Second Marinade
Step 1: Heat 1 tablespoon of milk and add the saffron to it. Stir and set it aside.
Step 2: Heat the half tablespoon of vegetable oil in a pan. Add the 1 teaspoon of ajwain or carom seeds and the chickpea flour, and mix constantly with a wooden spoon over low heat until it turns a shade darker and smells nutty. Do not worry if the flour looks slightly lumpy; it is completely fine. Set it aside.
Step 3: In a big mixing bowl, whisk together the yogurt, ginger paste, garlic paste, garam masala, 1 teaspoon of crushed ajwain or carom seeds, kasuri methi, turmeric, black pepper, red chilli powder, salt, and the food colour (if you prefer to use it).
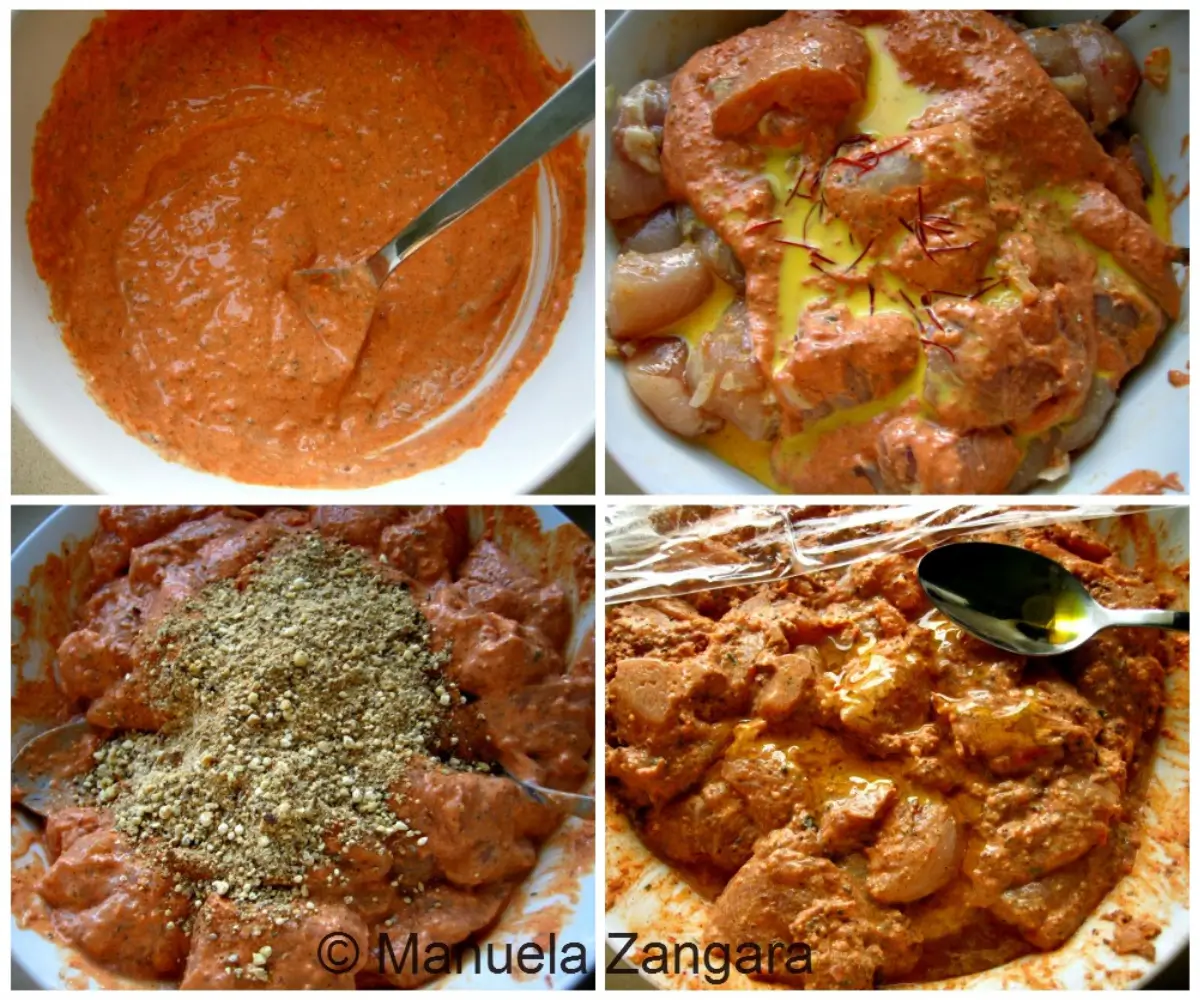
Step 4: Add the chicken pieces to this marinade, then add the saffron milk and the toasted chickpea flour, and mix well. Add the mustard oil and mix again. Set it aside for at least 4 hours or overnight.
Step 5: When you are ready to cook the chicken, thread the cubes onto skewers. You can skip this step if you are making the tikka to use in other dishes.
Step 6: Put the skewered chicken on a tray lined with baking paper or greased and bake in a preheated oven at 205°C to 215°C – 400°F to 420°F for about 15 minutes or until cooked through.
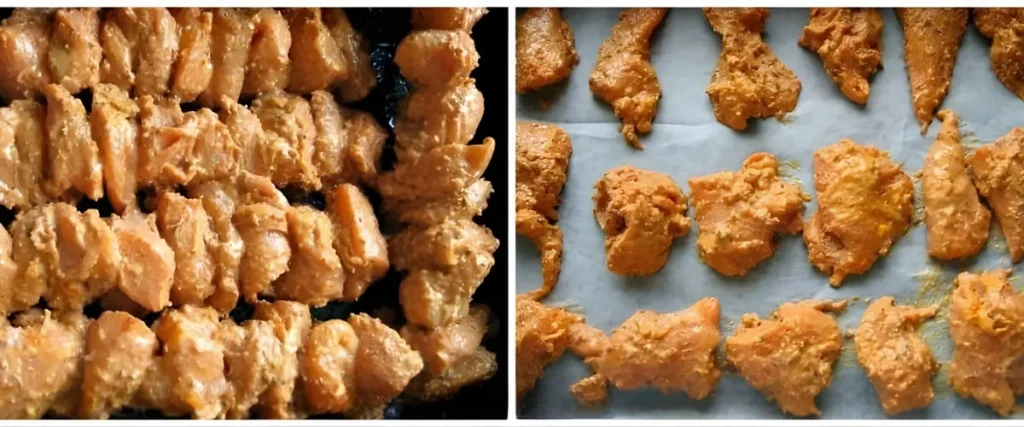
Step 7: Generously baste the chicken skewers with ghee or oil on both sides and turn them a couple of times. For a charred look and taste, broil the chicken for another 3 to 5 minutes.
Step 8: Serve the chicken tikka hot with sliced red onions, lemon wedges, Hari Chutney, and freshly made naan or garlic naan. Sprinkle some chaat masala on top if you like.

Frequently Asked Questions
Yes. Use a thick, unsweetened coconut yoghurt. Its consistency works well in the marinade, and the taste stays balanced once cooked.
Yes. It suits plain basmati rice, jeera rice, or a light pilaf. The spices in the tikka balance well with mild, buttery rice.
Yes. Bell peppers, red onions, and zucchini work well alongside the chicken. Cut them into similar-sized pieces so they cook at a similar pace.
Fresh coriander is the most traditional choice and works well when added just before serving. Mint is another good option, adding a cooler note alongside the warm spices.
Extra Help from the Kitchen
Dry the Chicken Before Marinating – Pat the chicken cubes with kitchen paper to remove surface moisture. A dry surface helps the marinade adhere evenly and prevents diluted flavour.
Check Salt Levels Early – Taste a small spoonful of the second marinade before adding the raw chicken to adjust seasoning while it is still safe to sample. Proper seasoning at this stage improves the final result.
Use a Wide Bowl for Marinating – Spread the chicken in a broad, shallow bowl so the pieces sit in a single layer. This allows the spices and yoghurt to coat all sides without clumping.
Rotate the Skewers During Marination – Turn the chicken pieces once or twice while they rest in the fridge. Gentle movement helps the marinade reach the folds and edges of each piece.
Let Excess Marinade Drip Off – Lift each piece from the bowl and allow a brief drip before threading onto skewers. Too much marinade on the surface can slow browning and cause the coating to burn.
Variations and Twists
Make Chicken Tikka Masala – Simmer the cooked tikka in a tomato-based sauce enriched with cream or cashew cream to turn the grilled pieces into a full main dish served with rice or naan.
Add Vegetables to the Skewers – Thread bell peppers and red onion between the chicken pieces before cooking. The vegetables soften and char alongside the meat, adding sweetness and light smokiness.
Use Chicken Thighs for Extra Moisture – Replace breast meat with boneless chicken thighs, cut into even pieces. Thighs hold the marinade well and stay moist during high-heat cooking.
Add Tomato Paste to the Marinade – Mix a small amount of tomato paste into the second marinade for extra umami and a deeper cooked colour. The taste becomes slightly richer without changing the main method.
Prepare Vegetable or Paneer Tikka – Marinate paneer cubes or sturdy vegetables in a similar yoghurt mixture. Cook them alongside the chicken, but remove them earlier, as they cook faster.
Storage and Shelf Life
Store cooked Chicken Tikka in an airtight container in the fridge for up to 3 days. Freeze raw marinated chicken in a freezer-safe container for up to 2 months, keeping the pieces fully coated in the marinade to prevent drying.
Thaw the chicken overnight in the fridge before cooking. Reheat cooked Chicken Tikka in a hot oven at 180°C – 350°F for a few minutes or warm it gently in a pan until heated through.
Indian Chicken Recipes to Try Next
Chicken Tikka Recipe (Murgh Tikka)
Juicy chicken, a thick spiced marinade, and quick cooking give Chicken Tikka its rich taste and lightly charred finish. Serve it with naan, rice, or a simple chutney on the side.
Ingredients
- 1.1 kg – 2.5 lbs chicken tenderloins OR boneless skinless chicken breasts, cubed into 2.5 cm – 1 inch pieces
First Marinade
- 1½ tbsp lemon juice
- ½ tbsp red chilli powder
- ½ tbsp ginger paste
- ¼ tbsp garlic paste
- 1 tbsp grated onion
- salt
Second Marinade
- 1 tsp ajwain/carom seeds + 1 tsp ajwain/carom seeds – crushed with a mortar and pestle
- ½ tbsp vegetable oil
- 30 g – ¼ cup chickpea flour (besan)
- 5 tbsp thick plain yoghurt
- 1½ tbsp ginger paste
- 1½ tbsp garlic paste
- ½ tsp turmeric powder
- 2 tsp red chilli powder
- 1 tsp freshly ground black pepper
- 1 pinch saffron + 1 tbsp milk
- 2 tbsp virgin pure mustard oil
- 1 tsp garam masala
- 1 tsp kasuri methi/dried fenugreek leaves – optional
- red or orange food colour – optional
- salt
Others
- vegetable oil – for basting
- thinly sliced onions and lemon wedges – to serve
- hari chutney – to serve
- chaat masala – optional
Instructions
First Marinade
-
Mix all the ingredients of the first marinade in a big bowl, add the cubed chicken, and mix well. Set it aside for about half an hour.
Second Marinade
-
Heat 1 tablespoon of milk and add the saffron to it. Stir and set it aside.
-
Heat the half tablespoon of vegetable oil in a pan. Add the 1 teaspoon of ajwain or carom seeds and the chickpea flour, and mix constantly with a wooden spoon over low heat until it turns a shade darker and smells nutty. Do not worry if the flour looks slightly lumpy; it is completely fine. Set it aside.
-
In a big mixing bowl, whisk together the yogurt, ginger paste, garlic paste, garam masala, 1 teaspoon of crushed ajwain or carom seeds, kasuri methi, turmeric, black pepper, red chilli powder, salt, and the food colour (if you prefer to use it).
-
Add the chicken pieces to this marinade, then add the saffron milk and the toasted chickpea flour, and mix well. Add the mustard oil and mix again. Set it aside for at least 4 hours or overnight.
-
When you are ready to cook the chicken, thread the cubes onto skewers. You can skip this step if you are making the tikka to use in other dishes.
-
Put the skewered chicken on a tray lined with baking paper or greased and bake in a preheated oven at 205°C to 215°C – 400°F to 420°F for about 15 minutes or until cooked through.
-
Generously baste the chicken skewers with ghee or oil on both sides and turn them a couple of times. For a charred look and taste, broil the chicken for another 3 to 5 minutes.
-
Serve the chicken tikka hot with sliced red onions, lemon wedges, Hari Chutney, and freshly made naan or garlic naan. Sprinkle some chaat masala on top if you like.
Recipe Notes
Be careful not to overcook the chicken, as it can quickly become tough and dry.

Love travelling as much as cooking?
Many of the recipes I share are inspired by places I’ve visited around the world. On Travel with Manu you’ll find destination guides, itineraries and travel inspiration to help you plan your next adventure.

















This looks like a great recipe! Question: what is the purpose of gram flour in your marinade?
Thanks!
The gram flour is used to thicken the marinade. It also adds a little nutty flavour to the chicken and it’s a great gluten-free option. 🙂
Definitely going to try your recipie and thank you for sharing. I could tell it will be awesome.
Two additions I might do and want your feedback
1) brine the chicken breast.
2) keep chicken in white vinegar for 20 mins post brining
Hi Imran
You can definitely brine the chicken breast… it will make it moist and delicious! Go for it!
I would not keep it in vinegar though as I am afraid it would interfere with the flavour in the end. 🙂
Let me know how it goes!
I was looking for a crowd pleaser chicken kebab recipe. Found yours and I must say, it is one of the best!! I made this for 30 people. I had over 10 lbs of boneless and skinless chicken breasts and thighs. All of it is gone! I am storing this recipe as my favorites. Will surely make it many more time. Thanks for sharing.
Vry esy recipe .my husband like this one
Mouth watering!!!
https://www.facebook.com/photo.php?fbid=725030394191101&set=a.269783889715756.78399.252317124795766&type=1&theater
Your image is used on the site above.
Thank you so much for letting me know! Manu
Oh what a wonderfully easy recipe! And I actually have all the ingredients at home!!
Fabulous looking chicken! Love, love, love the seasoning!
Have to try this! Thanks for the recipe.
Looks so succulent!
Despite the long list of ingredients, this doesn’t look too hard. It could be worth trying. I will pass this one to my husband – he’s the curry maker so it falls into his camp.