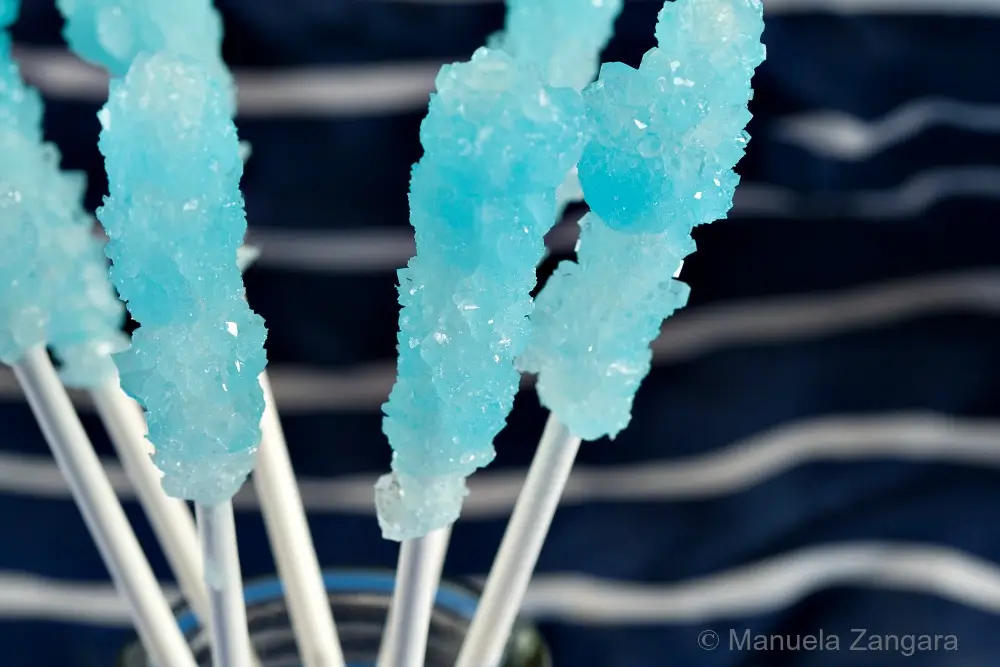
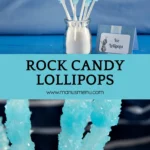
Crunchy sugar crystals on a stick never stop being fun, and Rock Candy Lollipops make them magical. Perfect for adding a touch of wonder to birthdays, holidays, or weekend treats.

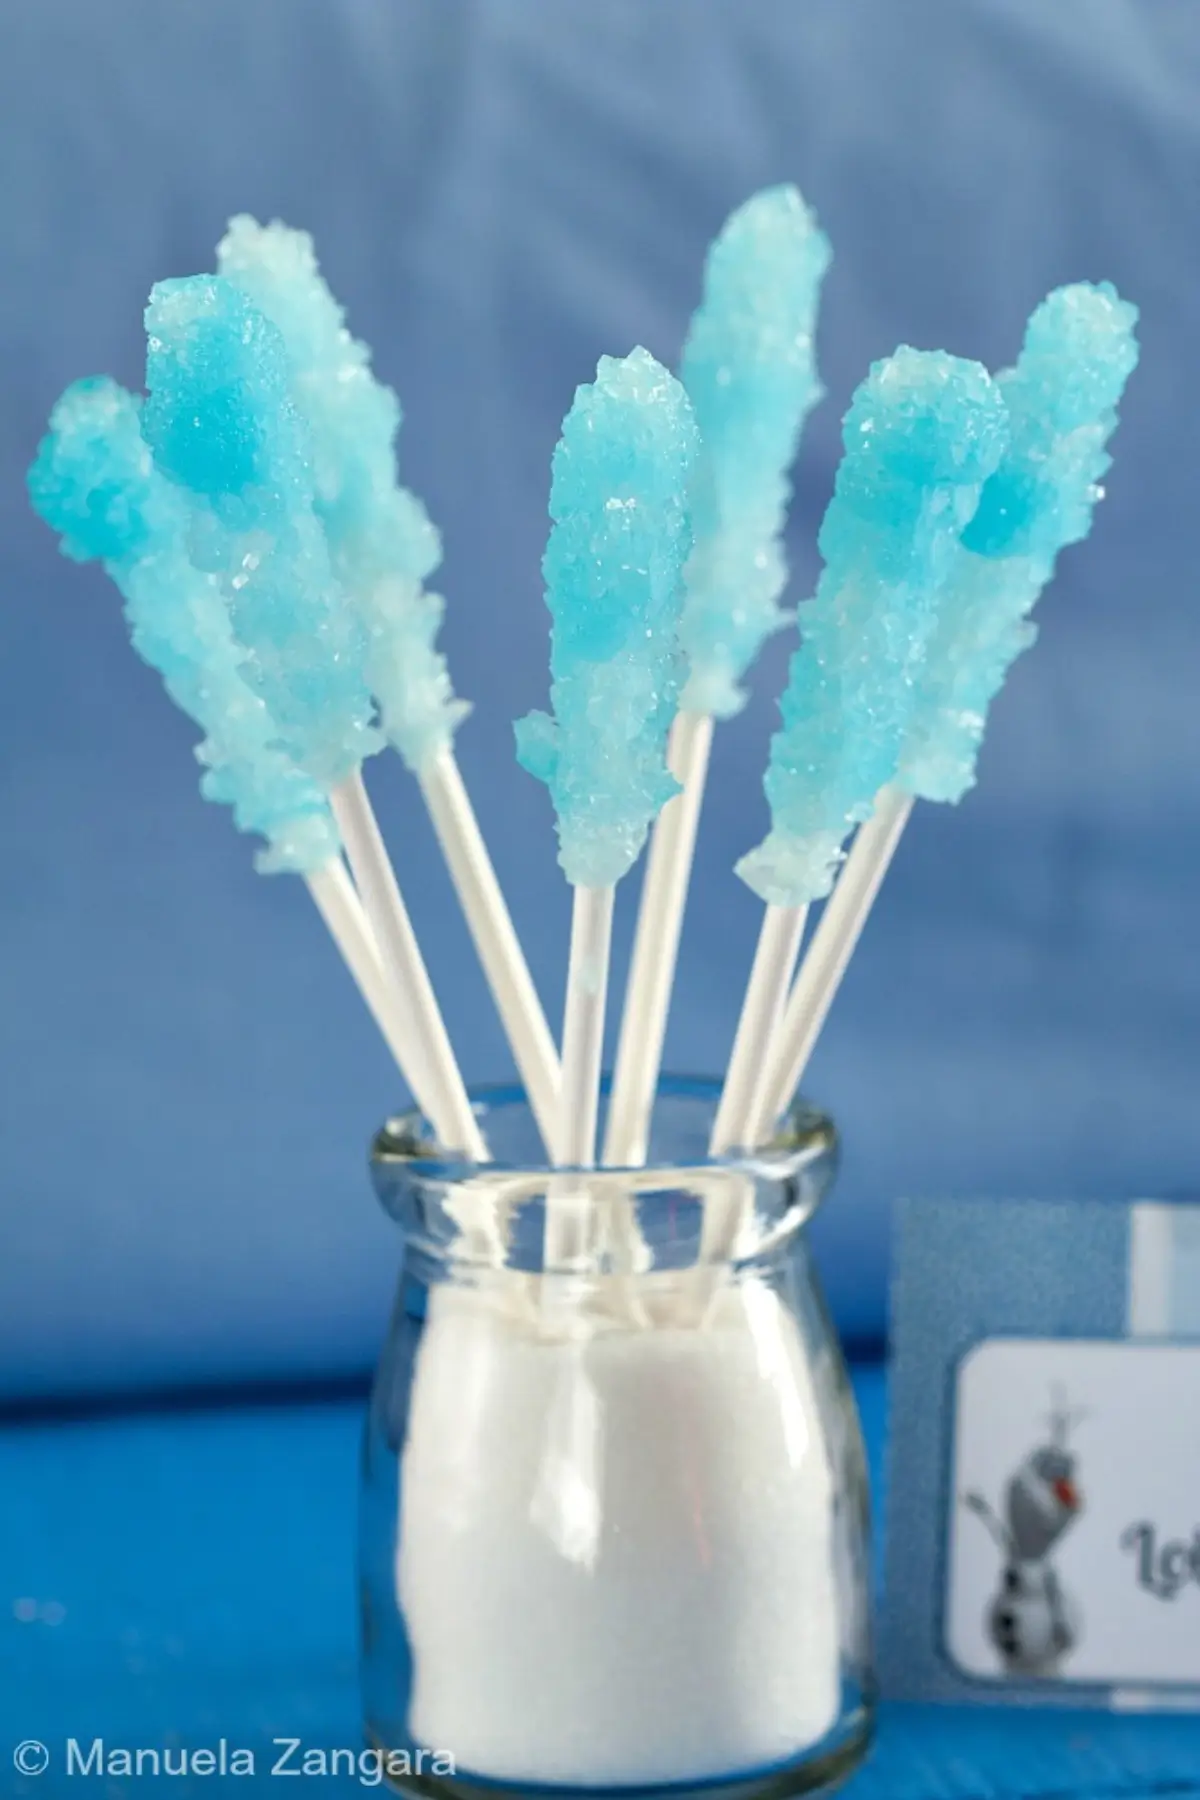
I made these lollipops for Victoria’s Frozen party. I wanted some candy that looked like ice, and these seemed like such a sweet idea. They turned out even better than I hoped.
The crystals resembled ice and grew in a rough, sparkly way that suited the theme perfectly.
Rock candy is very easy to make, but it needs time because the sugar has to crystallise on its own. Give yourself about a week. Some of mine were ready after three or four days, while others needed a little longer, so it’s worth checking them daily.
This is also a fun project to do with your kids. They can watch the crystals form and feel involved in the whole process. Have fun!
Reasons to Make These Lollipops with Kids
- A batch adapts easily to holidays or character-themed parties by adjusting colours and flavours.
- Kids treat the whole process like a fun science project and keep checking their sticks with real excitement.
- Adults enjoy them as much as kids, especially when used to sweeten warm drinks in a fun way.
Key Ingredients for These Candy Lollipops
Sugar
Builds the sweetness and structure of the crystals. Standard white sugar gives the cleanest taste and produces clear, glass-like crystals, which work well for colour-based designs.
Liquid Food Colour
Tints the syrup and gives the crystals their final look. Liquid colour blends quickly into hot syrup and produces even shades with only a few drops.
Flavouring
Adds aroma and gentle flavour. Essences such as mango, mint, or citrus stay stable in hot syrup and remain noticeable once the lollipops dry.
Find the complete list with measurements in the recipe card below.
How to Make Rock Candy Lollipops
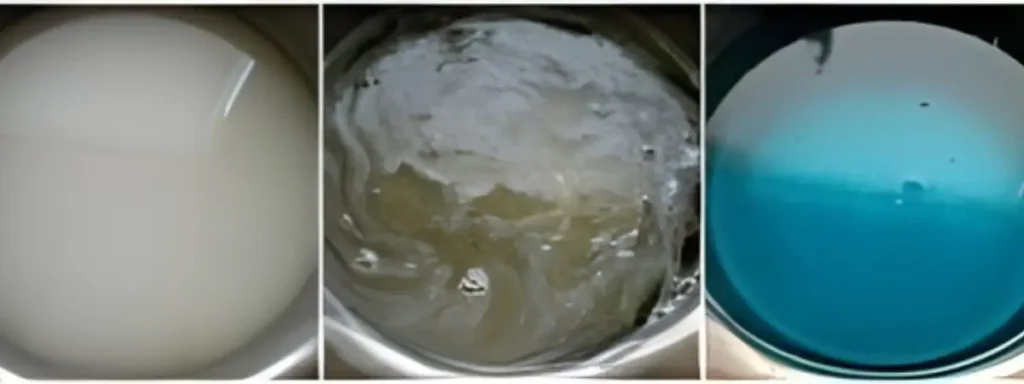
Step 1: Put the water and sugar in a pot and bring them to a rolling boil.
Step 2: Turn the heat off, then add the colour and essence and stir until the mixture is evenly combined.
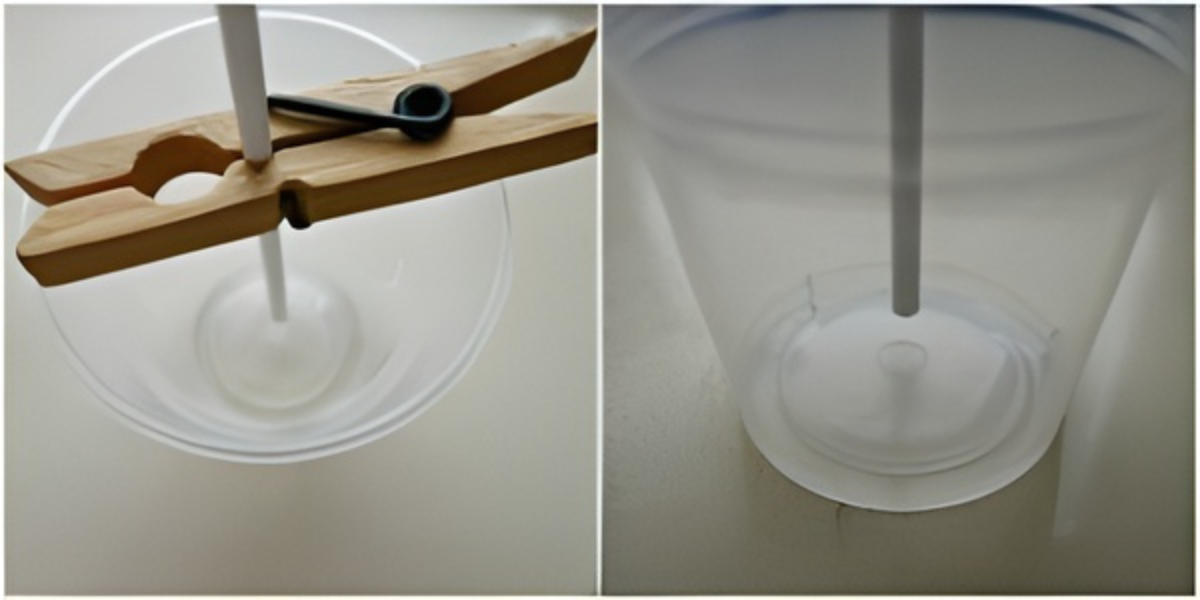
Step 3: Place a lollipop stick inside a plastic cup, making sure it does not touch the sides or the bottom. You can suspend it with pegs if needed.
Step 4: Dip a lollipop stick into the warm syrup to lightly coat the area where you want the crystals to grow, then roll it in granulated sugar so the first crystals have something to hold onto.
Step 5: Pour the syrup into the cup and fully submerge the coated stick.

Step 6: Repeat the process for all the lollipops you want to make.
Step 7: Leave the cups in a dry place for 3 to 7 days. The syrup will gradually set and form sugar crystals. Wipe the rim and inside edge of each cup daily so stray crystals do not cling to the sides or attach to the stick.
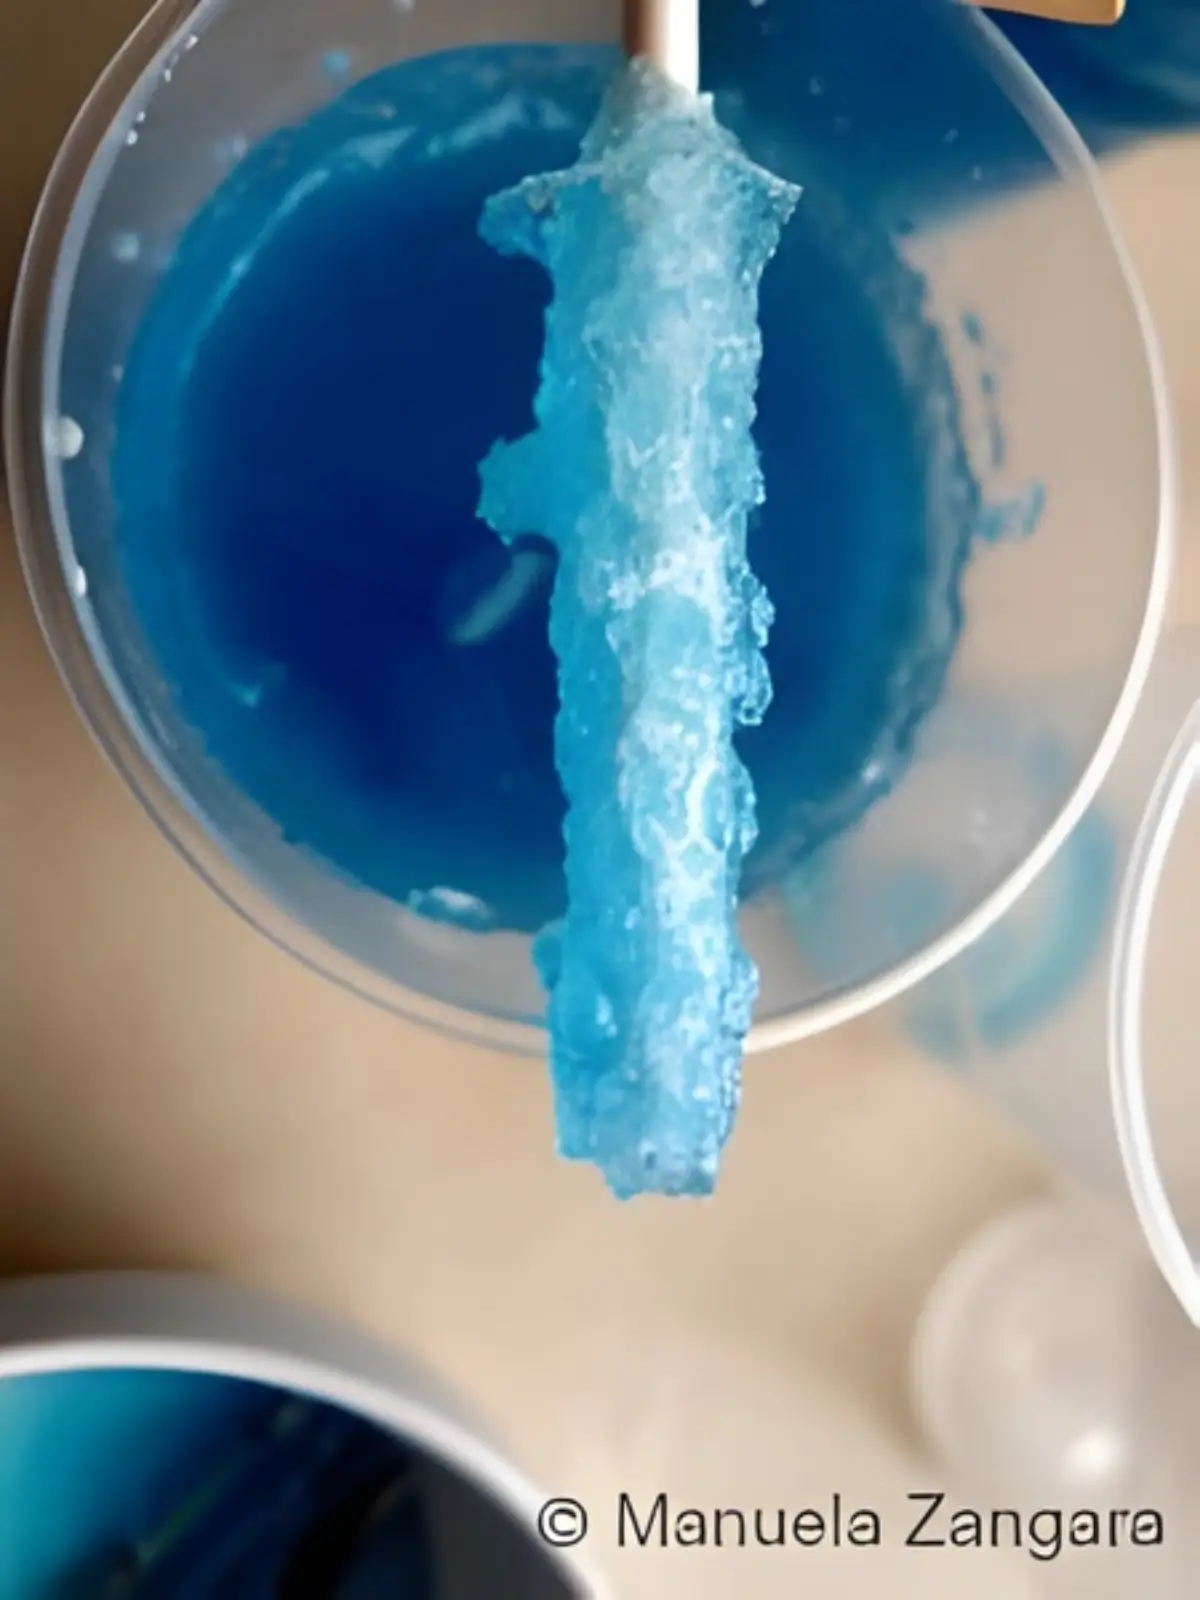
Step 8: Once the sugar has crystallised, lift the lollipops out and let them dry for a couple of hours before serving.
Frequently Asked Questions
Fruit essences such as lemon, orange, strawberry, and mango stay clear and bright in sugar syrup. Mint and vanilla also hold their aroma without fading during crystallisation.
Yes. Smooth wooden sticks work well as long as they are sturdy and stay straight once coated in syrup. They give the crystals a firm surface to cling to and are easy to suspend in the cups.
Small sprinkles, edible glitter, and fine sanding sugar sit neatly on the surface without weighing down the crystals. Add them once the lollipops are fully dry and press gently so they hold without breaking the structure.
Extra Help from the Kitchen
Use Clear Cups – Clear plastic cups make it easier to check crystal growth each day without disturbing the syrup or moving the sticks.
Warm the Sticks Before Coating – Rest the lollipop sticks near the stove so they’re slightly warm. A warm surface helps the sugar syrup cling evenly before dipping into granulated sugar.
Avoid Stirring Once Poured – After you fill the cups, avoid swirling or shifting them. Movement disrupts early crystal formation and slows the process.
Cover Cups Lightly – Place a breathable cloth or paper towel loosely over the cups to keep dust out while still allowing moisture to escape.
Give Each Cup Space – Arrange the cups with gaps between them rather than crowding them together. Better air circulation helps the crystals grow more evenly.
Variations and Twists
Use Fruit Essences for Added Flavour – Swap the optional flavouring for lemon, orange, strawberry, mint, or vanilla. Each one brings a different aroma once the crystals dry and pairs well with coloured syrup.
Divide the Syrup for Multi-Colour Batches – After preparing the syrup, split it into small heatproof bowls and tint each one differently. This method creates a range of colours from a single batch and suits themed celebrations.
Create Small Stirrers for Warm Drinks – Use shorter sticks to make crystal clusters for hot chocolate, tea, or flavoured milk. They dissolve slowly and add sweetness with a bit of visual appeal.
Tint the Syrup with Natural Colours – Plant-based colouring powders such as beetroot, butterfly-pea, or spirulina give softer tones and a more natural look, though shades may vary.
Storage and Shelf Life
Store the finished Rock Candy Lollipops in an airtight container at room temperature for up to 1 month. Keep them in a dry place and away from humidity, as moisture softens the crystals over time.
Avoid refrigerating or freezing them, because sugar crystals attract moisture when chilled and lose their structure once brought back to room temperature.
Sweet Ideas for Your Next Party
Rock Candy Lollipops Recipe
Crunchy sugar crystals on a stick never stop being fun, and Rock Candy Lollipops make them magical. Perfect for adding a touch of wonder to birthdays, holidays, or weekend treats.
Ingredients
- 250 ml – 1 cup water
- 600 g – 3 cups sugar
- Liquid food colour – I used 5 drops of blue
- Flavouring – optional, I used 1 tbsp mango essence
- Plastic cups – pegs, and lollipop sticks
Instructions
-
Put the water and sugar in a pot and bring them to a rolling boil.
-
Turn the heat off, then add the colour and essence and stir until the mixture is evenly combined.
-
Place a lollipop stick inside a plastic cup, making sure it does not touch the sides or the bottom. You can suspend it with pegs if needed.
-
Dip a lollipop stick into the warm syrup to lightly coat the area where you want the crystals to grow, then roll it in granulated sugar so the first crystals have something to hold onto.
-
Pour the syrup into the cup and fully submerge the coated stick.
-
Repeat the process for all the lollipops you want to make.
-
Leave the cups in a dry place for 3 to 7 days. The syrup will gradually set and form sugar crystals. Wipe the rim and inside edge of each cup daily so stray crystals do not cling to the sides or attach to the stick.
-
Once the sugar has crystallised, lift the lollipops out and let them dry for a couple of hours before serving.


I was looking for a totally different recipe and found this! I was going to look for a recipe for rock candy a while back but had forgotten about it. I should have known, when in doubt always check here first! I love the blue and MANGO is my fave.