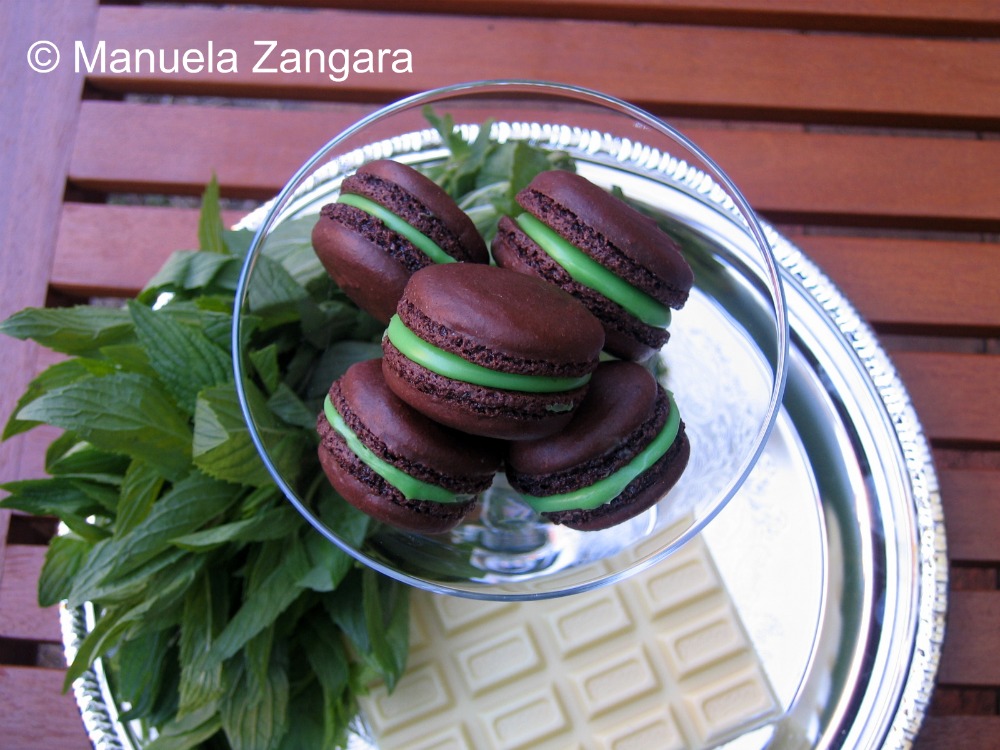
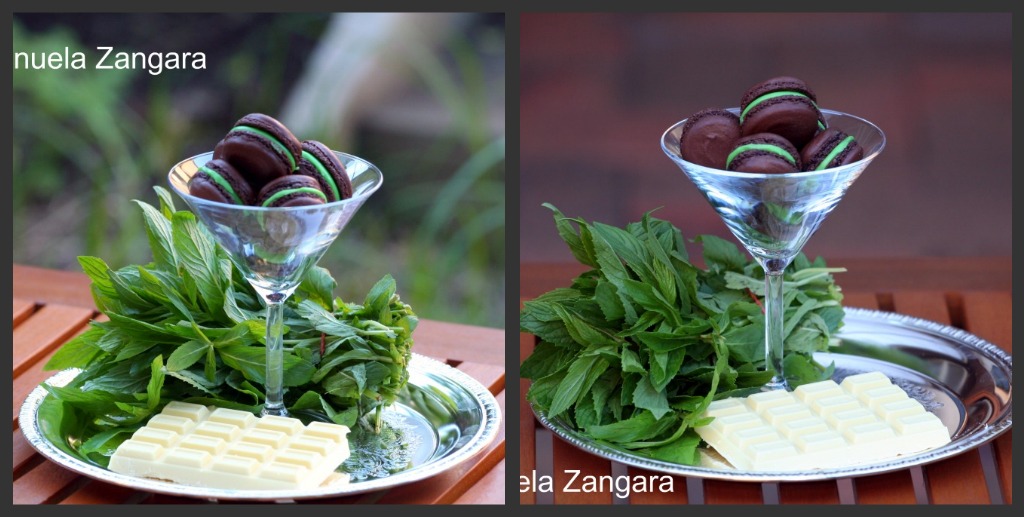
I must admit I had never attempted to make macarons before! Yes… you got that right! I have always been intimidated by how “precise” you need to be. Besides, I am not a “baker”. Mind you, I do bake occasionally (and I am doing more so lately), but I tend to use the stove more than the oven. Since I started blogging though, I have seen so many posts of beautiful and mouth watering macarons that I decided to give it a go. I found this recipe for the shells over at Joshua’s Just Eat and thought it sounded “easy enough” for me to try. I must admit I had a few problems with my oven, but in the end I think I got them right… thanks to my friend Jill’s tips! You absolutely must visit her site: Mad About Macarons, just thinking of it makes my mouth water! So, here you have my first (well… second to be honest ;-P) attempt at making macarons.
Sharing this recipe with Full Plate Thursday by Miz Helen and It’s a Keeper Thursday by Christina.
Ingredients – Adapted from Just Eat’s Le Macaron Royal recipe
For the shells:
95 gms ground almonds or almond meal, sifted
75 gms egg whites (aged) and brought back at room temperature
155 gms pure icing sugar, sifted
45 grams sugar
20 gms cocoa powder, sifted
Black or brown food coloring (powder or paste) – optional
For the white chocolate and mint ganache:
100 gms white chocolate
50 gms thickened cream
2 tbsp mint syrup
1 egg yolk
Green food coloring (liquid) – optional
To make the shells:
The first thing to do is to “age” your egg whites. You can either leave them in the fridge for 4 days or keep them out on your kitchen’s bench top for a couple of days. I covered mine with a sieve, to prevent small particles to get into it. Remember to bring them back at room temperature BEFORE whisking them. You can use your egg yolks in many other recipes… you could make a yummy Carbonara or some Genovesi Ericine for example. You can also visit Jill’s blog for many other creative ideas: she’s hosting a very interesting series of guest posts on how to use up your left over yolks!
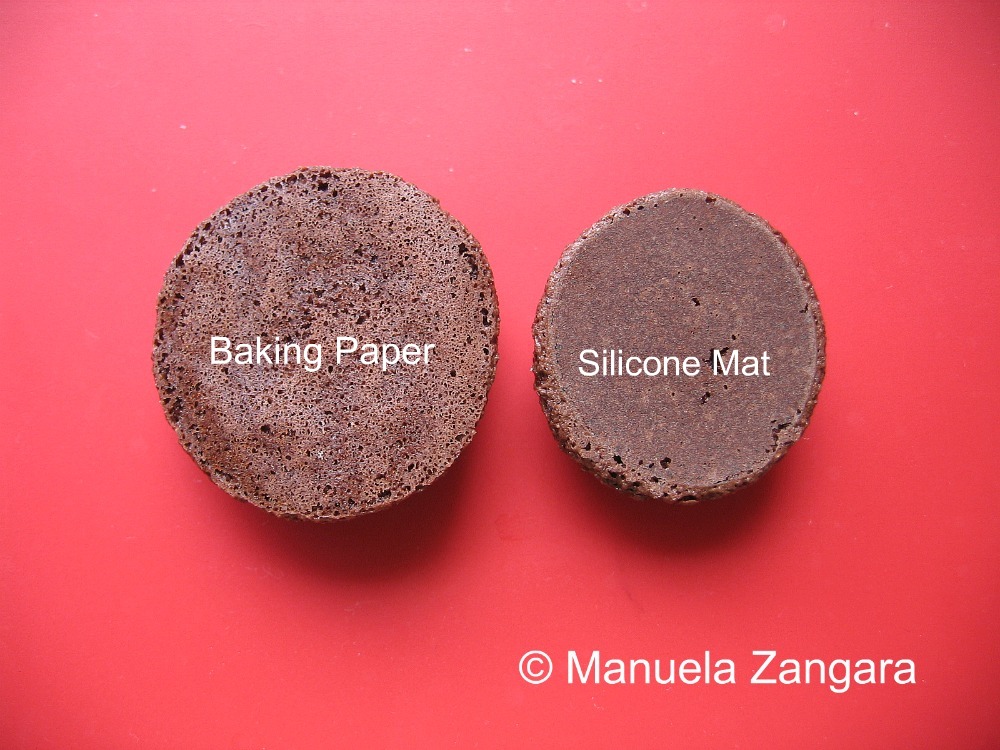
On the day you want to bake your macarons, make sure you have everything ready, BEFORE you start making your shells. Prepare the piping bag with the right nozzle (a normal circular nozzle of about 1 cm in diameter) and line your oven trays with baking paper or with a silicone cookie mat. I have used cookie sheets and I have lined one with baking paper and the other with the silicone mat and either way is fine. Also, ensure that the bowl where you will be whisking the egg whites is perfectly clean and dry or you will not be able to get the meringue right.
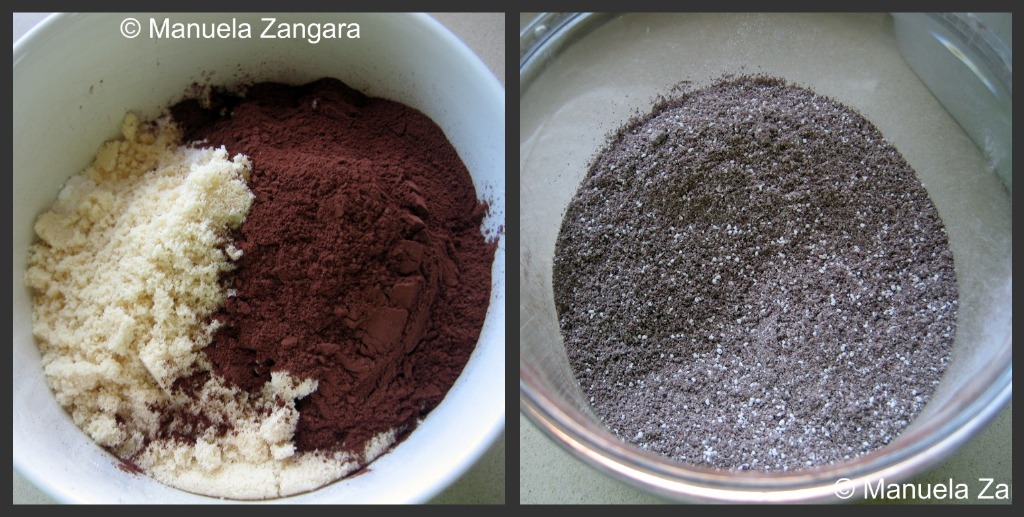
Now you are all set to start making your macarons. Sift the almond meal, the pure icing sugar and cocoa powder and mix them together in a large bowl.
The next step is to make the meringue. Put the egg whites in a bowl and start whisking them with an electric mixer. Add the sugar (and the food colouring – optional) little by little and keep whisking until you get very stiff peaks. The meringue has to look translucent.
Add the meringue to the almond meal and icing sugar mix and stir well using a spatula.
When all the meringue has been incorporated, you need to do what is known as the “macaronnage”. Using a pastry scraper (or the same spatula that you were using to mix), scrape the batter back and forth against the bowl to remove air bubbles, until your batter ribbons off the scraper (or “flows like magma”).
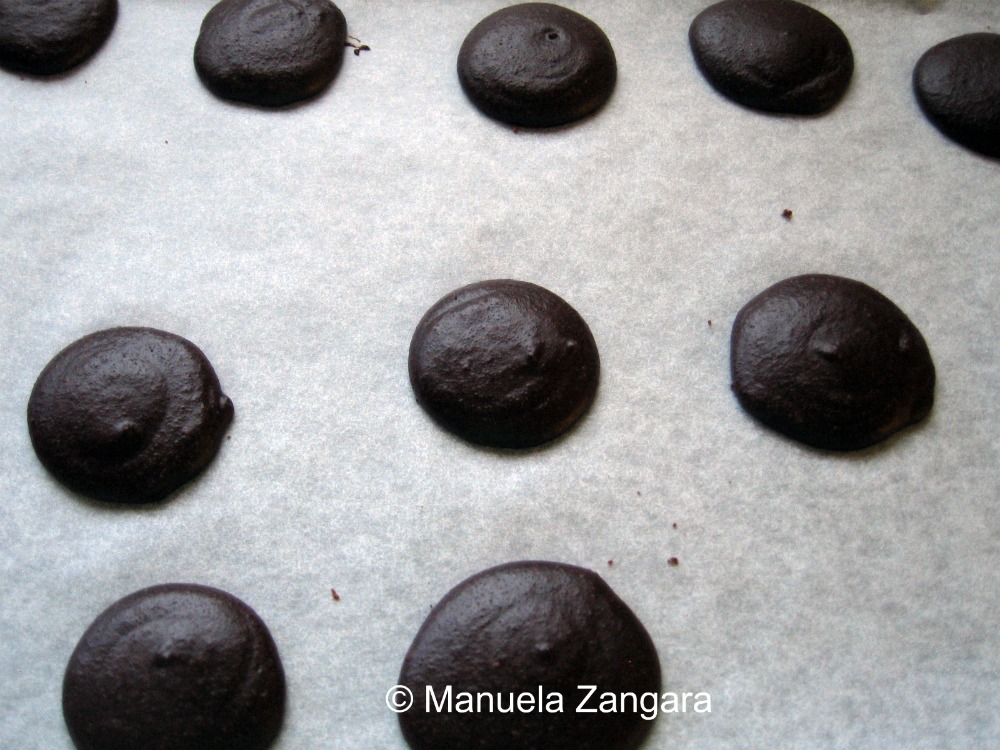
Now you are ready to pipe it! Fill your piping bag and pipe out circles of batter on the lined baking tray/cookie sheet by squeezing the bag while keeping it in one spot. Let the macarons rest between 30 to 60 minutes or until they harden a bit.
Baking is actually what I had the most problems with. I baked one batch of green shells at what I thought was 160°C for about 12 minutes and while they had nice feet and were cooked nicely, they slightly browned on the top (so they did not look as “green” as I had expected). I asked Jill and she suggested to check my oven’s “actual” temperature with an oven thermometer… and guess what? While I had set it to bake at 160°C, it was actually heating up to 180°C!!! I also noticed that sometimes the temperature would drop and go back up again… Not very good when you have to bake macarons!
So I decided to bake this chocolate batch at 150°C (fan forced) for about 15-17 minutes. I kept a thermometer in all the time and kept checking that the temperature would not rise too much… I also kept them on the lowest shelf of the oven, just to be extra safe… and it worked! I totally quote Jill who suggests “experimenting with your oven, checking its real temperature and seeing what works best for you”.
When ready, take them out of the oven and let them cool down BEFORE attempting to detach them from the baking paper/silicone mat… if you try to detach them before, they may break and you will ruin those nice feet on the macaron! So be patient. If you still cannot detach them easily, you can also put them in the freezer for a couple of minutes… they will come off easily then.
Once cool, put them in an air tight container and keep them in the fridge till you are ready to assemble them.
To make the white chocolate and mint ganache:
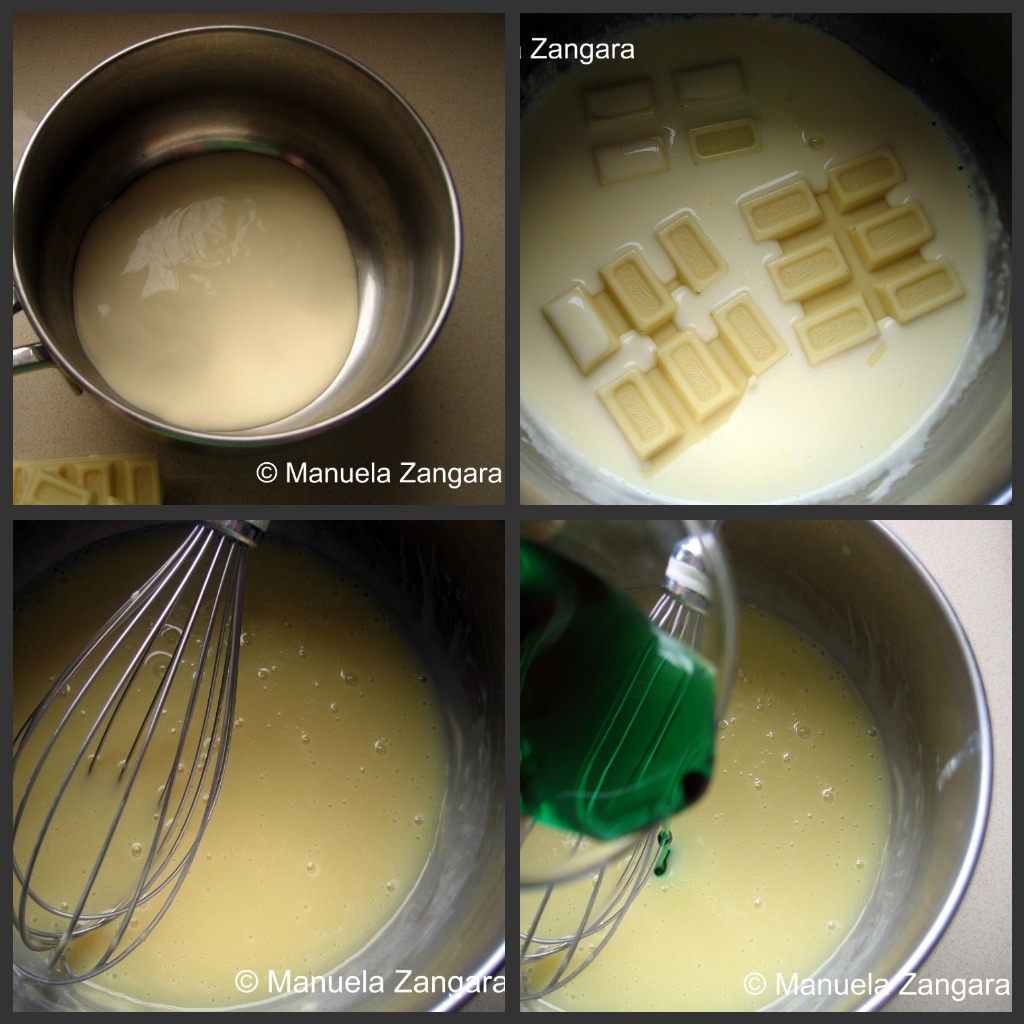
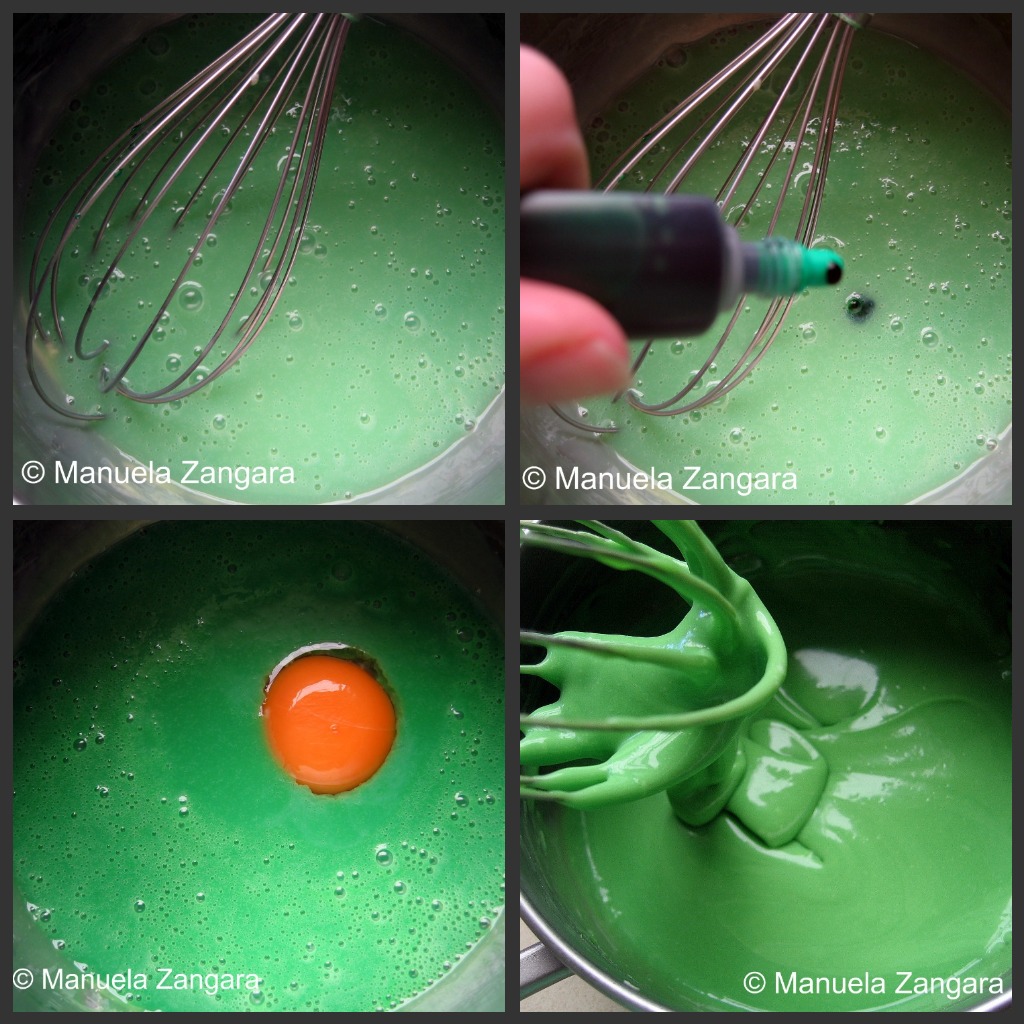
Put the cream in a pot and heat until almost boiling. Add the white chocolate and stir until melted and smooth. Add the mint syrup (and food colouring – optional). Let it cool slightly.
Now whisk the egg yolk into the chocolate. Refrigerate until it hardens and is ready to be piped onto the macarons’ shells.
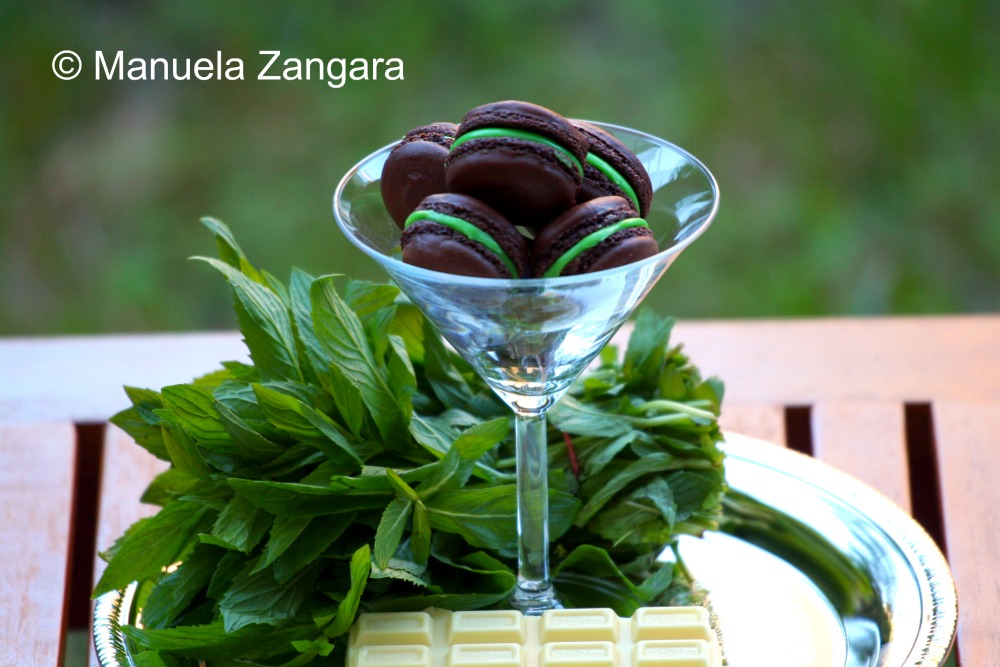
Pipe the white chocolate and mint ganache on half of the shells and put the remaining shells on the top, like a sandwich. Tip: if the ganache is still a bit too fluid, put the shells with the piped ganache back in the freezer for a couple of minutes before attaching the other shells on top.
Put the ready macarons back in the fridge so the ganache hardens a little more. They are best eaten the day after… if you can resist.
A BIG thank you to Jill of Mad About Macarons for all her great tips and encouragement! I would have never tried again without her help!!! <3 And if you haven’t done it yet, please visit her site, it is full of fantastic tips and mouth watering pictures on macarons and more! Also, thanks a lot to Joshua from Just Eat, where I got the basic macaron shells recipe from! He too has a fantastic website, you should really check it out!
Enjoy… maybe with a pot of mint tea!
NOTE: If you liked this recipe, you can vote for it over at Foodfrenzy for the monthly challenge. This month’s ingredient is mint! UPDATE – This recipe WON the May challenge!!!! YEAHHHHH! Thank you all very much for your votes!
On another note… I was honoured with the Versatile Blogger Award by 2 of the bloggers I enjoy reading the most: Tina from Pinay Cooking Corner and Mindy from Whiski Business! Thank you so much ladies! I do feel fluttered and so happy. It really means a lot to me that the people I admire like what I do!!! 🙂

So… time to pass this award to some other bloggers I love. As I have passed on many awards only a couple of days ago, this time I will award different blogs:
Cooking Italian in the Midwest
And then I ate it
So there you have it… have fun browsing the above fantastic blogs!!! And thank you once again Tina from Pinay Cooking Corner and Mindy from Whiski Business: you made my day! 🙂















Manu! You made beautiful macarons! I can’t believe this is your 1st (technically 2nd) macarons. Now I’m so scared to even try making it. LOL This will be like my 10th attempt if I’m lucky! Seriously you did a great job. Looks so delicious too…. I want one…
Can I have some, Manu! Your macarons look perfect! You just made me crave for them!
The Macaroons looks so perfect, and to make it that perfect just on second attempt… awsm !! I don’t like mint with chocolate babe .. but if you serve me that glass I doubt if I can control myself… Love the presentation babe
Manu, you’re macarons look splendid, well done on your firsts (both) attempts and probably welcome to the macaron addict club 🙂
Congrats on the award and thanks so much for passing it to me 🙂 Enjoy your day!
Hi Manu
I always enjoy reading your posts because you seem to take us through each step of your recipes with such beautiful photos. It makes it so much easier to follow the instructions. We have only just started blogging and are honoured that you enjoy reading our blog. There are so many good bloggers among us so thank you for passing the award to us 🙂 🙂
Great post Manu. I feel I’ve learnt as much by the problems you had with the macarons as well as your ultimate success. When I attempt them, I’m going to go for the silicon mat. Love the colour/flavour combo. I’m also a big fan of Jill’s site. Will have to check out Joshua’s blog after your recommendation.
Manu, what can I say? Many thanks for your lovely comments and wowza on your macarons and total presentation. They look absolutely stunning and love the combo of chocolate mint. Just want to add that my publisher (Waverley Books) has the license to my recipe and so I can’t put it on my site for obvious reasons, so thanks for being so understanding!
No worries Jill. I knew about the copyright issue, that’s why I did not ask you for the recipe… I would have never put you in that position. 🙂 I actually recommend everyone to buy your book and check out your blog!!! You have been sooooo helpful and encouraging during the full process with all your tips… and the truth is I would not have tried the second batch without you! 🙂
Merci, Manu – mwah! xo
Everyone just needs to have confidence in themselves and do it! Still drooling at your photos.
Manu, these are absolutely perfect! Jill’s macarons are on my to-do list, too, and hope I can be as successful as you! Just gorgeous, my friend!!!
These look amazing…great job!
Thanks! 🙂
I’m new to your site, and wanted to stop by and say hello = )
Did you prefer the baking paper over the mat?
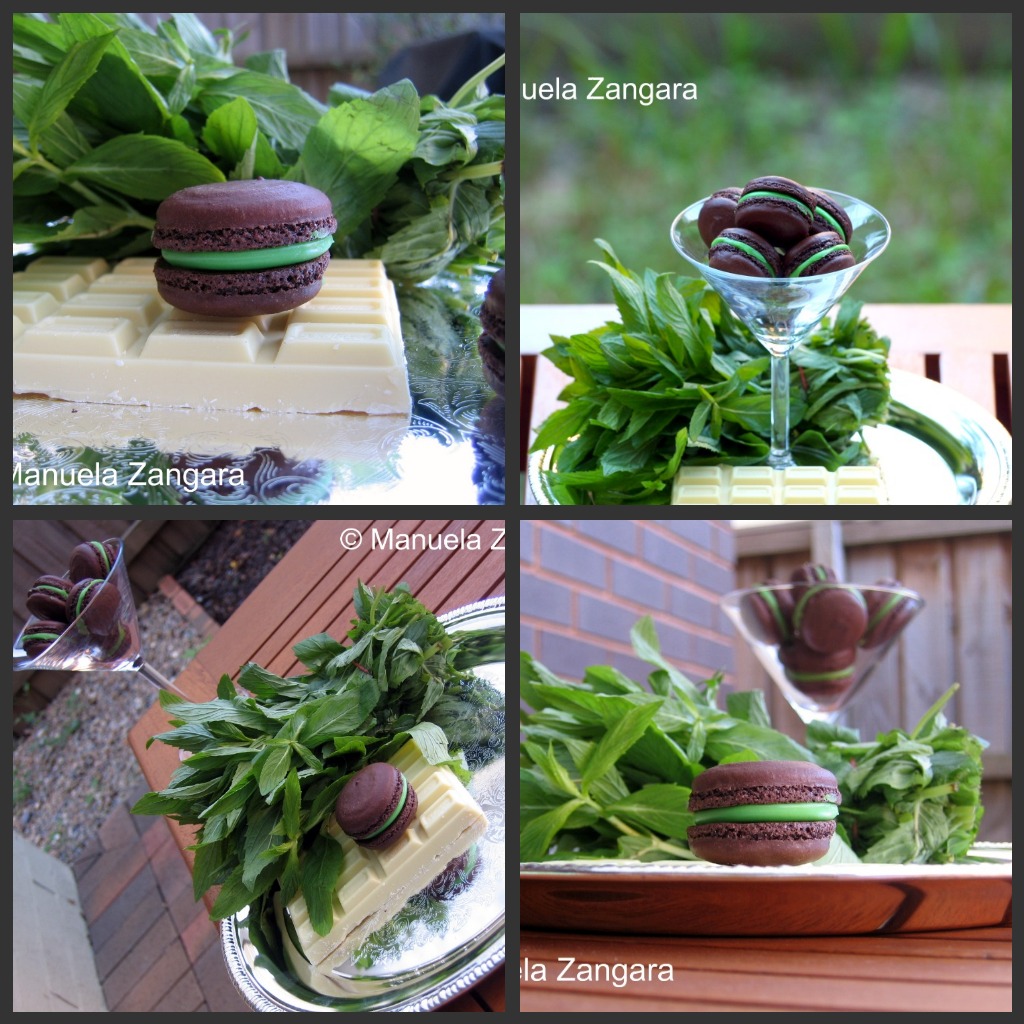
Hi Elle Marie! Welcome to my blog! 🙂 I had never used a mat before and I have to say the surface of the macarons baked on the mat were much smoother. But overall I think that baking paper works just as well. In the end, nobody gets to see that part of the macarons once it is “sandwiched”… so I would say, if you have a mat use it, but do not buy it just for the macarons. 😉
I can’t believe your second attempt turned out so perfectly! You did an amazing job. The macarons are beautiful and they look delicious. Bravaaaaaa!
I am totally impressed, and honestly totally scared to try making them myself!:))
You did amazing job, and combination is really awesome, it worked together in taste as well in color! Thank for sharing and have a wonderful night!!!
Manuuuuuuuuuuuuuuu!!!! Holy mama—those are fabulous, and your pictures??? REALLY?!?! WOW!! Gorgeous! After the chowder can we have these?? Have you noticed on my blog there is 1—O N E desert? I’m far too chicken and far TOOOOO impatient to bake. It has to be exact and I’m so dang random, uh yeah, that’s pretty obvious! HAHA!! We all know the award BELONGS to you….you own it girlie 😉
Hugs & Luvs
Wow! Yours turned out beautifully for your 1st/2nd time making them. Thanks for the photo of the comparison on the silicone mat vs. parchment. I will keep that in mind whenever I try my hand at macarons. Congrats on the award! A big thank you for the pass along of the award as well. Much appreciated!
Your macarons are gorgeous! I’m still too intimidated to try making my own.
Congratulations to all! Well deserved!
p.s. Thank you for all the tips on the macarons. You did an amazing job!
Oh wow, I love to eat macaroons. Love the choice of colors. I bookmark the recipe. Thanks for the tips.
I am VERY excited and honored to be awarded. Thanks so much!
Macarons look good! Job well done!
Hi Manu,
Jill is a great teacher 🙂 Mine even worked without the bag but I would not condone trying to make them without one, I was just gung ho impatiently foolish & lucky. They did turn out tasty, absolutely delicious but didnt look as wonderful as the piped ones. Jill is the Ms Macaron Maestro 😀 I love her book you’ve had great teaching yours look wickedly fun & delicious too. Well done. Thank you for your kindness, for enjoying my blog.
Rosie, don’t be intimidated .. . I tried a ‘Gung ho & away I go” attitude towards making them & each batch turned our deeelcious. Theyre a must, there addictive & soon you’ll be a Madmacaroooooonie 😀 … Join us & share the love 😉
Thank you sooooo much! I am very honored to get another award! And this time I’ll do my best to pass it on ASAP!
By the way are you sure you were not baking macrons in a previous life? these look like a professional job!
These are incredible!!!! I am so impressed. I have tried macarons before and the first time was semi – successful (my dodgy oven was the down fall) but the other attempt was a disaster.
Wow. I have never heard of aging egg whites. This is a very impressive process; congrats on doing such a great job with it:)
Oh my..this is perfect! Its a masterpiece.Congratulations Manu
What a stunning colour combination Manu! And the difference between the baking paper and silicon mat is very marked. Perhaps I should buy a silicon mat now! 🙂
…you are a braver woman than me! Look at how awesome your macarons turned out! Outstanding. You should be INCREDIBLY proud 🙂
oh…I love this…must try this one..!
first time here…fascinating space you have..lovely posts..
Happy to follow u..:)
do stop by mine sometime..
Tasty Appetite
Hi Manu, Ihave soemthing for you on my blog to thank you for the awards you have been passing along: http://cookingitalianinthemidwest.blogspot.com/2011/05/roasted-tomato-pasta.html
Manu, Manu, Manu! I can’t believe that this is your first time! Actually, I can totally believe it! 😀 Your macarons are IMPECCABLE! And I love that the filling is has white chocolate and mint. Gorgeous combo … gorgeous photos!
I have flipped totally for the beautiful pictorial of this incredibly delicious macaroons! Amazing!
Manu, Your macarons look absolutely gorgeous and delectable!! Now I need to catch up on all your other blog posts I’ve been missing out on while I was away 🙂
Hi Manu,
What a beautiful presentation for a very special cookie. Really this is just an elegant dessert, great recipe! Thank you so much for sharing with Full Plate Thursday and hope to see you next week!
Hi Manu, I found your blog through Jill’s & I totally love your blog! Your macarons look fantastic… I wish I could work up the nerve to try macarons! I am a new blogger (a little over 2 months now), and I love discovering amazing new food blogs… I will be back for more of your yummy recipes! Thanks for sharing 🙂
I love anything with mint chocolate, so those look GREAT to me! Kudos for you for making macarons. I’ve always wanted to, but they seem so intimidating. Thanks for the tips on how to make them.
Oh! it’s new level for me and u make first time? so perfectlly done! very creative and unique combo of flavours..Looks delicious ……Lovely color too.
Wow! Brilliant first try at macarons! I’ve never made them.
Thanks for the award, chum, I really appreciate it!
Thanks Manu! what a nice honor! love you blog and this post is amazing – your photos are mouthwatering!
oh wow! manu, ur Macaroons looks so perfect, and to make it that perfect just on first attempt… Looks so appealing!
Gorgeous macarons. It’s wonderful how you explain all the details which helps a none macaron maker like me to follow step by step and hopefully make it. That minty flavor makes it heavenly. Thanks for sharing.
These macarons are beautiful. I love love love the flavors you picked. YUM. I have never made macarons before and every time I see someone blog them I alwyas say I am going to try. I think you really made me want to make them right away! White chocolate and mint?!?! Perfect.
Congratulations on winning recipe of the month! These look beautiful! Well done.
These look delicious!!! I love your presentation!
I can’t believe these are your first Macarons. They turned out perfect. I love the flavors you used. Good job, congrats! Thanks for participating in this month’s YBR 🙂
I’ve enjoyed my first visit to your blog! Its beautiful! Congratulations on your first attempt at Macarons– they turned out perfectly and the flavors sound delicious! I’ve always been intimidated by them and haven’t attempted them yet. Your picture tutorial is great and very helpful!
The macarons look so delicate and good, the combination of colors is just perfect. This month I made my first macarons, and it’s getting addictive, I can’t wait to make it again, for sure it’s going to be some chocolate 🙂
Manu,
Those macarons look gorgeous!
What’s to do with this macaron frenzy off-late all over the blogosphere?
I might never try them, ‘cos I find them so overwhelming and looks like it needs oodles of patience and perseverance as I’ve read they are a whimsical dessert.
For your second attempt, they look so perfect!
Hi Manuela,
I thought I’d let you know that a picture of your macarons were featured in an album I made of my handmade bag. I made it over last weekend 🙂 I have added credits to the picture of the macarons I used from your website too. Many thanks!
Shéba Anne
https://www.facebook.com/profile.php?id=721929335
how many you macaroons can you make with this recipe?
Hi! This recipe makes about 20 macarons. 🙂
i am amazed with your creativity.who could have ever imagined to come up with an idea of chocolate and macarons?