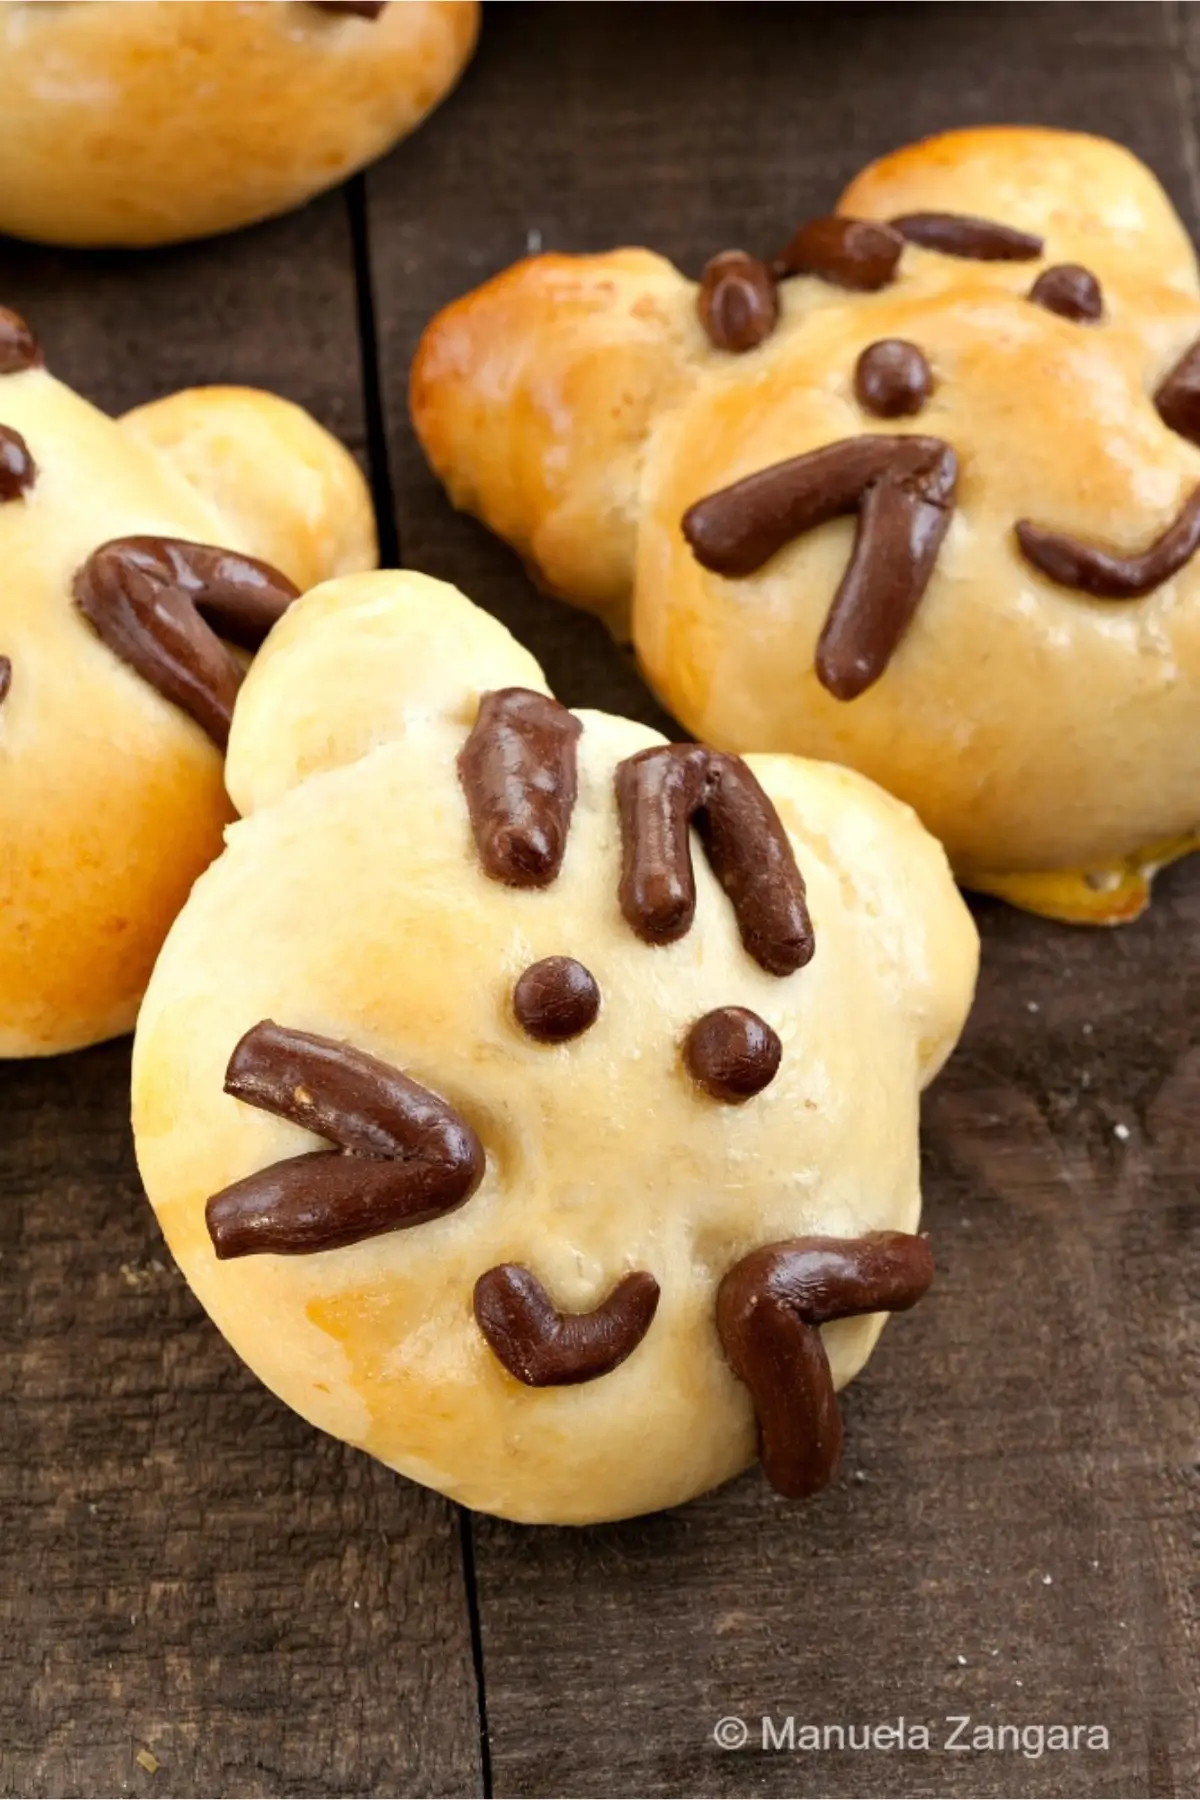
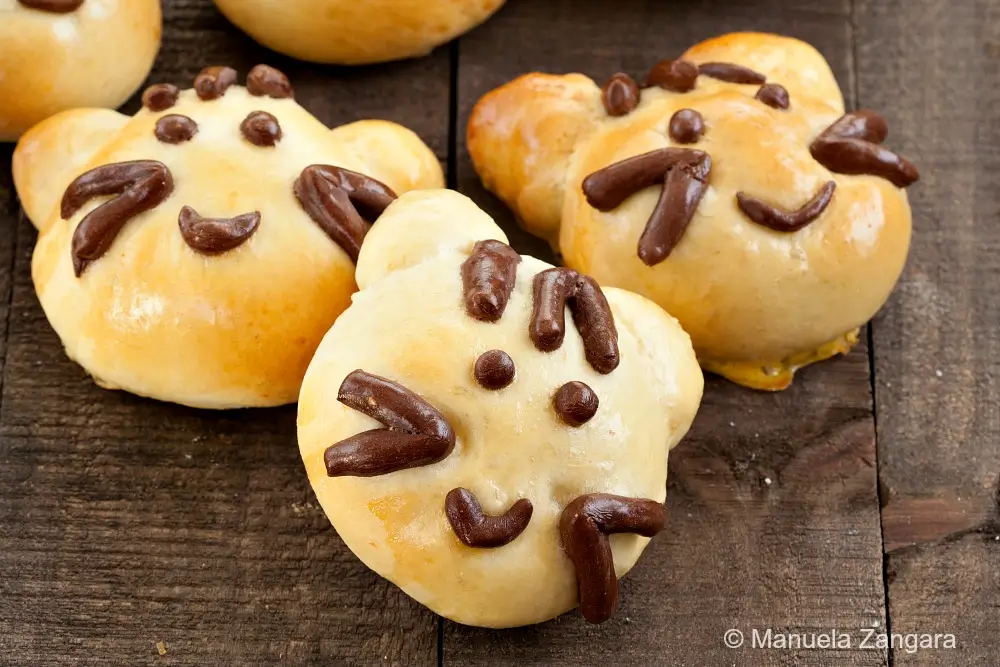
Soft, fluffy bread shaped into the cutest little cats. These Kitty Cat Bread Buns are almost too adorable to eat.
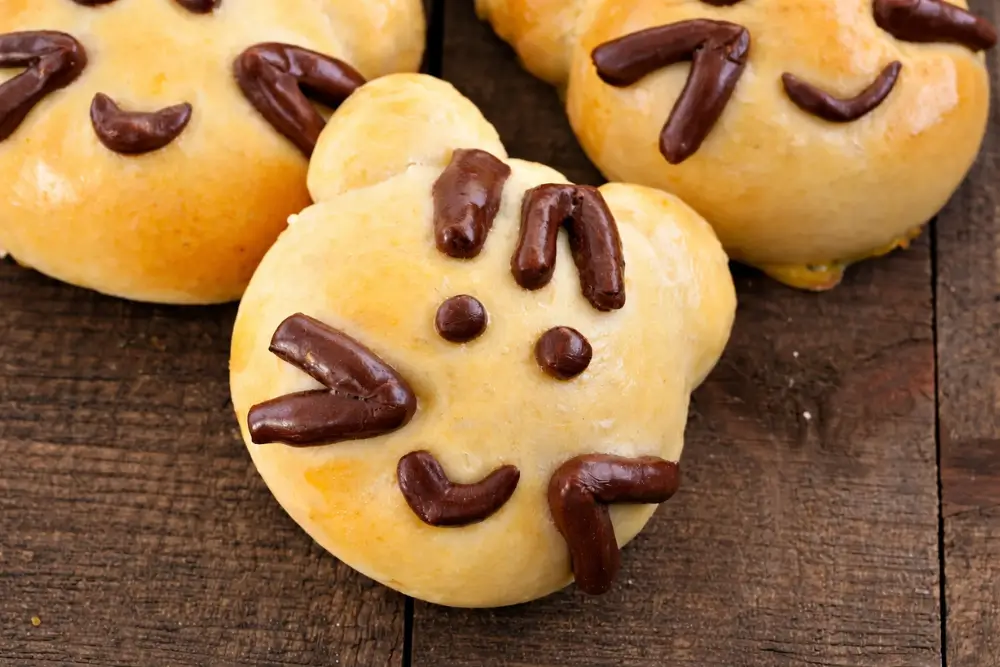
I made these savoury Kitty Cat Bread Buns for my daughter’s 5th birthday party, and they were very popular. They tasted good and looked quite cute, which always helps at a children’s party.
The brown dough comes from cocoa powder, but it is completely savoury. The cocoa is unsweetened and used only for colour, so the buns do not taste sweet.
They are easy to make, although they do take a bit of time. Like most bread buns, they need to proof twice. The advantage is that they can be prepared in advance and frozen.
When I organise parties, I always try to make food that freezes well. There is usually a lot to do on the day, including decorating, and it is a relief knowing some of the food is already done and only needs defrosting. These freeze very well.
I enjoy shaping bread into animal faces. You might remember my pizza-flavoured Piggy Buns, which were just as fun to make and serve.
I filled these Kitty Cat Bread Buns with tuna and mashed potatoes, but you can use any filling you prefer.
Enjoy!
What Makes These Buns Worth Making
- Creates soft bread buns with a filling that stays moist after baking, even when served later in the day.
- Works well as a standalone snack or part of a spread, depending on the occasion.
- Teaches basic bread shaping skills in a simple format, useful for anyone learning to bake with yeast.
Key Ingredients for Kitty Cat Bread Buns
Tuna
Makes up the savoury filling and adds protein. Choose tuna packed in water or olive oil, and drain it well so the filling stays compact and not watery.
Potato
Softens the filling and brings everything together. Floury potatoes, such as Russet or Yukon Gold mash smoothly and help keep the centre compact during baking.
Cocoa Powder
Adds colour to the decorative dough without changing its savoury character. Unsweetened cocoa powder works best, as sweetened types can affect both taste and texture.
Find the complete list with measurements in the recipe card below.
How to Make Kitty Cat Bread Buns
Bread Dough
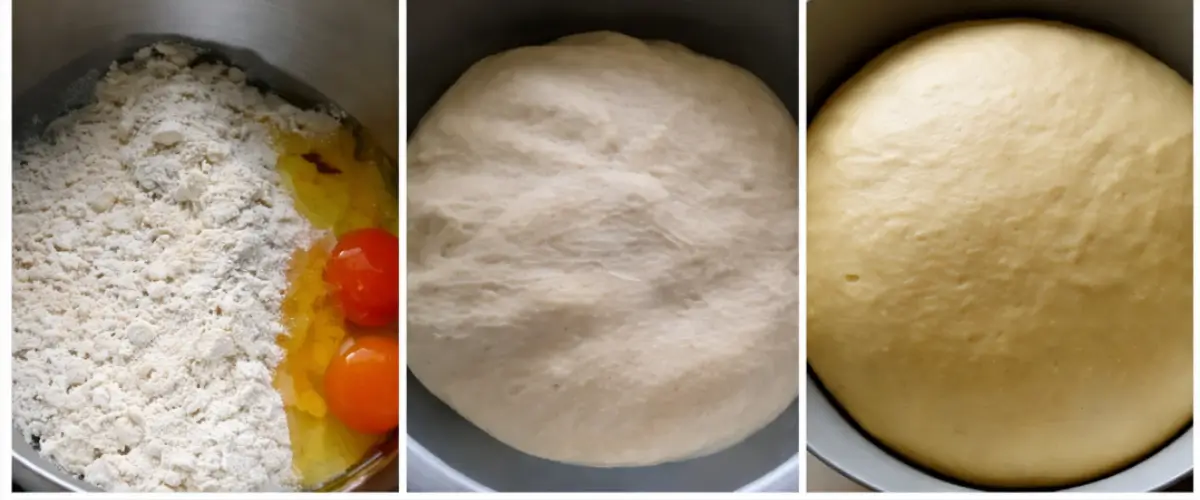
Step 1: Put all the ingredients into the bowl of an electric mixer fitted with the hook attachment and knead until you obtain a smooth, pliable dough. Set aside to proof for 1 hour, or until doubled in size.
Chocolate Dough
Step 1: Put all the ingredients into the bowl of an electric mixer fitted with the hook attachment and knead until you obtain a smooth, pliable dough. Set aside to proof for 1 hour, or until doubled in size.
Tuna Filling
Step 1: Mix all the ingredients in a bowl and divide the mixture into 8 equal portions.
Assembling
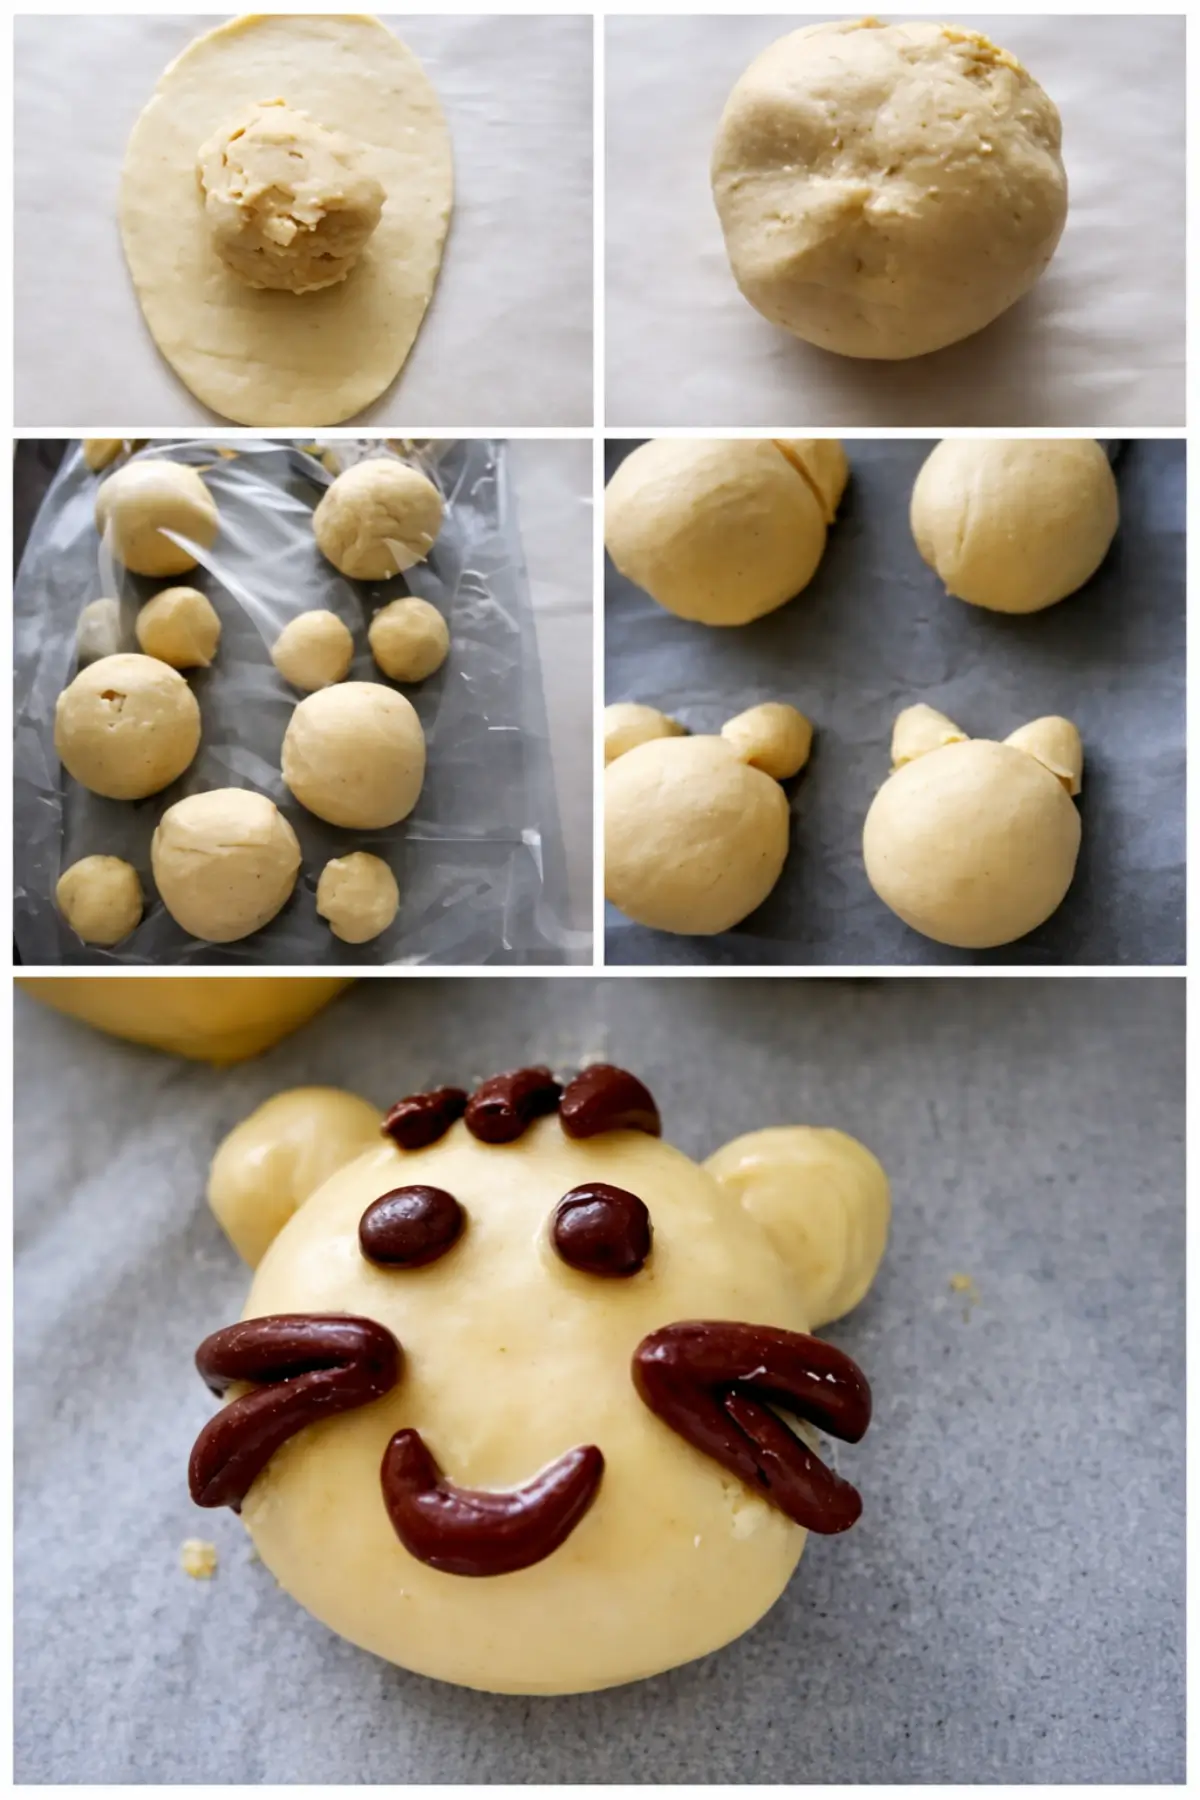
Step 1: Divide the bread dough into 8 large portions (about 40 g – 1½ oz. each) and 16 small portions (about 10 g – ⅓ oz. each). Shape them into balls, loosely cover with cling wrap, and allow them to rest for 10 minutes.
Step 2: Flatten each large ball into a flat oval. Place one portion of tuna filling in the centre of the dough, then pinch the edges together to enclose it and form a bun. Place the buns seam side down on a baking tray lined with baking paper.
Step 3: Roll and shape two of the small balls into teardrop shapes and place them next to each larger bun to form the ears.
Step 4: Repeat with the remaining dough.
Step 5: Roll the chocolate dough into thin ropes, then cut and place them onto the buns to decorate the cat faces.
Step 6: Cover the buns loosely with cling wrap and allow them to proof for another hour.
Step 7: Once the buns have doubled in size, brush them with egg wash and bake in a preheated oven at 180°C – 355°F for 18 minutes.
Step 8: Remove the buns from the baking tray and allow them to cool completely on a wire rack.
Step 9: Serve at room temperature.
Frequently Asked Questions
Yes. Small amounts of finely chopped, well-cooked vegetables such as zucchini, peas, or carrots can be added for extra variety.
Cooked chicken, finely diced ham, or a simple cheese filling all work well. Choosing a filling that stays fairly dry and compact helps it sit neatly inside the dough and bake evenly without leaking.
Keeping the dough well-hydrated and allowing it to proof fully helps achieve a softer result. Using egg and olive oil in the dough also supports a tender crumb once baked.
Yes. All-purpose flour works well for this recipe and gives a softer texture, which suits filled buns better than a very chewy crumb.
Rolling the cocoa dough into thin ropes works best. Cutting small pieces and placing them gently on the buns before the final proof helps the details stay in place during baking.
Extra Help from the Kitchen
Adjust Dough Hydration Gradually – Add liquid a teaspoon at a time during kneading if the dough feels stiff. Aim for a soft, pliable texture that stretches easily without sticking.
Drain the Tuna Thoroughly – Press the tuna gently in a sieve or with the back of a spoon to remove excess liquid. Keeping the filling dry helps the buns bake evenly and hold their shape.
Mash the Potato While Warm – Mash the potato while still warm so it blends smoothly with the tuna and cheese. A smooth mash gives the filling a consistent texture once baked.
Chill the Chocolate Dough Briefly if Needed – Place the cocoa dough in the refrigerator for about 10 minutes if it becomes too soft. Cooler dough holds fine decorative shapes more cleanly.
Rotate the Baking Tray Halfway Through Baking – Turn the tray once during baking to encourage even colouring, especially when decorative dough is placed on the surface.
Variations and Twists
Cheese-Filled Savoury Buns – Replace the tuna filling with cubed or grated melting cheese mixed with a small amount of Parmigiano, keeping the filling compact so it melts without leaking during baking.
Ham and Cheese Buns – Replace the tuna with finely diced cooked ham and grated cheese to create a balanced savoury filling that works well inside the soft bread dough.
Everything Seed-Topped Buns – Brush the buns with egg wash after proofing and sprinkle with sesame seeds, poppy seeds, and dried onion flakes to add texture and savoury flavour to the crust.
Tuna and Sweet Corn Buns – Stir well-drained sweet corn into the tuna and potato mixture before shaping; the corn adds mild sweetness and texture.
Curry-Style Filled Buns – Replace the tuna and potato filling with a mild curry-flavoured tuna or vegetable filling, keeping it fairly dry so it stays contained during baking.
Storage and Shelf Life
Store the cooled Kitty Cat Bread Buns in an airtight container at room temperature for up to 2 days. For longer storage, freeze the buns once fully cooled, placing them in freezer bags or well-sealed containers for up to 2 months.
Thaw the buns at room temperature until soft. Reheat briefly in a low oven at 160°C – 320°F before serving.
You May Also Enjoy These Bread Recipes
Kitty Cat Bread Buns Recipe
Ingredients
Bread Dough
- 300 g – 2 ½ cups flour
- ½ tsp yeast
- 1 egg
- 20 g – 6 tsp sugar
- ⅛ tsp salt
- 20 g – 1 ¼ tbsp extra virgin olive oil
- 150 ml – ⅔ cup water – lukewarm
Chocolate Dough
- 100 g – ¾ cup flour
- ¼ tsp yeast
- ½ tsp sugar
- 60 ml – ¼ cup + 1 tbsp water
- 1 tbsp cocoa powder
Tuna Filling
- 95 g – 3.5 oz tuna
- 1 potato – boiled and mashed
- 2 tbsp Parmigiano Reggiano – finely grated
- salt and pepper – to taste
Egg Wash
- 1 egg
- 1 – 2 tbsp milk
Instructions
Bread Dough
- Put all the ingredients into the bowl of an electric mixer fitted with the hook attachment and knead until you obtain a smooth, pliable dough. Set aside to proof for 1 hour, or until doubled in size.
Chocolate Dough
- Put all the ingredients into the bowl of an electric mixer fitted with the hook attachment and knead until you obtain a smooth, pliable dough. Set aside to proof for 1 hour, or until doubled in size.
Tuna Filling
- Mix all the ingredients in a bowl and divide the mixture into 8 equal portions.
Assembling
- Divide the bread dough into 8 large portions (about 40 g – 1½ oz. each) and 16 small portions (about 10 g – ⅓ oz. each). Shape them into balls, loosely cover with cling wrap, and allow them to rest for 10 minutes.
- Flatten each large ball into a flat oval. Place one portion of tuna filling in the centre of the dough, then pinch the edges together to enclose it and form a bun. Place the buns seam side down on a baking tray lined with baking paper.
- Roll and shape two of the small balls into teardrop shapes and place them next to each larger bun to form the ears.
- Repeat with the remaining dough.
- Roll the chocolate dough into thin ropes, then cut and place them onto the buns to decorate the cat faces.
- Cover the buns loosely with cling wrap and allow them to proof for another hour.
- Once the buns have doubled in size, brush them with egg wash and bake in a preheated oven at 180°C – 355°F for 18 minutes.
- Remove the buns from the baking tray and allow them to cool completely on a wire rack.
- Serve at room temperature.


These look so good! I was wondering if you have a suggestion to replace tuna? Can it be replaced with chocolate to make a dessert bun or another savoury filling? I want to make these with my step daughter but I am allergic to tuna (canned meats preservative allergy) I’d appreciate any suggestions that would still hold the right consistency
Hi Mary! Sorry for the late reply. The filling can be anything. You could add cheese or ham or both instead of tuna. 🙂
What a fantastic mother you are and what a terrific baker too. I wish I’d had these when I was 5.
These are so adorable!! The tuna filling was a surprise – I wasn’t expecting that, which s a GREAT thing! The kids will gobble these right up!!