Cute feline-shaped Cat Cookies with bright eyes add a meow-worthy touch to any party! Add M&M’s for bright colour and a fun, friendly look that brightens the spread.
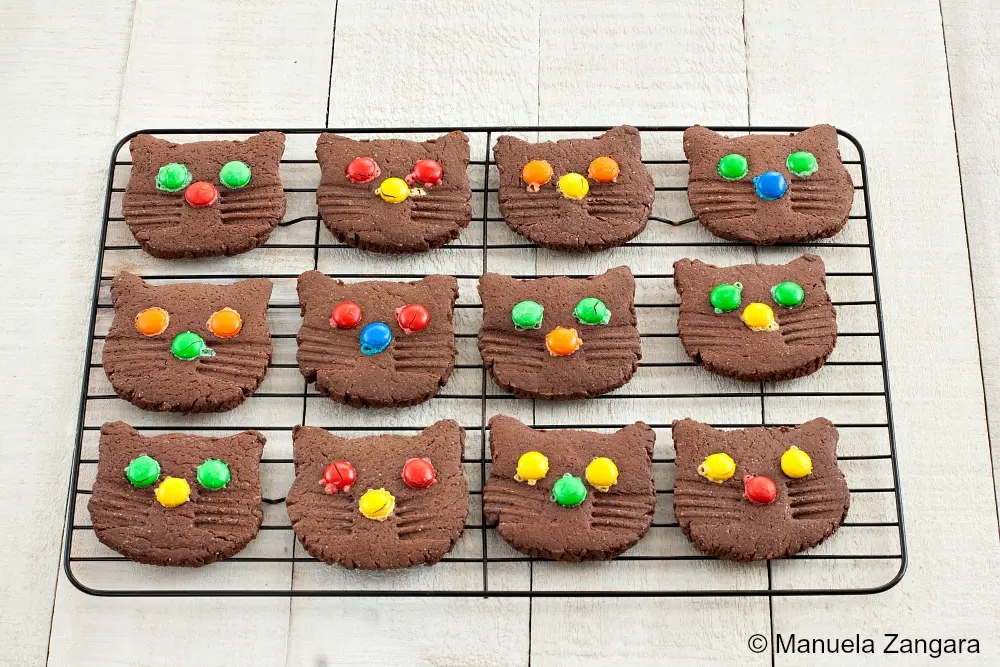
I made these cookies for my daughter’s 5ᵗʰ birthday party. If you follow this blog, you will already know the theme was “kitty cats”. The recipe is quick to make, and the chocolate dough is easy to handle and not too sweet.
I often bake these cat-shaped cookies for my kids’ parties because you can prepare them in advance and freeze them already cut. Then you only need to bake them from frozen, with no defrosting.

To shape the faces, I made simple cardboard stencils, the same way I did for last year’s Miffy Cookies.
Decorating them is straightforward, too, as I used M&M’s and a fork for the whiskers. Everyone loved them, so I prepared another batch for school instead of the usual lolly bags. Have fun!
Why Cat Cookies Are Party Favourites
- Uses simple ingredients most households already keep in the pantry, which makes prep easier.
- Works well for birthday themes, school events, or small celebrations at home.
- Encourages kids to help in the kitchen since decorating feels fun and easy.
Key Ingredients for Cat-Shaped Cookies
Sugar
Gives structure and sweetness without making the dough overly rich. Fine white sugar works well here because it blends smoothly with the butter and keeps the surface of the biscuits even.
Butter
Adds tenderness and helps the dough hold its shape as it bakes. Use softened unsalted butter for better control over flavour and to keep the dough easy to cream.
Cocoa Powder
Adds chocolate depth and keeps the dough firm during shaping. Natural unsweetened cocoa gives a balanced flavour, while Dutch-processed cocoa creates a darker colour if you prefer a deeper shade.
Chocolate M&M’s
Give colour and expression without melting or losing shape in the oven. Choose colours that suit your theme, and press them gently into the dough.
Find the complete list with measurements in the recipe card below.
How to Make Cat Cookies
Step 1: Cream the butter and sugar in the bowl of an electric mixer fitted with a paddle attachment, working on low to medium speed, until the mixture is well combined.
Step 2: Add the egg and milk, then mix until smooth. Sift the flour and cocoa powder together, add them to the bowl, and mix again. The dough is ready when it starts to gather around the paddle attachment.
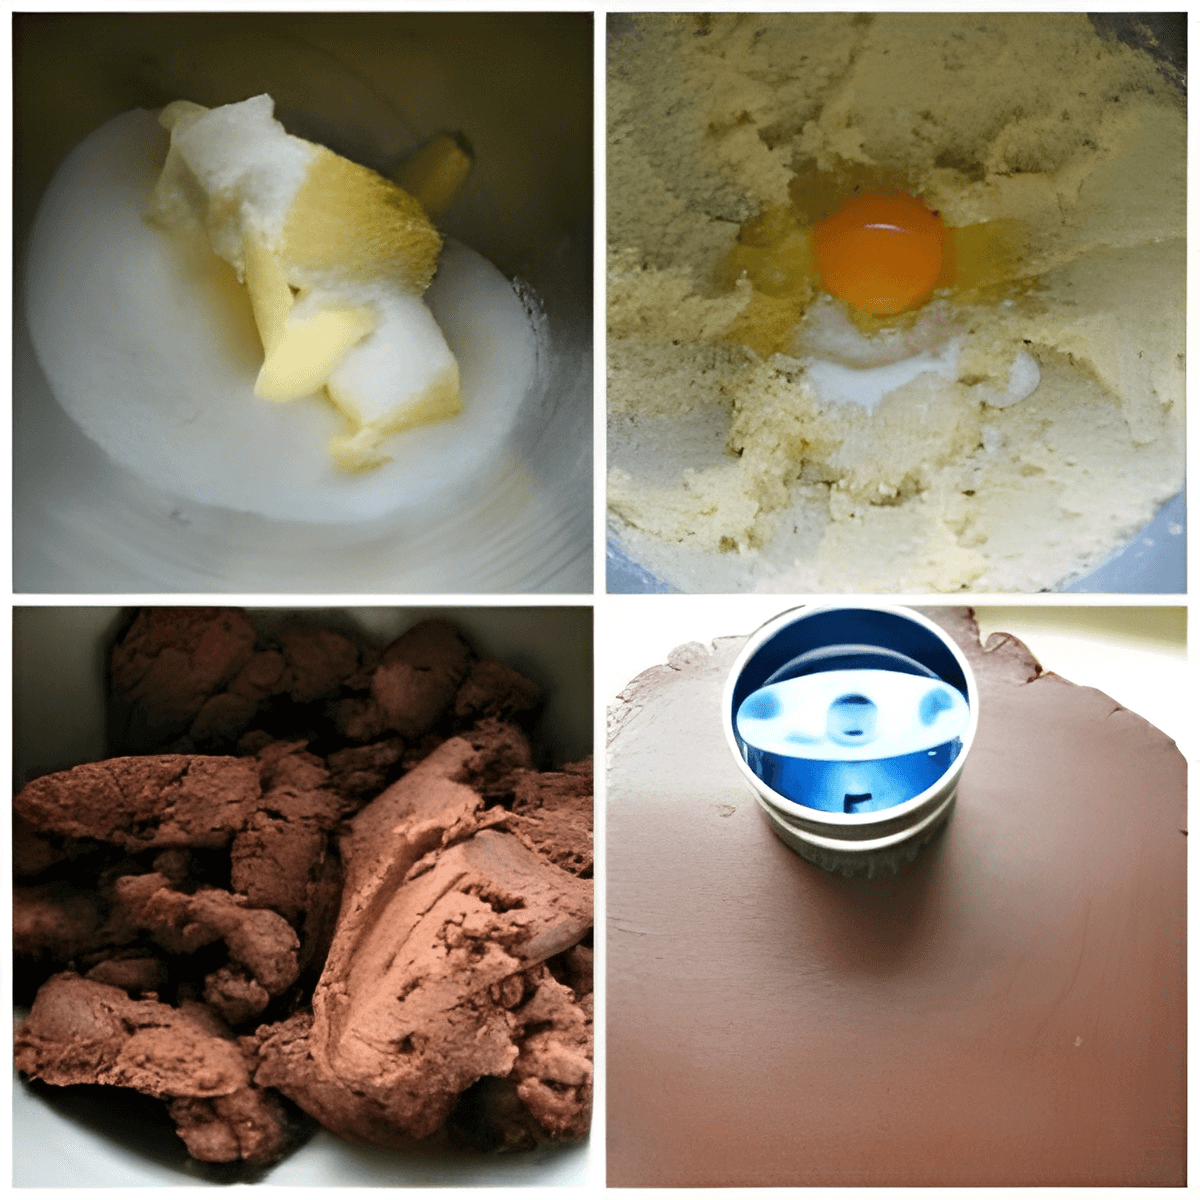
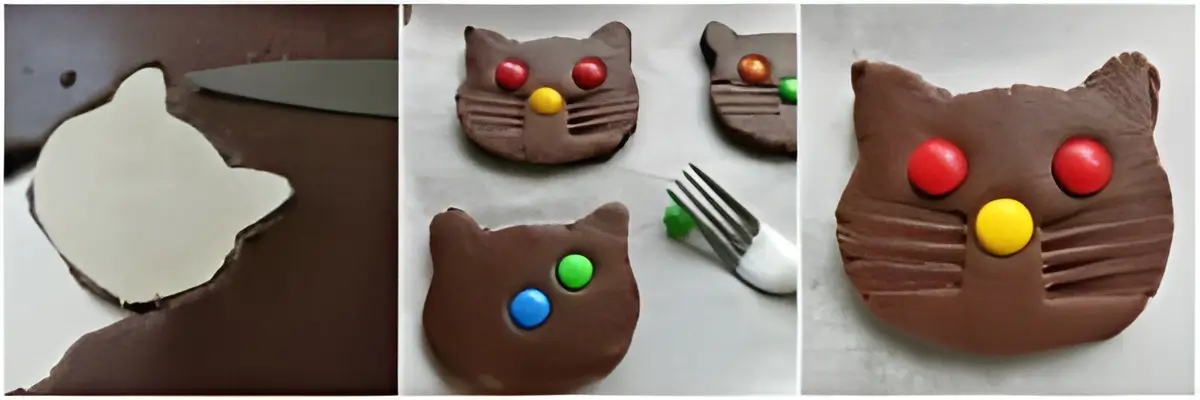
Step 3: Roll the dough into a 6 mm – ¼ inch thick sheet and cut out the cookies using a cardboard stencil. You can make your own stencil by printing the image you want to use, placing transfer paper between the printout and a clean piece of cardboard, tracing the outline with a pen, and cutting out the shape with a sharp craft knife.
Step 4: Arrange the cookies on a baking tray lined with baking paper and decorate them with M&M’s. For the whiskers, press the dough gently with the prongs of a fork.
Step 5: Bake in a preheated oven at 180°C – 355°F for 15 minutes.
Step 6: Leave the cookies to cool on the baking tray for a few minutes, then transfer them to a wire rack to cool completely.

Frequently Asked Questions
Yes. You can use mini chocolate chips, white chocolate chips, small sugar pearls, or a light drizzle of melted chocolate once the biscuits are cooled.
A simple icing made with icing sugar and a few drops of water or lemon juice sets firmly and is easy to pipe around small edges.
Yes. A small amount of vanilla extract or ¼ teaspoon cinnamon blends well with the chocolate base and doesn’t affect the dough texture.
Not always, but a quick 10-minute chill helps if the kitchen is warm or the butter softens fast. It firms the dough enough to hold the stencil shape and makes lifting the cut pieces easier.
Extra Help from the Kitchen
Work on a Cool Surface – A cooler bench keeps the dough firm for longer, which helps the shapes come out clean. Warm dough softens quickly, especially if you work near the oven.
Lift the Dough with a Spatula – A thin metal spatula slides neatly under the cut shapes and prevents any stretching. This is especially helpful for pointed ears or narrow details.
Choose a Simple Stencil Shape – Smooth outlines are easier to cut around and stay consistent in the oven. Shapes with sharp corners or tiny curves can warp more during baking.
Dust the Rolling Pin Lightly – A light coating of flour on the rolling pin stops sticking without changing the dough’s texture. It also helps you keep an even thickness across the whole sheet.
Use Two Baking Trays – Rotate between two trays to keep the process steady. One tray can cool while the other bakes, which helps you avoid working the dough too much in one go.
Variations and Twists
Halloween Cat Cookies – Use the chocolate dough and add black gel colouring to deepen the colour before rolling. Shape the biscuits with your cat stencil and bake them until firm, then decorate with Halloween sprinkles in orange, green, purple, and black.
Shortbread Cat Cookies – Swap the dough for a simple shortbread base using flour, butter, and sugar. Roll it to the same thickness and cut with your stencil for a light, crumbly biscuit.
Sandwich Cat Cookies – Bake matching pairs of shapes and fill them with a thin layer of Nutella, jam, or simple chocolate cream. Keep the filling light so the outline stays clear.
White Cat Cookies – Prepare the plain dough and decorate the cooled biscuits with white royal icing or small fondant details for the eyes and nose. This keeps the colour clean and bright.
Pink Cat Cookies – Use the plain dough by replacing the cocoa with the same amount of flour. Cover the cooled biscuits with smooth pink royal icing and finish with a simple white bow or a small icing flower for a soft pastel look.
Storage and Shelf Life
Store the cat cookies in an airtight container at room temperature for up to 5 days. Freeze the shaped dough on a tray, then move the pieces to a container and freeze for up to 2 months.
Bake the frozen shapes at 180°C – 350°F and add a minute or two if needed. Cool the baked biscuits fully before storing to keep the texture firm and even.
Fun and Festive Cookie Ideas
Cat Cookies Recipe
Cute feline-shaped Cat Cookies with bright eyes add a meow-worthy touch to any party! Add M&M’s for bright colour and a fun, friendly look that brightens the spread.
Ingredients
- 75 g – ⅓ cup sugar
- 75 g – ⅓ cup butter – at room temperature
- 1 egg
- 1½ tbsp milk
- 225 g – 1 scant cup flour
- 25 g – ¼ cup cocoa powder
- chocolate m&m’s
Instructions
-
Cream the butter and sugar in the bowl of an electric mixer fitted with a paddle attachment, working on low to medium speed, until the mixture is well combined.
-
Add the egg and milk, then mix until smooth. Sift the flour and cocoa powder together, add them to the bowl, and mix again. The dough is ready when it starts to gather around the paddle attachment.
-
Roll the dough into a 6 mm – ¼ inch thick sheet and cut out the cookies using a cardboard stencil. You can make your own stencil by printing the image you want to use, placing transfer paper between the printout and a clean piece of cardboard, tracing the outline with a pen, and cutting out the shape with a sharp craft knife.
-
Arrange the cookies on a baking tray lined with baking paper and decorate them with M&M’s. For the whiskers, press the dough gently with the prongs of a fork.
-
Bake in a preheated oven at 180°C – 355°F for 15 minutes.
-
Leave the cookies to cool on the baking tray for a few minutes, then transfer them to a wire rack to cool completely.


These are so adorable!! I’m amazed that the M&M’s hold up so well being baked, I would have assumed that I would have had to attach them later with icing sugar. And the way you do the whiskers is so clever!!