Sprinkle some fairy magic on your next party table. This Tinkerbell Cake has soft layers, cute details, and all the charm kids love.
My eldest daughter Victoria loves Tinkerbell. She has all four films and watches them over and over with her little sister. They curl up together on the couch, share a blanket, and follow the story with so much joy. When it was time to choose her birthday cake, she asked for a “Tinky Cake”.
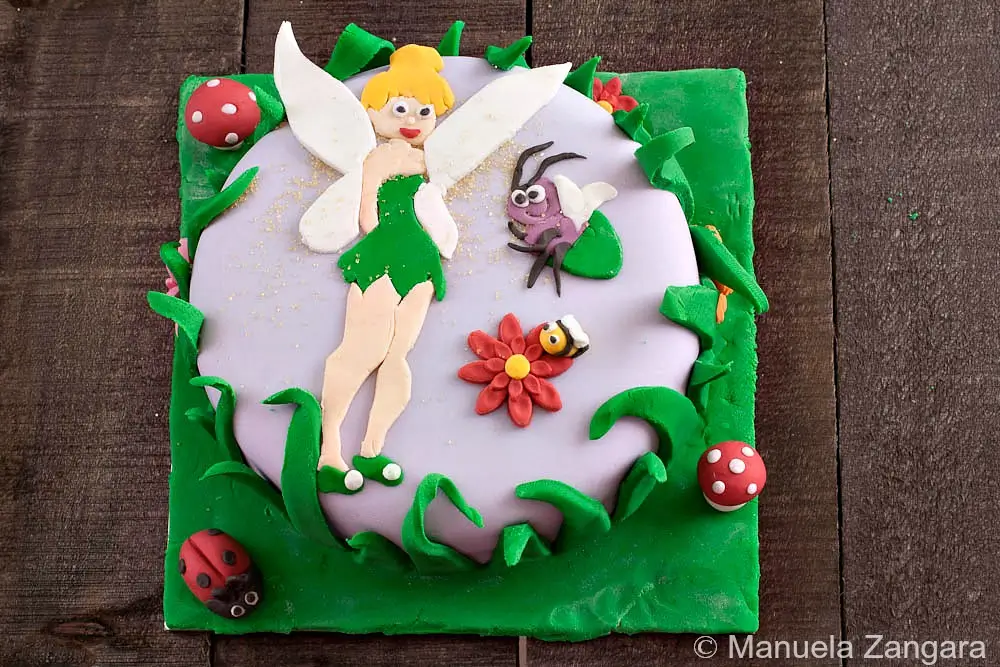
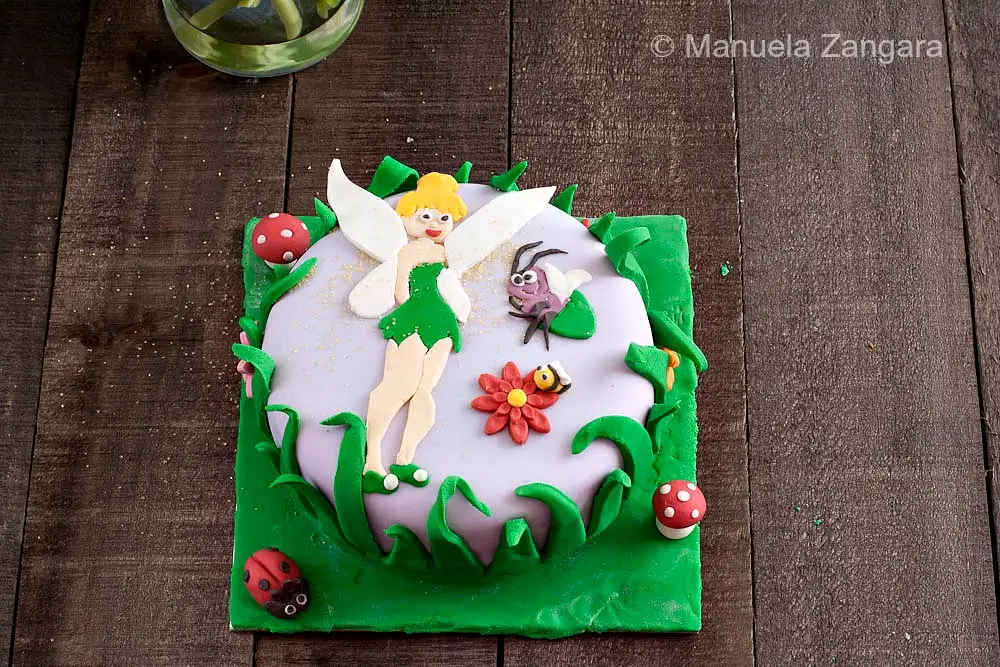
I decided straight away to make a fondant cake with a flat Tinkerbell image on top instead of attempting a full figurine, which felt a bit too complicated for me.
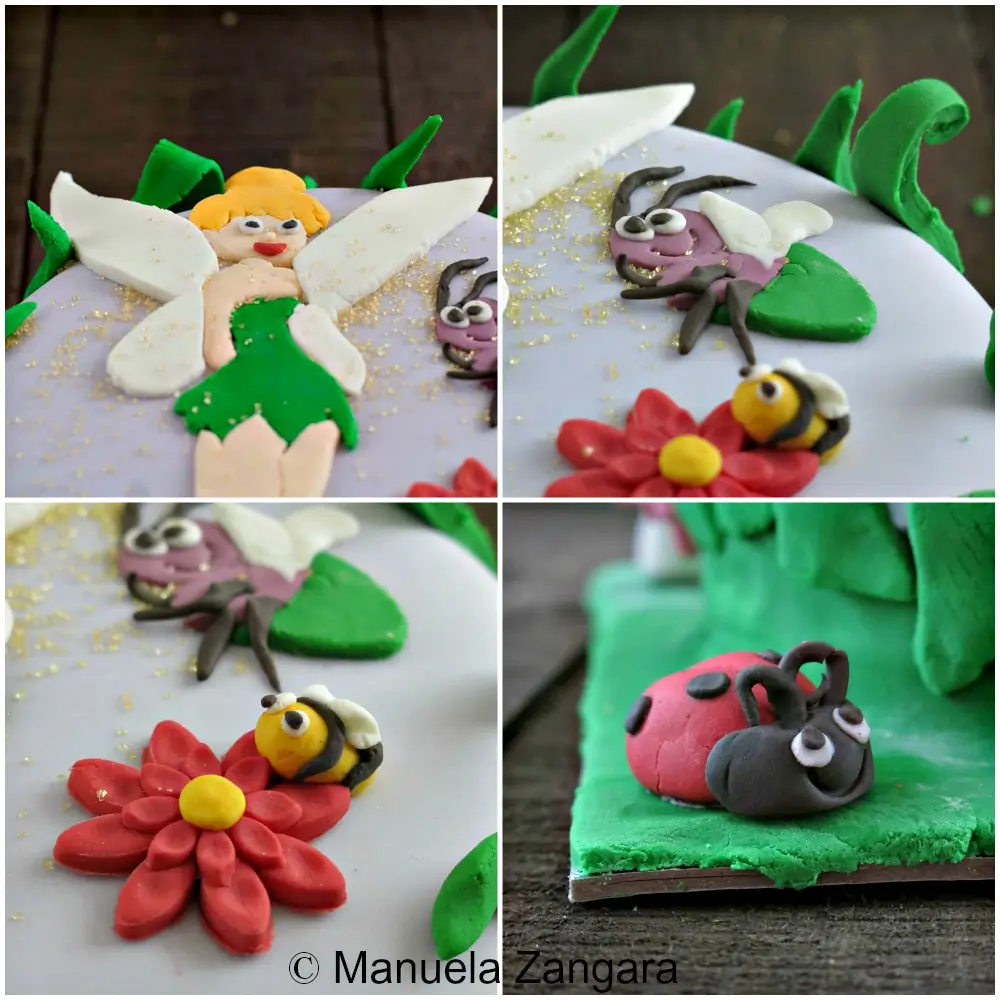
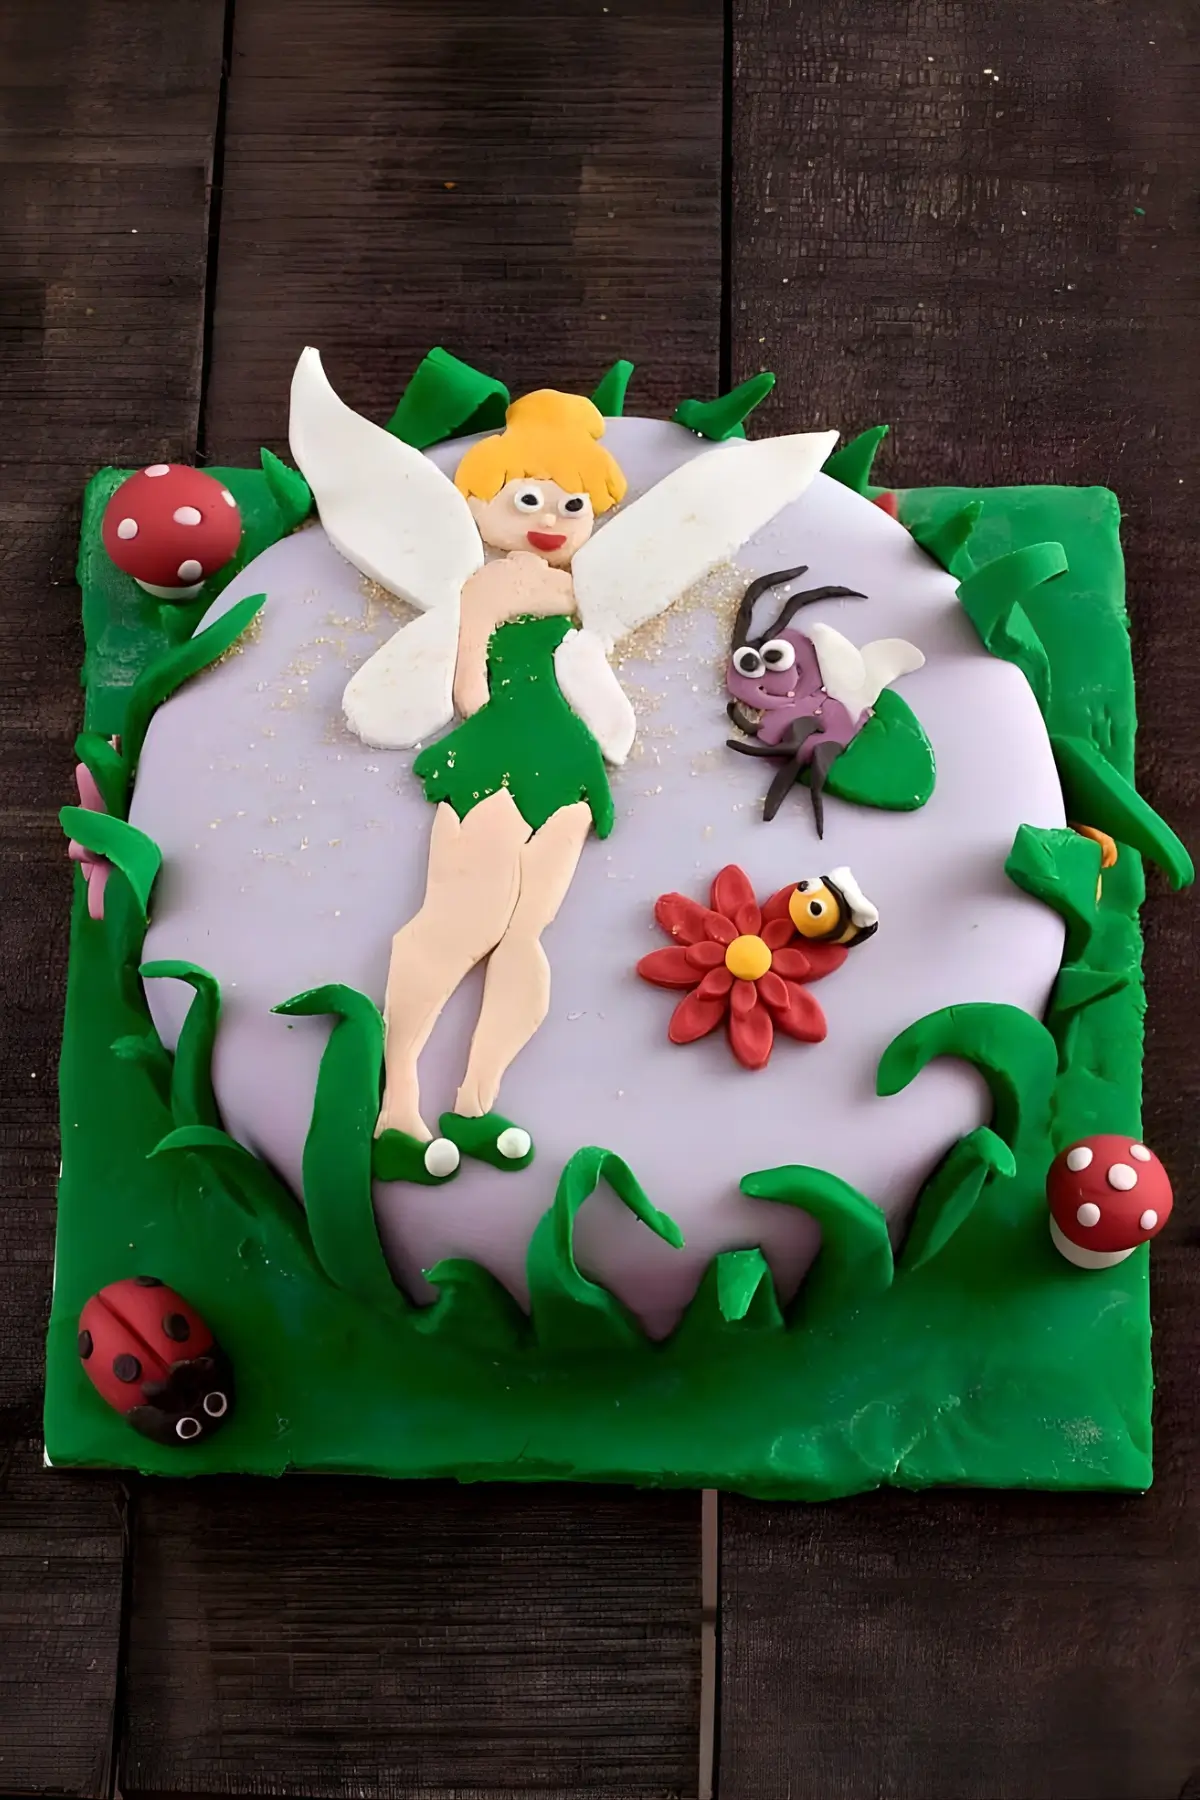
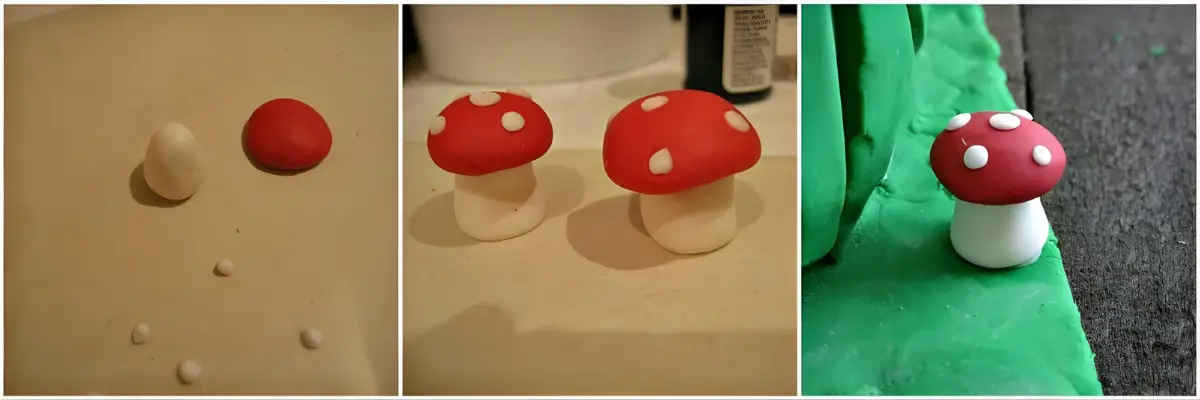
I added Tinkerbell’s firefly friend Blaze, some flowers, two toadstools, a little bee, and a ladybug. You can include anything you like, as long as it stays within the “nature and fairies” theme. Have fun with it and let creativity guide you.
In the end, both Victoria and I were very happy with how it turned out. I’ll leave you to MsM’s Tinkerbell Cake!
Reasons to Make Tinkerbell Cake for Your Next Party
- Pastel colours make the whole cake look soft and sweet, perfect for young kids’ parties.
- Cake slices hold their shape well, so plates stay tidy and kids can carry them around easily.
- A yoghurt cake base keeps everything light and pleasant to eat, even after a big birthday meal.
Key Ingredients for Tinkerbell Cake
Yoghurt Cakes
Give a soft, even crumb that holds its shape when frozen, making levelling and stacking much easier. A plain or lightly flavoured yoghurt cake works best.
Coloured Fondant
Forms the main fairy scene and stays stable at room temperature. Choose gel colours for clean tones, and pick softer shades like lavender, green, or yellow to suit the Tinkerbell theme.
Icing for Crumb Coating
Helps seal the cake and creates a smooth base before adding fondant. Any icing with a medium consistency works well, and a light vanilla flavour blends easily with the decorations.
Find the complete list with measurements in the recipe card below.
How to Make Tinkerbell Cake
For the Cake
Step 1: Bake the cakes. Two yoghurt cakes work well and can be frozen for easy assembly.
Step 2: Colour all the fondant you are going to need. Dip a toothpick in the gel colour, rub it onto the piece of fondant you want to colour, and knead until the colour is uniformly combined.
For the Decorations
Step 1: Prepare the fondant decorations about 3 or 4 days before the party. Keep the fondant wrapped and stored in a dry place so it doesn’t harden.
Step 2: To make Tinkerbell and Blaze, create custom stencils. Print the image you want to make, place transfer paper between the image and clean cardboard, and trace the outline with a pen before cutting out all the single pieces with a sharp exacto knife or craft knife. This method is reliable, works well for detailed fondant pieces and cookies, and allows almost any design to be recreated.
Assembling the Cake
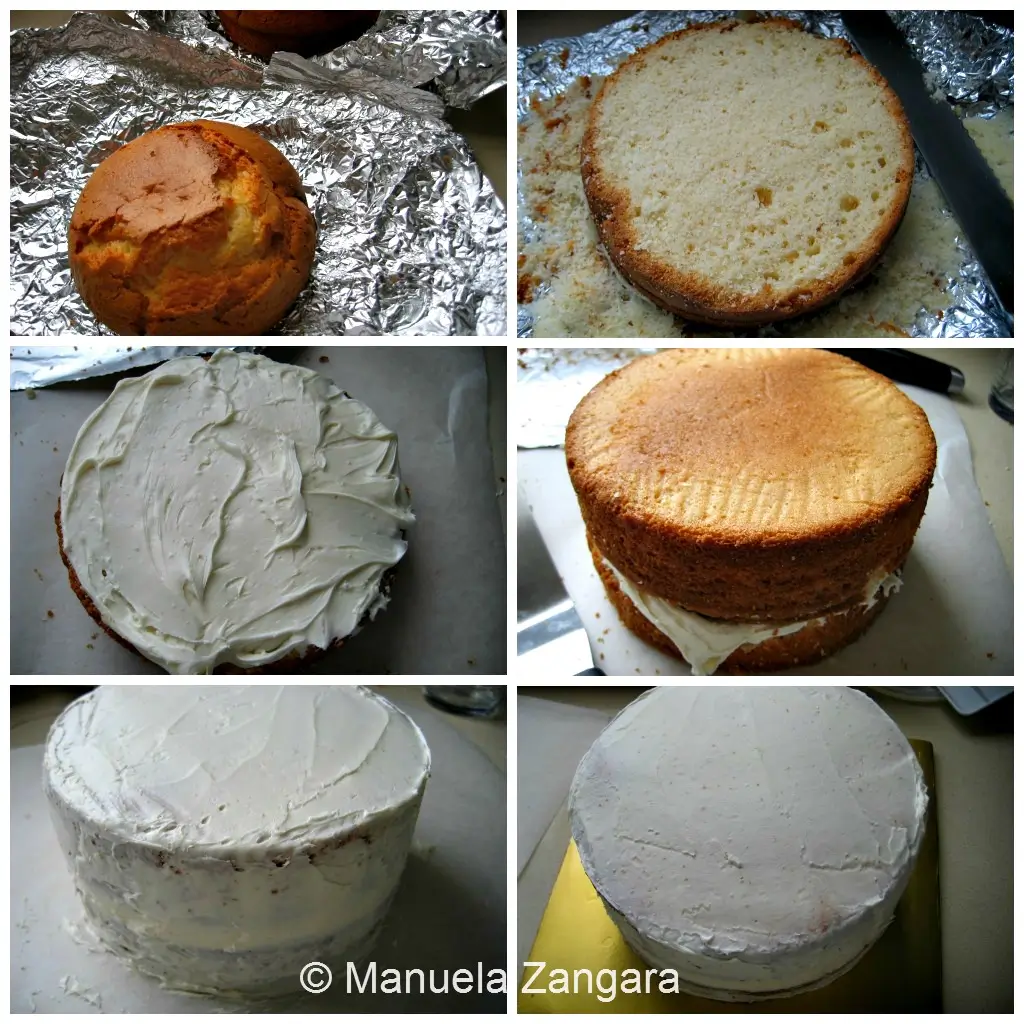
Step 1: The day before the party, assemble the cake. Make icing for the crumb coating using your favourite recipe, keeping it slightly less dense so it spreads easily. Take the 2 yoghurt cakes out of the freezer and level them while still frozen with a sharp serrated knife.
Step 2: Spread a layer of icing on one cake and top it with the other cake. Choose the smoothest and flattest surface for the top (this is usually the bottom of one of the cakes), as this makes icing and decorating easier.
Step 3: Crumb coat the cake while it is still frozen, as this is much easier when the cake is firm. Start from the top, then coat the sides. Use a cake spatula to smooth the surface as evenly as possible. When the cake is fully coated, place it in the fridge to harden. This coating will make the fondant top look smooth and will prevent crumbs from showing through.
Step 4: When the icing has set, transfer the cake onto a cake board and secure it to the base with a little icing.
Decorating the Cake
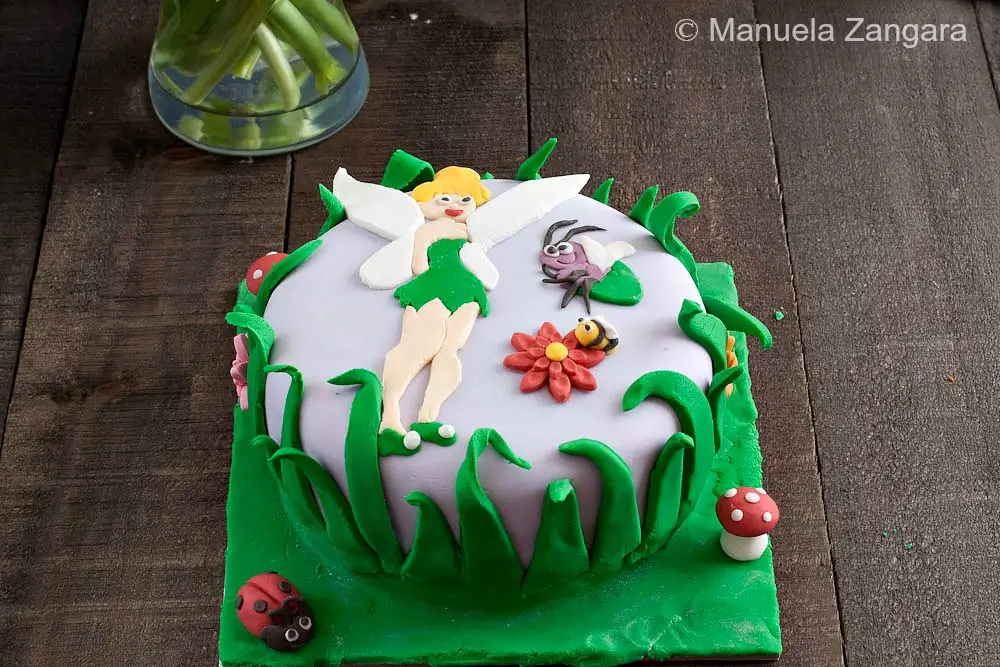
Step 1: Roll out the lavender fondant and cover the top of the cake with it (no need to go all the way to the bottom as this part will be covered with the green fondant, so trim off the excess lavender fondant with a sharp knife). Roll out the green fondant and cover the remaining cake and the base with it. Smooth it with a fondant smoother and cut out any excess.
Step 2: Cut strips of green fondant to resemble long grass and “glue” them around the cake using a little water.
Step 3: Using water, attach all the decorations that were prepared earlier, including Tinkerbell, Blaze, colourful flowers, two toadstools, a small bee, and a ladybird.
Step 4: Just before serving, sprinkle some golden-coloured sugar onto Tinkerbell’s wings to create a “Pixie Dust” effect.
Frequently Asked Questions
Yes. Vanilla, chocolate, or lemon sponge works well under fondant. Choose a cake with a firm crumb, so it stays stable when levelled and covered.
Flowers, butterflies, small insects, and extra fairies all work well. Use the same stencil method to keep the shapes neat and consistent.
Yes. Ready-made fondant gives consistent colour and saves time. It also keeps an even texture, which helps when covering the cake or cutting small shapes.
Warm the fondant with your hands, knead it again, and roll it to an even thickness. Dust your board and rolling pin with icing sugar or cornflour to prevent sticking. A small amount of white vegetable shortening is optional and can help reduce cracking.
Extra Help from the Kitchen
Use Firm Boards for Fondant Work – A strong rolling board stops fondant from sagging or stretching when you lift it onto the cake, giving cleaner edges and fewer surface marks.
Dry Brushes for Detailing – A soft, dry brush removes excess icing sugar or corn starch without scratching the fondant. It also helps tidy small areas around eyes, wings, or flowers.
Test Colour Intensity on Small Pieces – Colour a small sample first so you can adjust shades without wasting fondant. This is especially useful for skin tones, greens, and purples.
Keep Hands Slightly Warm – Fondant reacts well to gentle warmth. Warm hands soften small pieces evenly, making them easier to shape into smooth flowers, insects, or fairy details.
Let Stencils Air-Dry – Leaving cardboard stencils uncovered for a few hours keeps them firm. Dry stencils hold their shape when pressed against fondant and help you cut cleaner outlines.
Variations and Twists
Add Raspberry Jam Between the Layers – Spread 2–3 tablespoons of raspberry jam over the first layer before stacking to add gentle fruit flavour without softening the crumb coat.
Tint the Icing with a Light Green Shade – Mix a small amount of green gel colour into the crumb-coat icing to keep the inside tones consistent with the fairy theme once sliced.
Add Vanilla Bean to the Icing – Mix ½ teaspoon vanilla bean paste into the crumb-coat icing to give the interior a richer flavour that pairs well with the sweet fondant.
Swap Vanilla or Chocolate Sponge – Replace the yoghurt cakes with vanilla or chocolate sponge for a more traditional base under fondant.
Storage and Shelf Life
Store the finished cake in a cool, dry place for up to 2 days. Fondant keeps its form at room temperature, so refrigeration is usually unnecessary unless the kitchen is very warm.
Freeze unfrosted yoghurt cakes for up to 1 month, wrapped well to prevent ice crystals from forming. Thaw the cakes in the fridge before levelling and decorating.
Keep leftover slices in an airtight container for 1–2 days at room temperature. Add the golden sugar on Tinkerbell’s wings shortly before serving so the colour remains clear.
More Fun Birthday Cakes to Try
Tinkerbell Cake Recipe
Sprinkle some fairy magic on your next party table. This Tinkerbell Cake has soft layers, cute details, and all the charm kids love.
Ingredients
- 2 yoghurt cakes
- coloured fondant
- icing – for crumb coating
- icing sugar OR cornflour
Instructions
For the Cake
-
Bake the cakes. Two yoghurt cakes work well and can be frozen for easy assembly.
-
Colour all the fondant you are going to need. Dip a toothpick in the gel colour, rub it onto the piece of fondant you want to colour, and knead until the colour is uniformly combined.
For the Decorations
-
Prepare the fondant decorations about 3 or 4 days before the party. Keep the fondant wrapped and stored in a dry place so it doesn’t harden.
-
To make Tinkerbell and Blaze, create custom stencils. Print the image you want to make, place transfer paper between the image and clean cardboard, and trace the outline with a pen before cutting out all the single pieces with a sharp exacto knife or craft knife. This method is reliable, works well for detailed fondant pieces and cookies, and allows almost any design to be recreated.
Assembling the Cake
-
The day before the party, assemble the cake. Make icing for the crumb coating using your favourite recipe, keeping it slightly less dense so it spreads easily. Take the 2 yoghurt cakes out of the freezer and level them while still frozen with a sharp serrated knife.
-
Spread a layer of icing on one cake and top it with the other cake. Choose the smoothest and flattest surface for the top (this is usually the bottom of one of the cakes), as this makes icing and decorating easier.
-
Crumb coat the cake while it is still frozen, as this is much easier when the cake is firm. Start from the top, then coat the sides. Use a cake spatula to smooth the surface as evenly as possible. When the cake is fully coated, place it in the fridge to harden. This coating will make the fondant top look smooth and will prevent crumbs from showing through.
-
When the icing has set, transfer the cake onto a cake board and secure it to the base with a little icing.
Decorating the Cake
-
Roll out the lavender fondant and cover the top of the cake with it (no need to go all the way to the bottom as this part will be covered with the green fondant, so trim off the excess lavender fondant with a sharp knife). Roll out the green fondant and cover the remaining cake and the base with it. Smooth it with a fondant smoother and cut out any excess.
-
Cut strips of green fondant to resemble long grass and “glue” them around the cake using a little water.
-
Using water, attach all the decorations that were prepared earlier, including Tinkerbell, Blaze, colourful flowers, two toadstools, a small bee, and a ladybird.
-
Just before serving, sprinkle some golden-coloured sugar onto Tinkerbell’s wings to create a “Pixie Dust” effect.
Recipe Notes
I prepared two batches of my Yoghurt Cake recipe and still had enough batter left to bake 12 cupcakes. One batch should be more than enough next time.


Manu I have tackled simple fondant decorations on the past. Nothing fancy … My daughter is turning 17 and she wants a cake that I would have to decorate with fondant. I may go the easier cupcake route. But as always you inspire me to actually try to do a fondant cake. Wish me luck!
What a gorgeous cake. And such a lot of work!