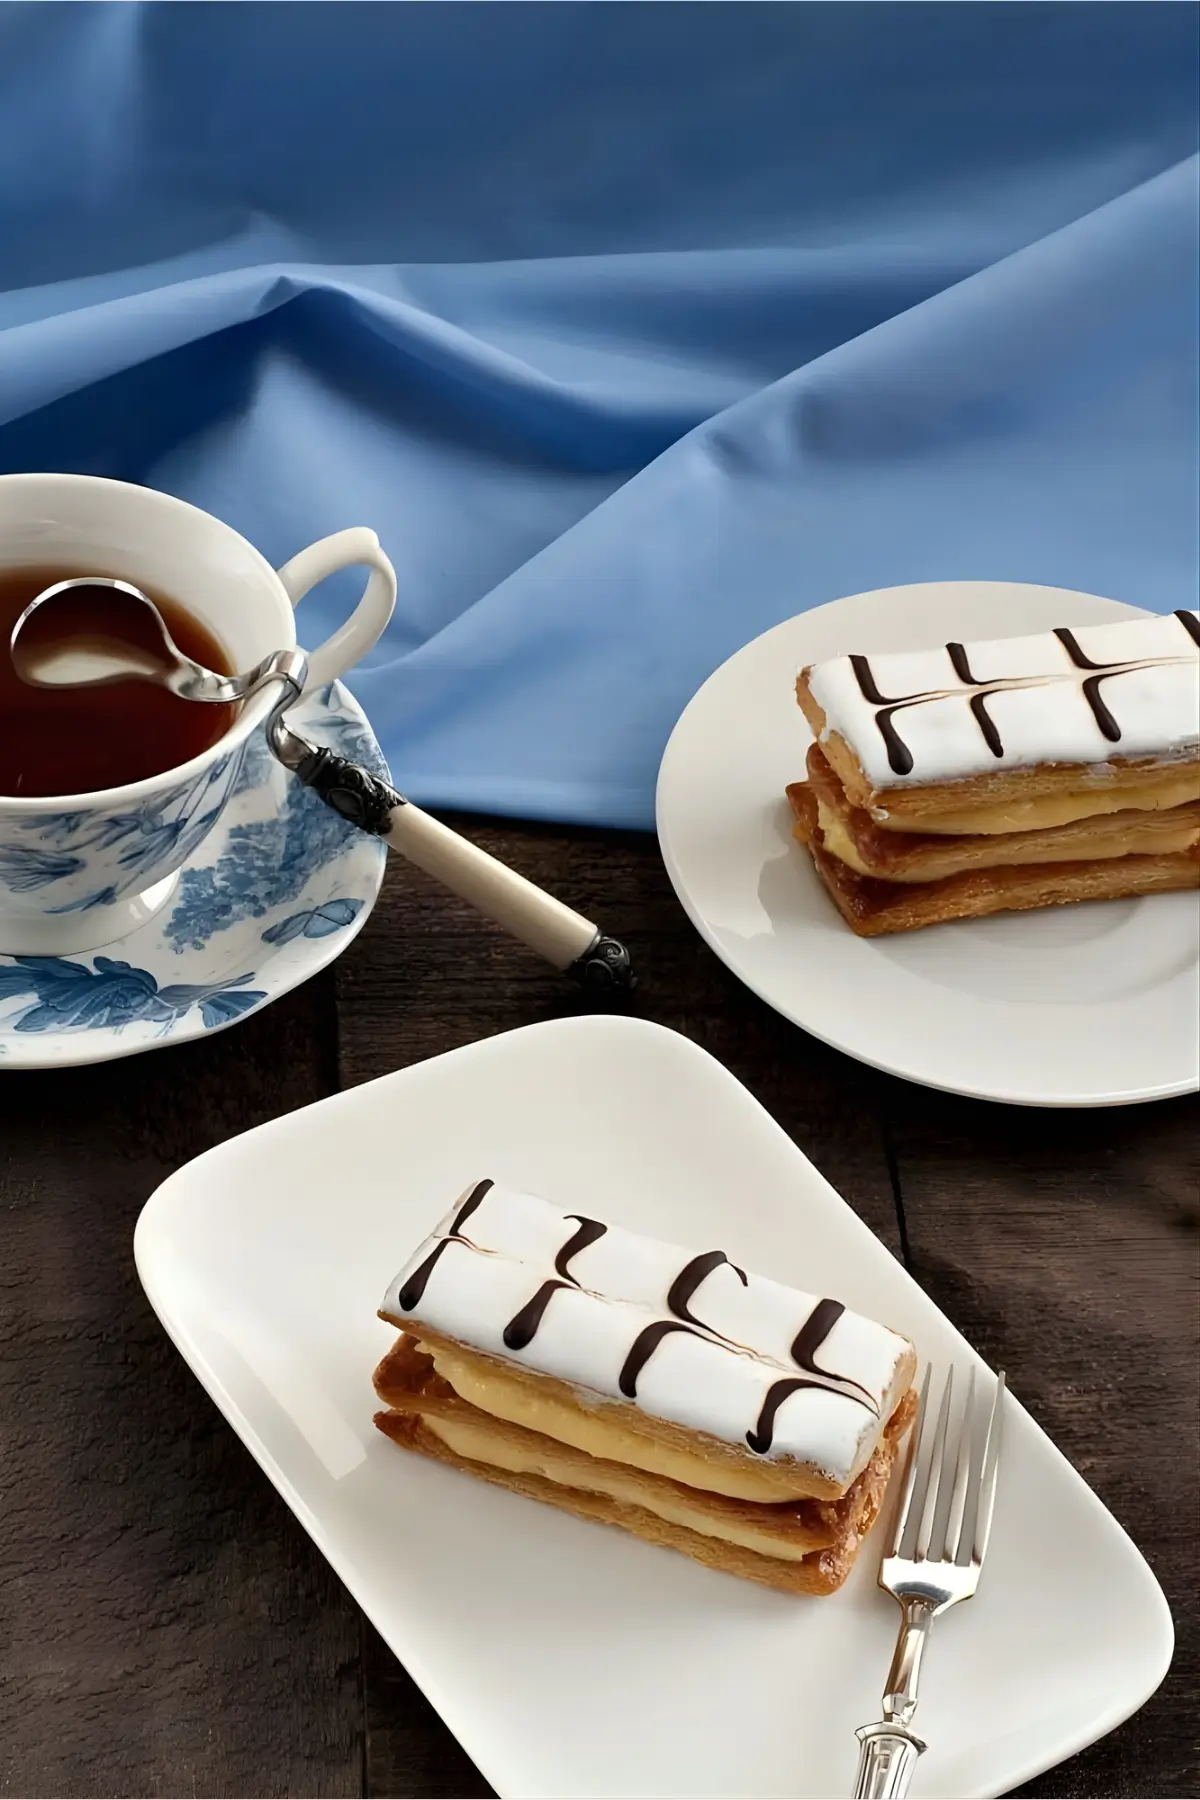
Light pastry, smooth cream, and a sweet finish make this Mille-Feuille a dessert you’ll want to save for any gathering. Bake it today and serve it with fresh fruit or coffee.
After sharing how to make your own puff pastry, I wanted to show you one of my favourite ways to use it at home. Mille-Feuille works so well for this because the layers bake up light and crisp, the centre stays silky, and the small individual pieces make serving much easier at the table.
If you are short on time, good store-bought puff pastry still bakes into airy layers and gives you a sweet treat that feels right at home on any afternoon table.
What is Mille-Feuille?
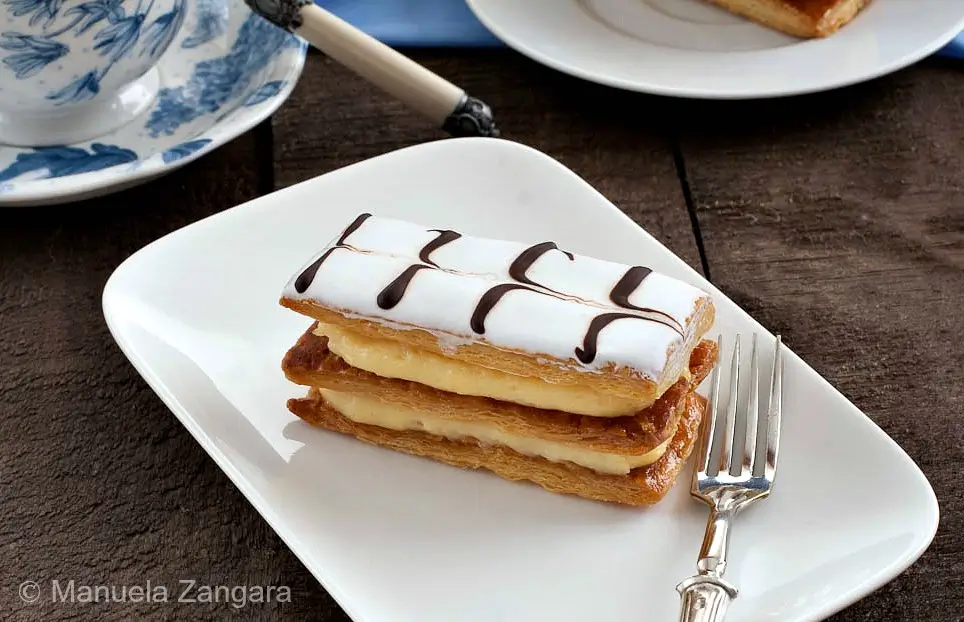
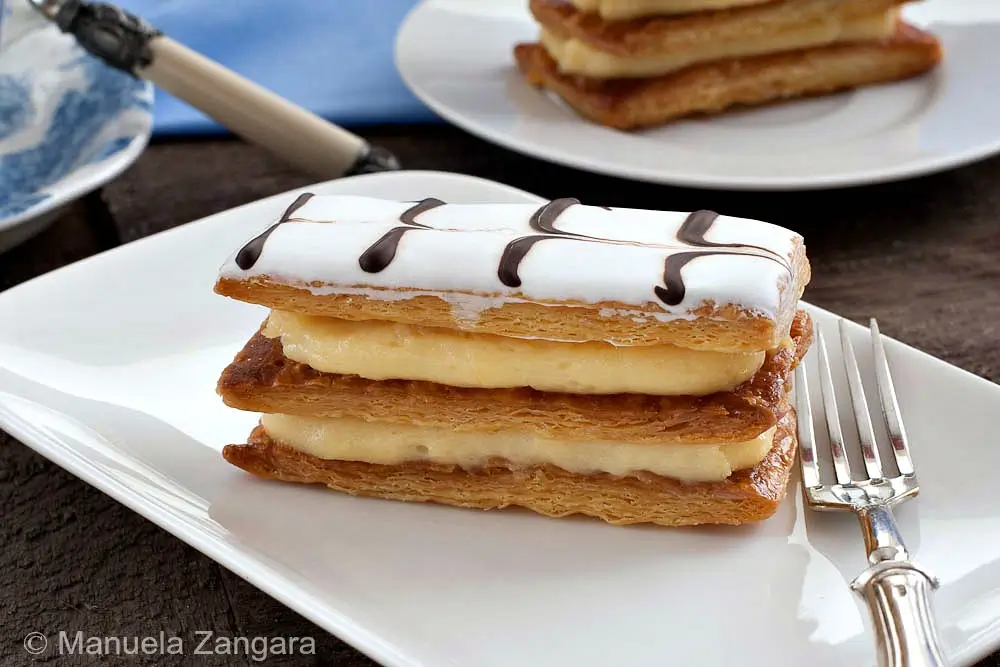
A mille-feuille is a French pastry made from crisp puff pastry and smooth crème pâtissière. The name means “a thousand sheets,” which suits the way the pastry bakes into light, flaky layers that break softly under a spoon.
It’s usually put together with three layers of pastry and two layers of custard, creating a mix of crunch and cream in every bite.
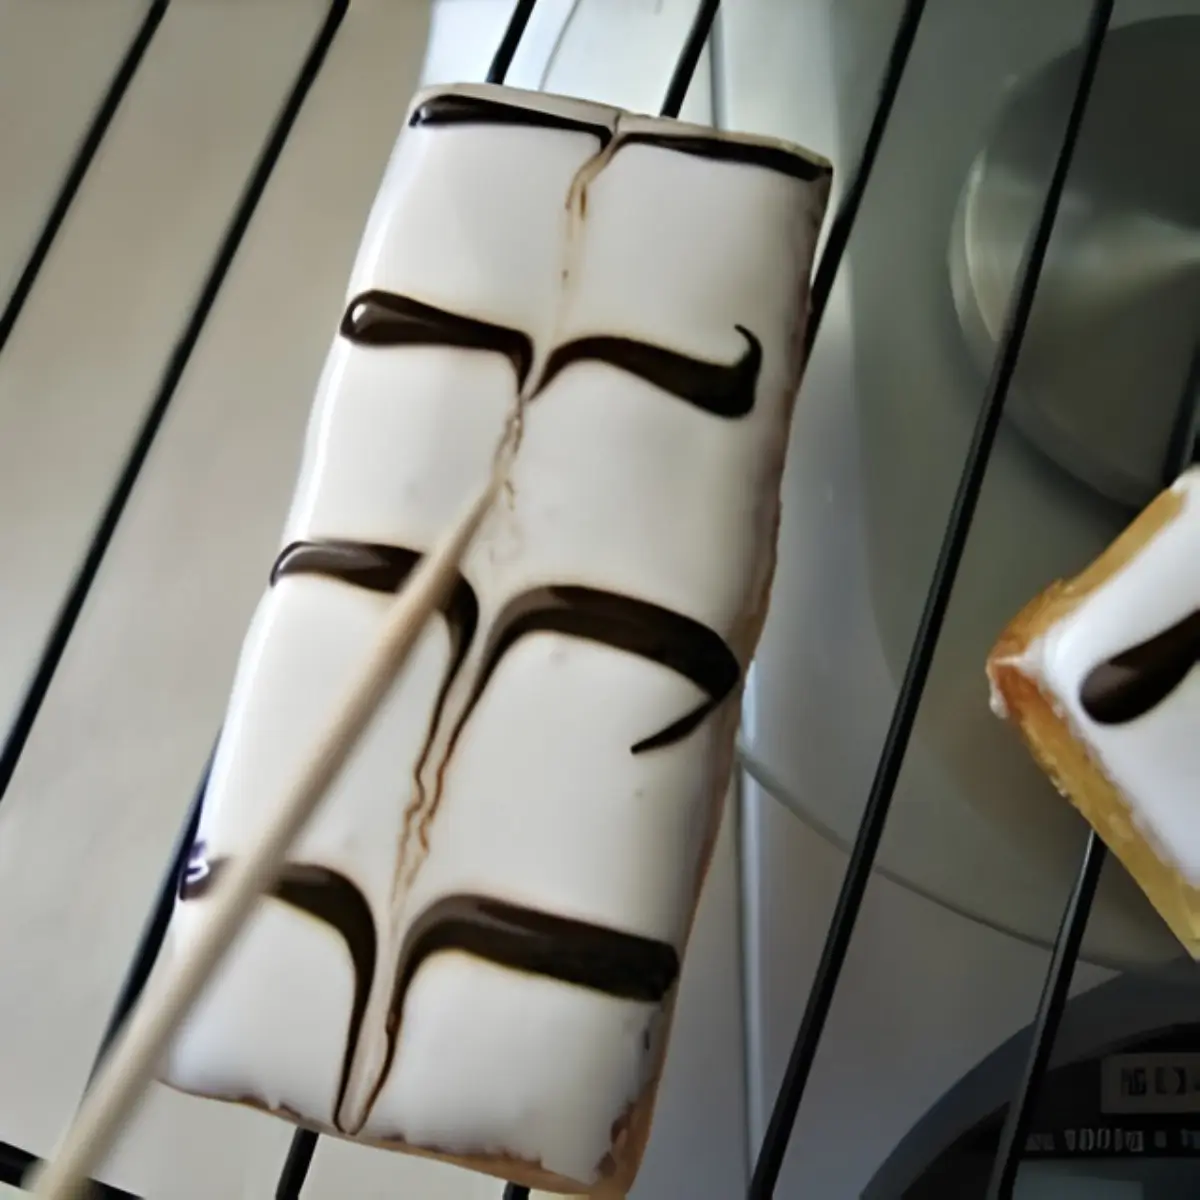
The top is covered with fondant icing and finished with thin lines of chocolate that are gently pulled into a feather pattern.
Some people call it a Napoleon, and in Australia and New Zealand, it reminds many of a vanilla slice, though it sits a little lighter and has a smoother finish.
Why We Love Mille-Feuille
- A tray of small Mille-Feuilles works well for birthdays, dinners, or a quiet afternoon treat.
- Leftover pastry scraps become an easy reason to assemble a quick batch.
- Kids enjoy helping with the chocolate lines, which adds a bit of fun in the kitchen.
Key Ingredients for Mille-Feuille
Puff Pastry
Provides the signature crisp layers for Mille-Feuille. Thin sheets bake into even, golden pieces that stay firm under the cream and give the dessert its clean structure.
Crème Pâtissière
Forms the soft centre of the dessert. Its thicker texture pipes neatly, settles evenly between the pastry sheets, and sets well once chilled, so the layers stay stable.
Dark Chocolate
Adds thin contrasting lines for the feather decoration. Its deeper flavour balances the sweetness of the icing and gives a clear visual pattern.
Find the complete list with measurements in the recipe card below.
How to Make Mille-Feuille
Pastry
Step 1: Prick the rectangles of puff pastry with a fork so they do not puff up while baking.
Step 2: Place them on a baking tray lined with baking paper and cover them with a silicone mat (or another sheet of baking paper and a heavy baking tray) to stop them from puffing up too much.
Step 3: Bake in a preheated oven at 200°C – 400°F for 15 minutes. Then remove the top tray and baking paper, sprinkle the pastry with icing sugar, and return it to the oven (uncovered) to brown and caramelise for another 5 to 10 minutes. Keep an eye on it at this stage, as the sugar can burn.
Step 4: Remove from the oven and let the puff pastry rectangles cool on a wire rack.
Filling
Step 1: Once the pastry has cooled, begin assembling the mille-feuille.
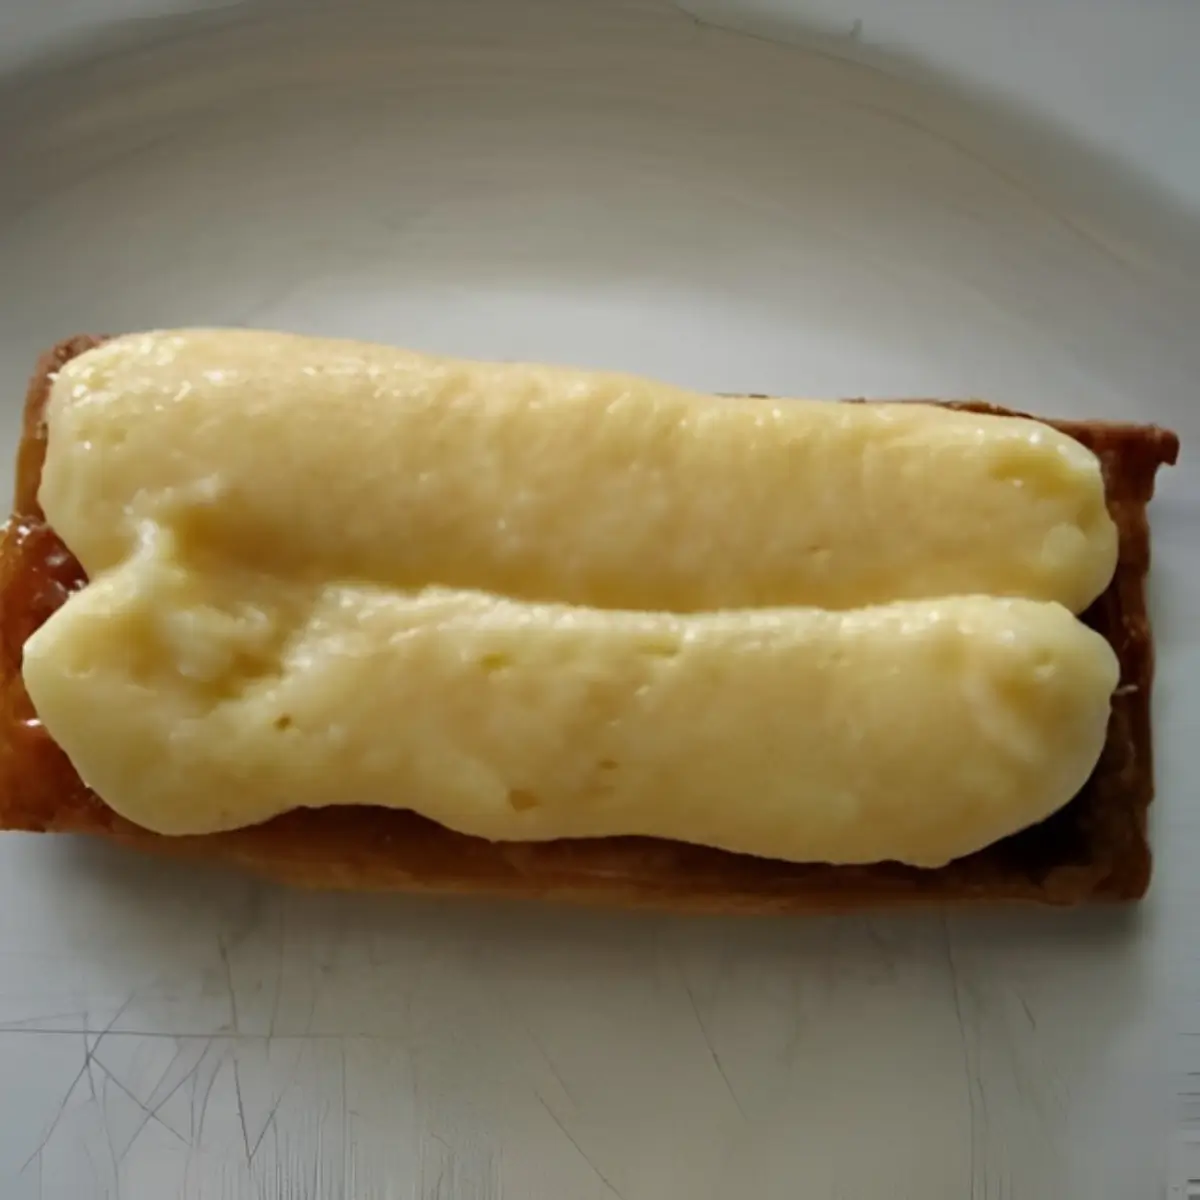
Step 2: Transfer the crème pâtissière to a piping bag fitted with a large round nozzle (or use a reusable bag with the end snipped).
Step 3: Pipe enough crème pâtissière to cover 4 puff pastry rectangles.
Step 4: Top them with another 4 rectangles and press lightly so they stick to the filling.
Step 5: Pipe more crème pâtissière over the 4 pastries and top with the remaining 4 rectangles. Press lightly again to help them adhere.
Step 6: Refrigerate while you prepare the icing.
Fondant Icing and Decoration
Step 1: Melt the chocolate and transfer it to a piping bag (or a plastic bag with the corner snipped), fitted with a small round nozzle. Keep the bag upright in a glass or other tall container.
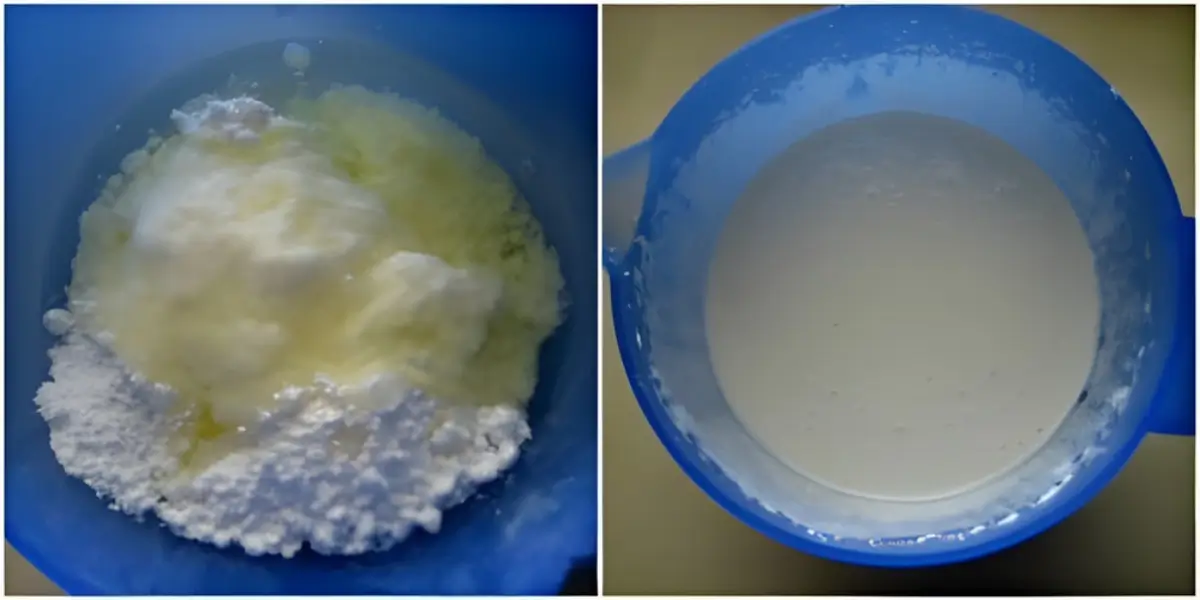
Step 2: To make the icing, whisk the egg white, lemon juice, and icing sugar with an electric mixer until smooth. The mixture should be thick enough to leave trails on the surface. If it is too thin, whisk in a bit more icing sugar.
Step 3: Take the pastries out of the fridge and pour the icing over the top of the mille-feuille, spreading it evenly (or remove the top pastry layers and dip them into the icing).
Step 4: Working quickly, pipe thin lines of chocolate across the width of each pastry.
Step 5: Use a toothpick or sharp knife to gently drag straight lines from top to bottom through the chocolate to create the pattern.
Step 6: Chill for a couple of hours to allow the icing to set and the flavours to develop.
Step 7: Serve cold or at room temperature.
Frequently Asked Questions
Yes. Good store-bought puff pastry bakes into thin, even layers and works well for individual portions. Choose an all-butter pastry for the best texture.
Bake the sheets until fully caramelised and cool them completely before adding the cream. Moisture is the main reason layers soften.
Dark chocolate with a higher cocoa percentage melts cleanly and pipes steady lines without dragging.
Not ideal for this dessert. Whipped cream feels too light once you stack the layers, and it softens quickly. Crème pâtissière stays firm, pipes neatly, and gives the support you need for clean portions.
Extra Help from the Kitchen
Work With Cold Tools – Chill your piping bag and nozzle for 10 minutes so the crème pâtissière stays firm while you work.
Keep Pastry Sheets Even – Trim the baked pastry with a sharp knife if the edges spread during baking. Neat sides help the layers stack properly.
Check Icing Thickness Before Spreading – Lift a little icing with a spoon; it should fall slowly in a steady ribbon. If it runs too fast, whisk in a small amount of icing sugar.
Test Chocolate Flow – Pipe a short line on baking paper first to check the chocolate is fluid enough for clean stripes. Adjust the thickness by warming it briefly if needed.
Slice With a Gentle Sawing Motion – If preparing a larger slab version, use a serrated knife and light strokes to avoid compressing the layers and pushing out the cream.
Variations and Twists
Berry and Diplomat Cream Mille-Feuille – Fold whipped cream into the crème pâtissière to create diplomat cream and add thin slices of fresh berries between the layers. Keep the fruit very thin so the pastry stays stable.
Chocolate and Hazelnut Mille-Feuille – Whisk melted dark chocolate into the crème pâtissière or add a thin hazelnut layer between the pastry sheets for a richer filling.
Pistachio and Strawberry Mille-Feuille – Stir pistachio paste into the crème pâtissière and tuck a few thin strawberry slices into the layers. This adds colour and a gentle nut profile while keeping the layers neat.
Jam and Cream Mille-Feuille – Spread a light layer of raspberry or strawberry jam under the cream. Use only a small amount so the layers do not slide once assembled.
Storage and Shelf Life
Store Mille-Feuille in a covered container in the fridge for up to 2 days. Keep the pieces in a single layer or separate them with baking paper so the icing stays intact and the cream holds its shape.
Freezing is not recommended because the pastry loses its crisp texture once thawed.
Mille-Feuille Recipe
Light pastry, smooth cream, and a sweet finish make this Mille-Feuille a dessert you’ll want to save for any gathering. Bake it today and serve it with fresh fruit or coffee.
Ingredients
Pastry
- 12 pieces puff pastry – 10×4 cm – 4×1.5 inch, 3 mm – 0.1 inch thick, thawed
- Icing sugar
Filling
- Crème pâtissière – make ½ dose of my recipe and chill it
Fondant Icing and Decoration
- 1 egg white
- 1 tbsp lemon juice
- 175 g – 6 oz icing sugar
- 2 tbsp dark chocolate – melted
Instructions
Pastry
-
Prick the rectangles of puff pastry with a fork so they do not puff up while baking.
-
Place them on a baking tray lined with baking paper and cover them with a silicone mat (or another sheet of baking paper and a heavy baking tray) to stop them from puffing up too much.
-
Bake in a preheated oven at 200°C – 400°F for 15 minutes. Then remove the top tray and baking paper, sprinkle the pastry with icing sugar, and return it to the oven (uncovered) to brown and caramelise for another 5 to 10 minutes. Keep an eye on it at this stage, as the sugar can burn.
-
Remove from the oven and let the puff pastry rectangles cool on a wire rack.
Filling
-
Once the pastry has cooled, begin assembling the mille-feuille.
-
Transfer the crème pâtissière to a piping bag fitted with a large round nozzle (or use a reusable bag with the end snipped).
-
Pipe enough crème pâtissière to cover 4 puff pastry rectangles.
-
Top them with another 4 rectangles and press lightly so they stick to the filling.
-
Pipe more crème pâtissière over the 4 pastries and top with the remaining 4 rectangles. Press lightly again to help them adhere.
-
Refrigerate while you prepare the icing.
Fondant Icing and Decoration
-
Melt the chocolate and transfer it to a piping bag (or a plastic bag with the corner snipped), fitted with a small round nozzle. Keep the bag upright in a glass or other tall container.
-
To make the icing, whisk the egg white, lemon juice, and icing sugar with an electric mixer until smooth. The mixture should be thick enough to leave trails on the surface. If it is too thin, whisk in a bit more icing sugar.
-
Take the pastries out of the fridge and pour the icing over the top of the mille-feuille, spreading it evenly (or remove the top pastry layers and dip them into the icing).
-
Working quickly, pipe thin lines of chocolate across the width of each pastry.
-
Use a toothpick or sharp knife to gently drag straight lines from top to bottom through the chocolate to create the pattern.
-
Chill for a couple of hours to allow the icing to set and the flavours to develop.
-
Serve cold or at room temperature.
Recipe Notes
- You will have more icing than you need, so keep the extra for glazing sugar cookies or a small batch of pastries.
- You can make mille-feuilles a day in advance and keep them chilled. The layers hold well, though the pastry gradually loses its crisp texture.


Hi, can you please tell me if I can make the creme patissiere and bake the pastry two days earlier and only layer the cakes with the pastry the day when it’ll be eaten?
Yes, you can make everything in advance and then layer it the day you want to serve it. Do not make the creme patissiere too much in advance though (one day would be best) as it doesn’t keep for long, even in the fridge.
Hi, Manu,
I’ve been eyeing this recipe of yours ever since i came across it a few months ago. I finally have the time and all the ingredients to attempt it! My husband is North African and grew up eating this, so I wanted to try my hand at making it for him. It’s a very hard dessert to find the US.
So I used store bought puff pastry this time, and made the creme patisserie as per your recipe. It came out lumpy and runny. 🙁 It tastes great though. Any tips? I let it cool on the stovetop, did not refrigerate it because I had an appointment and had to rush out of the house. Could that be the culprit?
Any insight is greatly appreciated!
Thanks!
Hi Safi! My guess is that the flour didn’t mix well with the milk and eggs. That’s probably you’ve got lumps and liquid cream. Try and use a hand mixer to make sure it’s all uniformly mixed and bring it back to the boil… hopefully it will thicken.
Thanks for the recipe.Just back from Paris,cant wait to try this.
Ok, I think I was putting too much pressure. The ones I didn’t really have much pressure on came out perfectly rectangular, slightly puffy, golden, delicious. The ones which were right under the tray I used as a weight were all fanned out and much too wide, crumbly and dark.
I made a few smaller batches until I got it right and assembled 4. They disappeared almost immediately, along with all the ‘seconds’ pile smothered in the left over custard cream.
I took a few pictures, I’ll upload and post tomorrow. Thanks Manu, can’t wait to try your croissants another time soon!
Yeahhh! I am so happy it was a success and you liked it! Can’t wait to see the pictures! 🙂
Hi Manu,
Starting construction now, if I had followed the Puff Pastry recipe 100% (which I think I did). How and which direction should I be cutting the Pastry to take full advantage of the puffs. Should I be rolling it to the 10 x 4 x 3mm so the layers are all squished more, or should I be cutting it across ways so the rectangle has a cross section of every layer.
Thanks,
Hi Sam! Sorry I just saw your messages, hope I am still in time. You can do it either way, whatever is more convenient to you. I made those with scraps and they still worked great. You don’t need to (actually you don’t want to) have it puff too much in the oven, that’s why you need to put something heavy on the top. 🙂 Let me know!!
Hi Manu,
Just reviewing the first batch (I did 9 rectangles as a tester).
The ones which I cut across the layers have kind of flaked apart and gotten really wide (maybe from the pressure). The which I cut in line with the layers (3-4 layers) have retained shape and seem to be browning nicely!
10 minutes left then cooling, I’ll be in touch when it’s tasting time!
Oh wow. Still waiting for this puff pastry. In 40 minutes I can do my last folding, flattening and final rest.
THEN I can get started.
If you happen to be at a computer at the moment Manu, how many grams of puff pastry makes 12 rectangles for when I cut it?
Hi Manu,
Making this recipe as we speak. My girlfriends absolute favorite treat, I’m making them for her, I think she’ll love the Crème Pâtissière compared to a regular custard as shown in many recipes online.
I’ll let you know how it goes and post an album to the comments.
Sam
Hi Sam! What a lovely idea!! I really hope she’ll like them! Do let me know! 🙂
Hi,
Would it be good to use a Creme legere instead of a Creme patissiere? Which do you prefer?
Talk about wow factor… WOW!!!!
very impressive!
I’ve purchased Mille-Feuille countless times from bakeries but never been game enough to try it at home. Your recipes have never let me down so I can’t wait to give this one a go!
Outstanding, Manu!