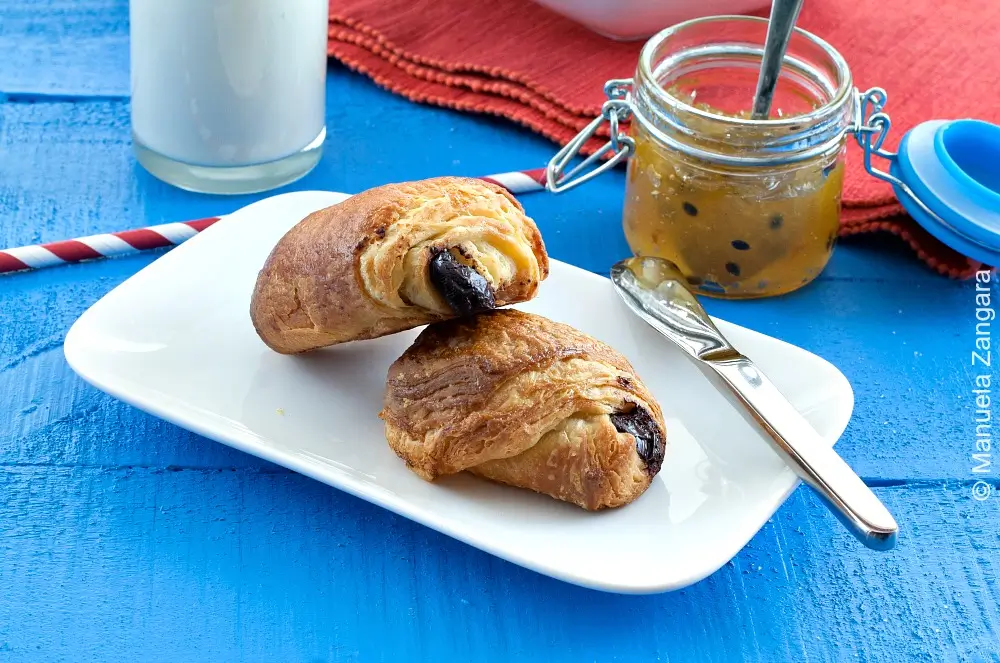
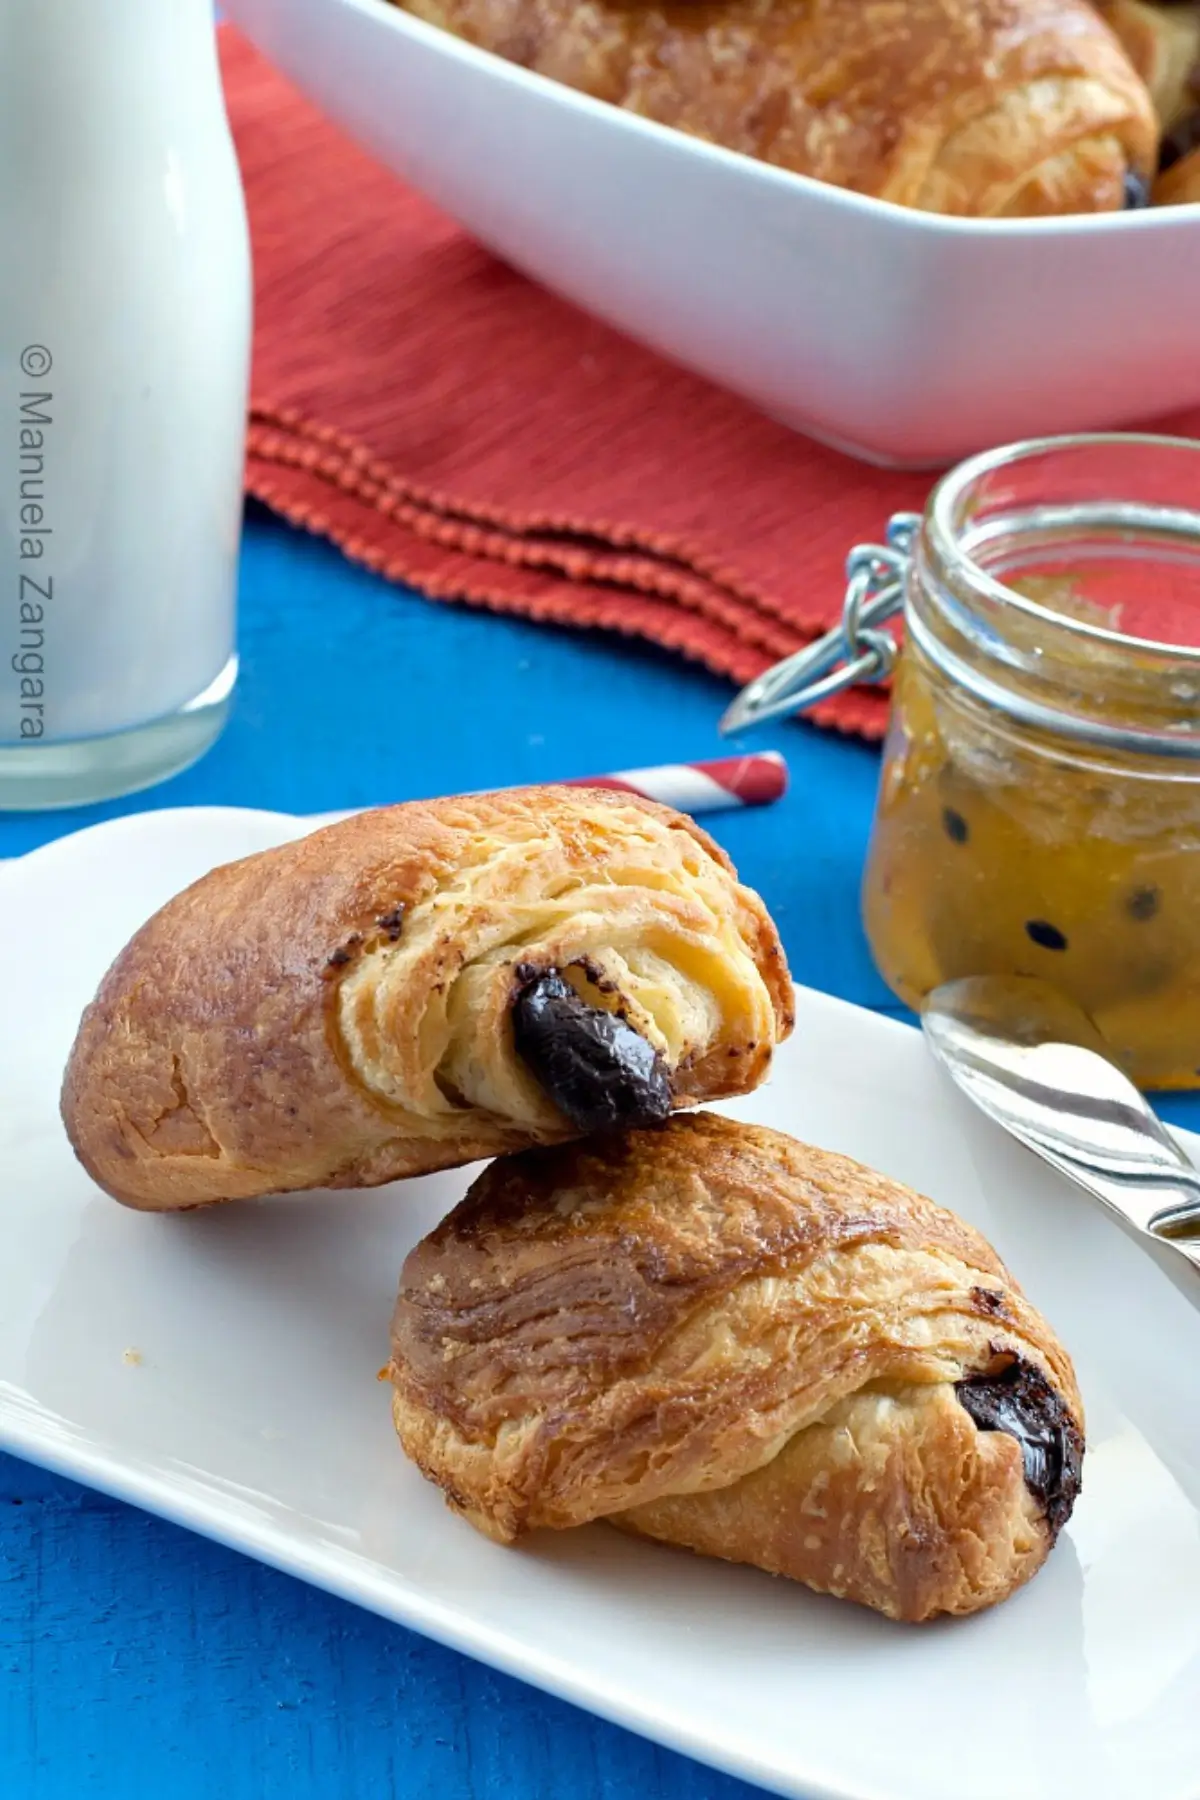
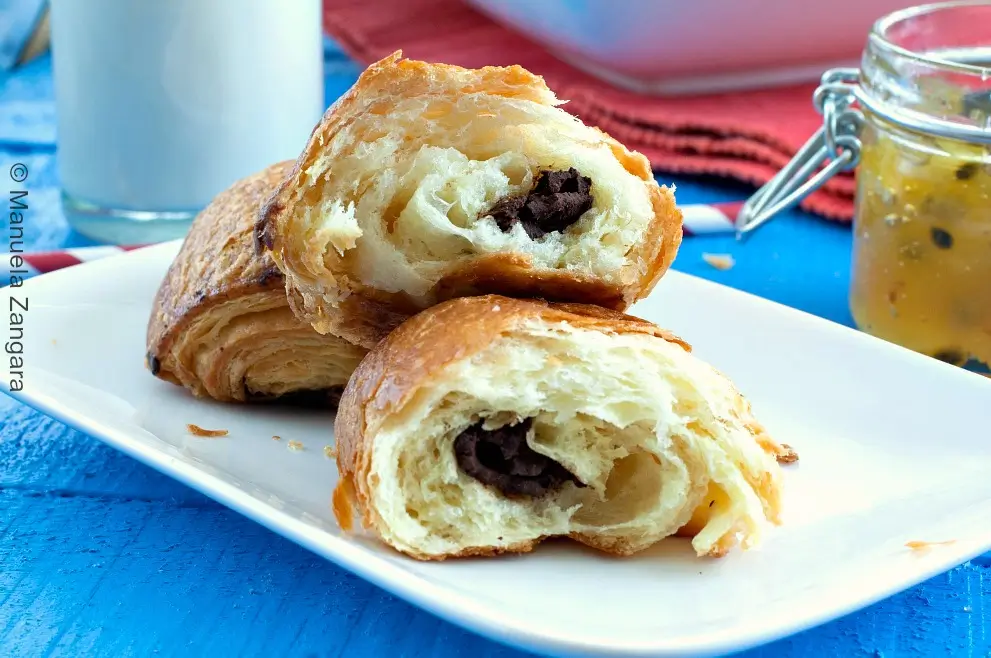
Fresh Pain Au Chocolat straight from the oven pairs perfectly with coffee and brings crisp buttery layers and soft chocolate. Freezer-friendly and ideal for make-ahead baking.
I have shared my recipes for French croissants and pain aux raisins, and it always felt incomplete without pain au chocolat, my kids’ favourite and a true breakfast classic.
These were made together with the croissants and pain aux raisins, then somehow left waiting in my archives. It was time to share them properly. I still remember how good they were. Light, flaky, and even better than many versions I have eaten in France.
As a child, pain au chocolat was always my breakfast in Paris. Each morning began with a stop at the bakery just outside our hotel. It was the perfect way to start a long day of walking and sightseeing. Warm pastries, paper bags, and the smell of butter still come back to me instantly.
The dough requires time, so I recommend making a full batch. These freeze well, so you can enjoy them over a longer period.
Why We Love Homemade Chocolate Croissants
- Crisp edges with a tender centre give a satisfying contrast from the first bite to the last.
- A tray of freshly baked pain au chocolat makes the kitchen smell inviting straight away.
- Homemade pastries avoid the dryness often found in packaged versions.
Key Ingredients for Pain au Chocolat
All-Purpose Flour
Gives the dough enough strength to handle repeated rolling and folding while staying easy to shape. A medium-protein flour works well, keeping the dough flexible without turning chewy or tight.
Butter
A good-quality butter with higher fat content spreads more evenly during lamination and behaves better when chilled. Aim for butter that feels firm yet bendable, not brittle or greasy.
Dark Chocolate Sticks
Bake cleanly inside the pastry and melt at a steady pace, giving a smooth chocolate centre. Chocolate sticks made for baking are ideal, though firm dark chocolate bars cut into neat batons can also be used.
Milk Powder
Helps keep the crumb soft and supports even colouring in the oven. Full-fat milk powder tends to give slightly better results than skim versions.
Find the complete list with measurements in the recipe card below.
How to Make Pain au Chocolat
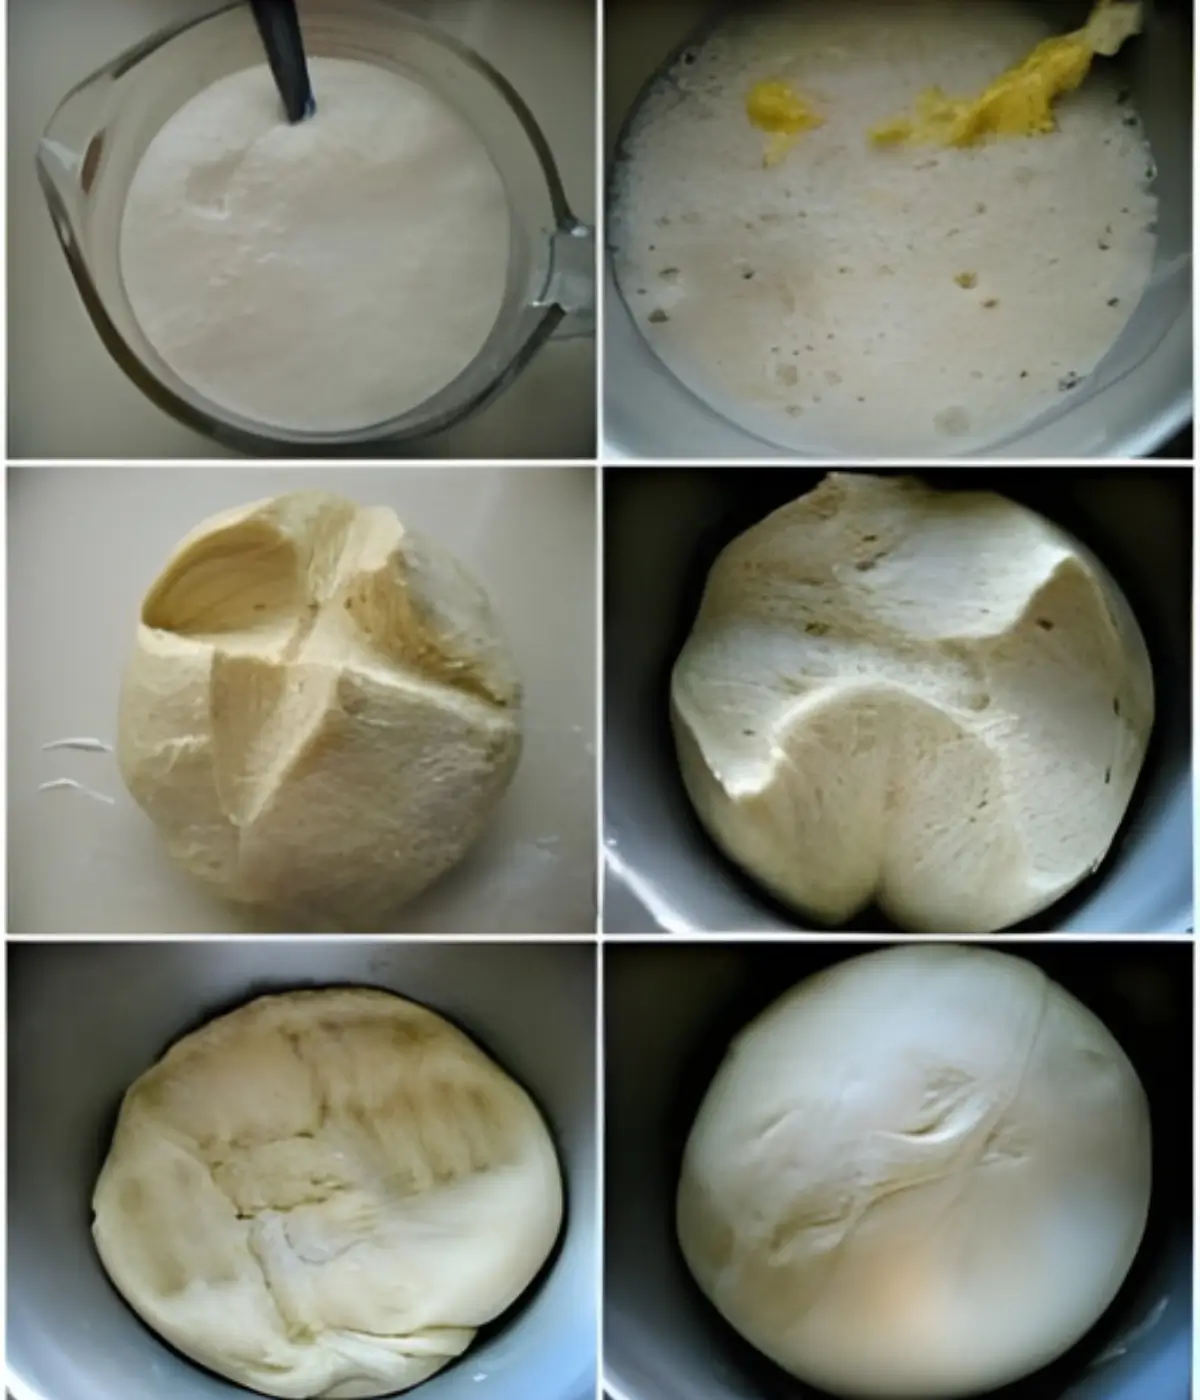
Dough Preparation
Step 1: Sift the flour into the bowl of an electric mixer fitted with a hook attachment, then add the salt, 110 g – ½ cup sugar, milk powder, milk, and 53 g – 3 ¾ tbsp of soft butter.
Step 2: Dissolve the yeast in half of the water and make sure it is lukewarm, together with the 2 tsp of sugar. Set it aside to activate, then add it to the bowl with the other ingredients once frothy.
Step 3: Knead the dough only until all the ingredients are just combined (do not overwork it, as you do not want to develop the gluten in the flour), adding the remaining water as needed to obtain a smooth dough.
Step 4: Shape the dough into a ball, place it in a bowl, cover with cling wrap, and let it rise for 1 to 1 ½ hours, or until doubled in size.
Step 5: Punch down the dough to return it to its initial size, cover again with cling wrap, and refrigerate for 1 hour to 1 hour and 15 minutes.
Step 6: Punch the dough down once more to its initial size.
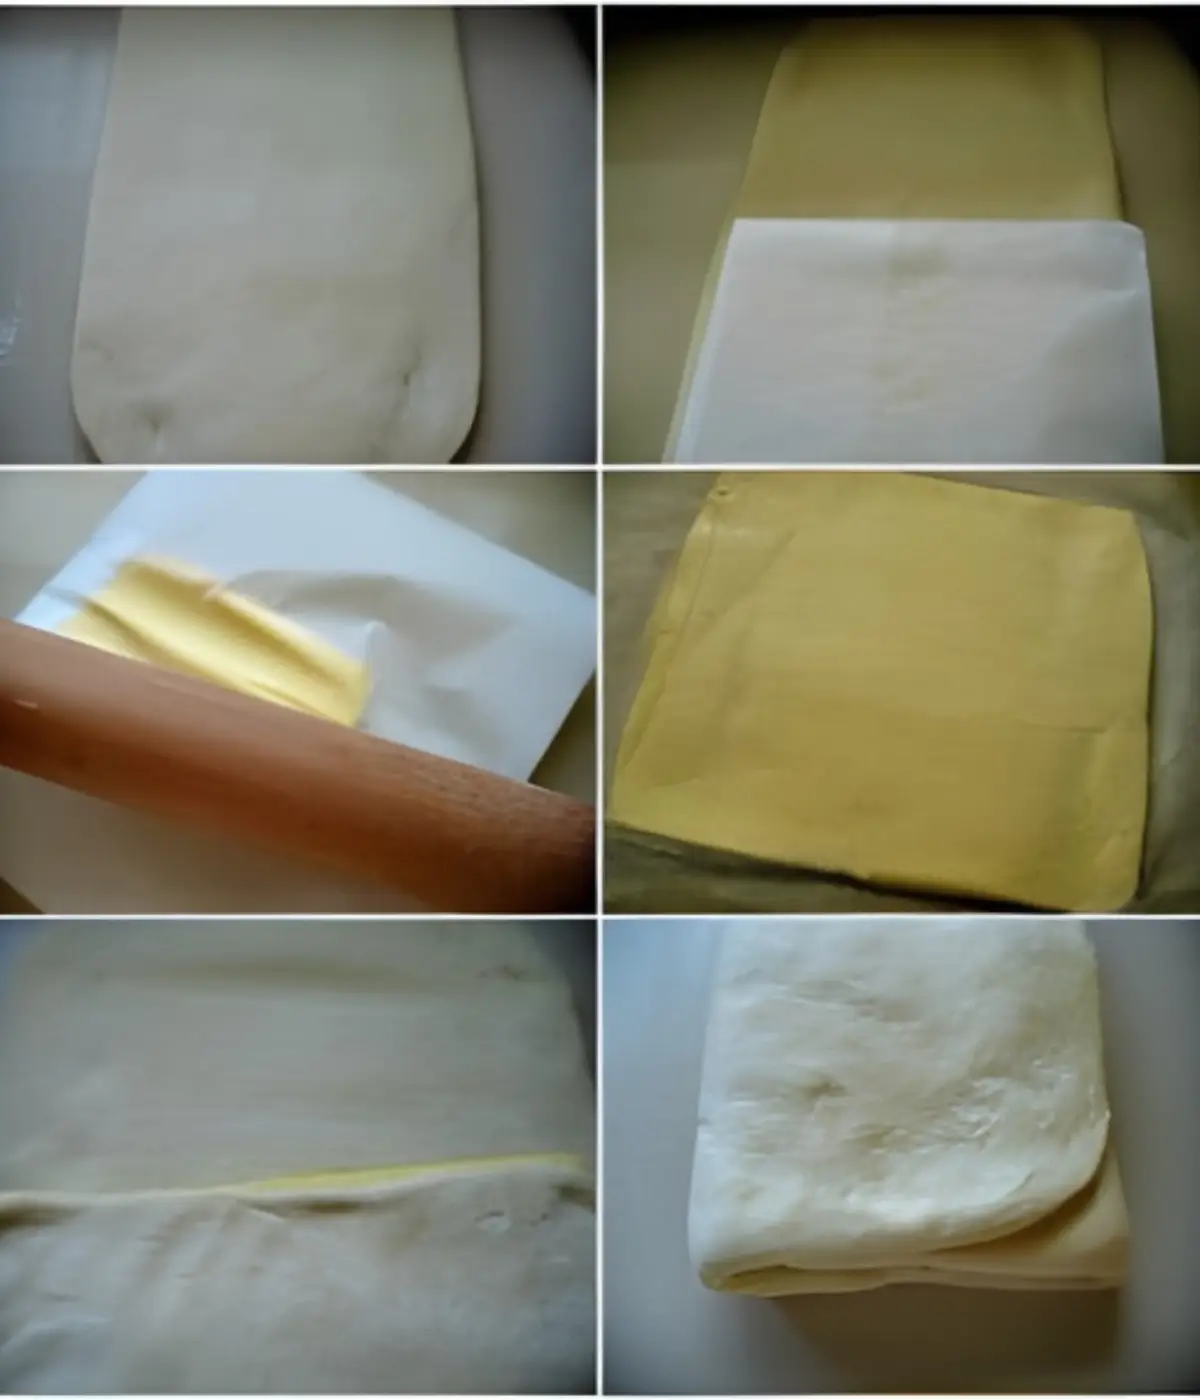
Preparing for Lamination
Step 1: At this point, you can either continue with the recipe or store the dough in the refrigerator until the next day; in either case, first chill the dough in the freezer for 30 minutes.
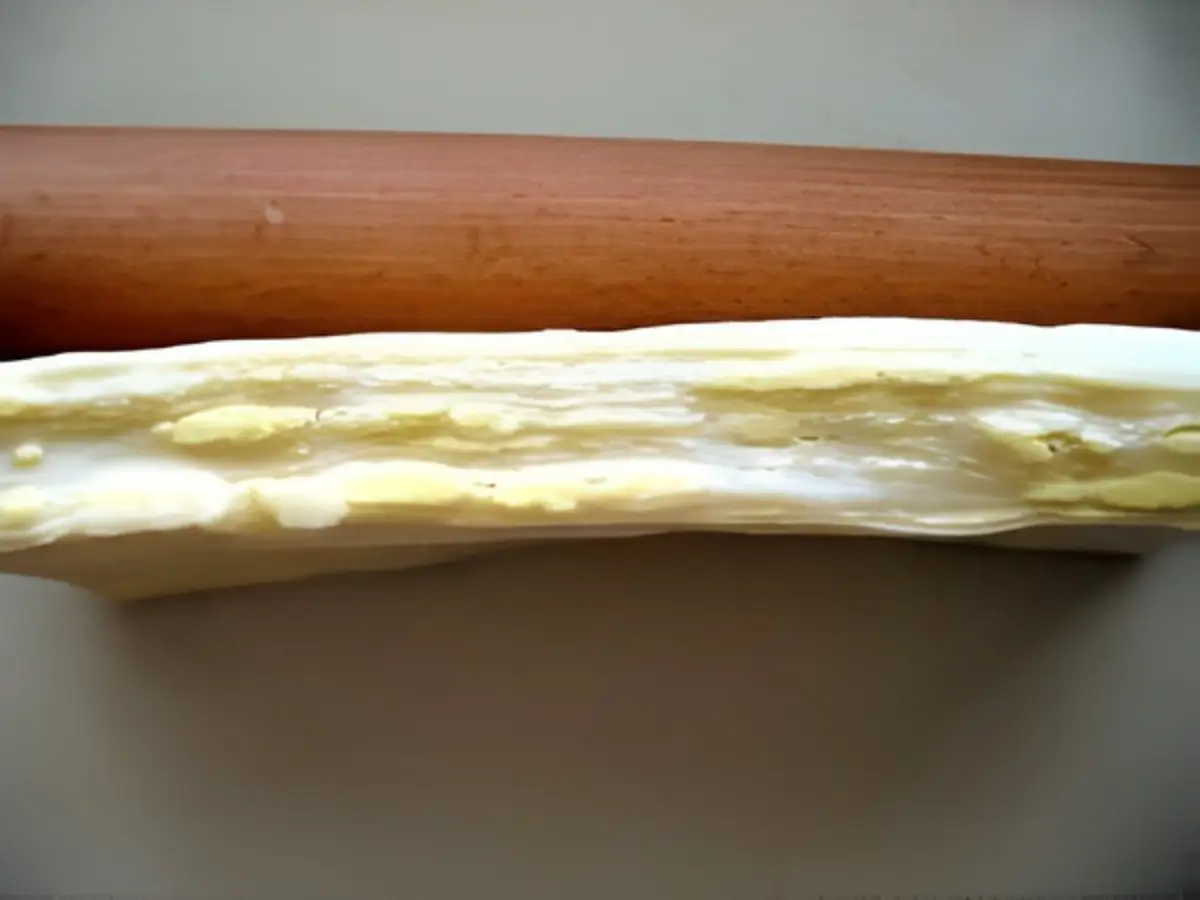
Step 2: Remove the dough from the fridge and roll it into a long rectangle shape, then cover it with cling wrap and return it to the fridge while you prepare the butter.
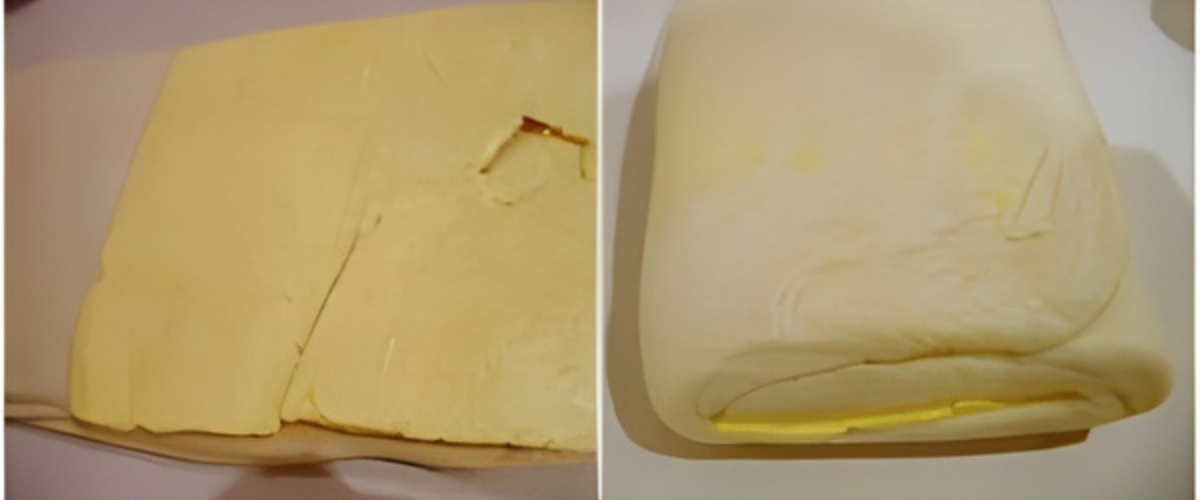
Step 3: Cut two sheets of baking paper and measure them against the rolled dough. Each sheet should cover ⅔ of the dough.
Step 4: Fold each sheet in half, then fold in about 2.5 cm – 1 inch along the three open edges to create sealed butter packets.
Step 5: Divide the butter into two equal pieces and place them into the paper packets. Close the packets and roll from the outside until the butter fills each packet evenly, then refrigerate until firm.
Note: Both the butter and the dough must be very cold before proceeding with lamination, or the butter may leak during rolling.
Laminating the Dough
Step 1: Remove the paper from one butter packet only, take the cold dough from the fridge, and place the butter rectangle over the lower two-thirds of the dough.
Step 2: Give the dough a simple turn by folding the bottom third up (butter on butter), then folding the top third down over it; you should now see three layers.
Step 3: Roll the dough into a long rectangle again and repeat the same simple three-fold turn, this time without adding any more butter.
Step 4: Cover the folded dough with cling wrap and place it in the freezer for 30 minutes, then transfer it to the fridge for 1 hour.
Step 5: Roll the dough out again into a long rectangle roughly the same size as before and repeat the simple three-fold turns, the first with the remaining butter and the next without.
Step 6: Flour your work surface regularly to prevent sticking, and use a brush to remove excess flour before folding the dough each time.
Step 7: At this stage, you should have completed four single turns in total. One turn with butter, one without, followed by a rest period, then one turn with the second butter packet and one without.
Step 8: Cover the dough and refrigerate overnight to make shaping easier and keep the butter firm.
Shaping and Baking
Step 1: The next day, roll the dough into a 2.5 mm – 0.1 inch thick sheet, returning it to the fridge if it starts to warm up.
Step 2: Divide the dough into three portions and work with one at a time, keeping the remaining dough covered and chilled.
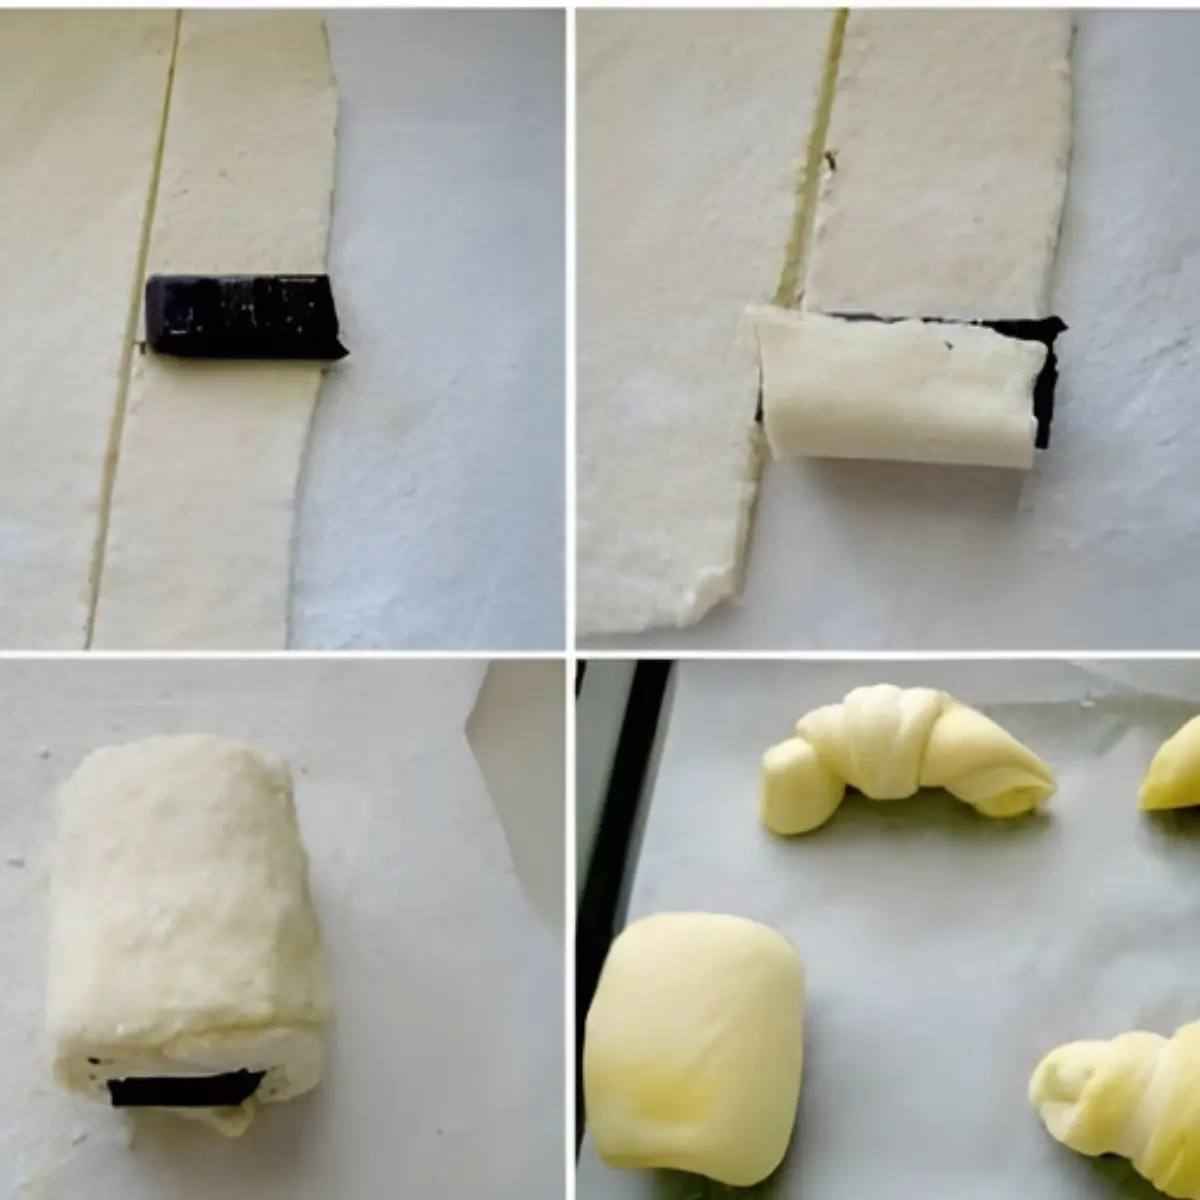
Step 3: Cut rectangles measuring 20 cm – 8 inches long and 10 cm – 4 inches wide. Place a chocolate stick measuring 10 cm – 4 inches at the base of each rectangle and roll up from the bottom. Arrange the pains au chocolat seam-side down on a baking tray lined with baking paper, leaving 5 cm – 2 inches of space between each one.
Step 4: Let them rise for 1 ½ to 2 hours at room temperature, loosely covered with cling wrap so the surface does not dry out.
Step 5: Brush with egg wash and bake for 20 minutes in an oven preheated to 220°C – 430°F. Lower the temperature to 190°C – 375°F immediately after placing the pastries in the oven.
Step 6: Continue baking until the pains au chocolat are deeply golden. Full baking gives a soft and airy interior.
Step 7: Allow them to cool for at least 10 minutes before serving.
Frequently Asked Questions
Yes. Replace the dry yeast with fresh yeast using the standard conversion. Dissolve it fully in lukewarm liquid before adding it to the dough.
The pastries should feel light when lifted and show an even, deep golden brown colour on all sides. Pale pastries often indicate underbaking and a dense interior.
Milk powder supports structure and browning, but it can be omitted if unavailable. The dough will still work, though the colour will be lighter and the crumb slightly softer.
Yes. Freeze them after shaping or after baking once fully cooled. Bake or reheat directly from frozen in the oven to bring back crisp layers and a soft, chocolate-filled centre.
All-purpose flour with medium protein gives the dough enough strength to hold layers while staying easy to roll and shape.
Extra Help from the Kitchen
Check Butter Plasticity Before Laminating – Press a finger lightly into the chilled butter. It should dent without cracking. Butter that snaps can break through the dough during rolling, while butter that feels oily will spread too quickly.
Control Proofing Environment – Proof the shaped pastries in a draught-free spot around 22–24°C. Cooler rooms slow yeast activity, while warmer spaces soften the butter before the pastries reach proper volume.
Strain the Egg Wash – Pass the egg wash through a fine sieve before brushing. This removes egg white strands and helps the surface bake with a more even colour.
Use a Sharp Wheel or Knife for Cutting – Clean, straight cuts allow the layers to open properly in the oven. A blunt blade compresses the dough and limits lift.
Rotate Trays Mid-Bake – Turn trays halfway through baking if your oven has hot spots. Even heat supports uniform colouring and prevents uneven browning.
Variations and Twists
Use Semi-Sweet or Bittersweet Chocolate Batons – Replace dark chocolate sticks with semi-sweet or bittersweet batons cut to the same size. The shaping and baking stay unchanged, while the flavour shifts slightly toward a softer sweetness.
Try Mini Pain au Chocolat – Cut smaller rectangles from the rolled dough and use shorter chocolate sticks. Reduce baking time slightly and keep an eye on colour, as smaller pastries brown more quickly.
Almond Pain au Chocolat – Add a thin strip of almond paste alongside the chocolate stick before rolling. Keep the amount modest so the filling stays neat during baking.
Savoury Twist with Cheese – Skip the chocolate and place a thin slice of mild cheese, such as Gruyère, inside the dough. Shape and bake exactly the same for a savoury laminated pastry.
Dual-Chocolate Filling – Use one dark chocolate stick together with a few small pieces of semi-sweet chocolate. This keeps the structure intact while adding a slightly rounder chocolate flavour.
Storage and Shelf Life
Store baked pain au chocolat at room temperature in an airtight container for up to 24 hours. For longer storage, freeze baked pastries in freezer-safe containers for up to 2 months.
Thaw at room temperature or overnight in the refrigerator. Reheat in a preheated oven at 180°C – 350°F for 6–8 minutes until warmed through and lightly crisp on the outside.
Other Pastries You Might Enjoy
Pain au Chocolat Recipe (Homemade Chocolate Croissants)
Fresh Pain Au Chocolat straight from the oven pairs perfectly with coffee and brings crisp buttery layers and soft chocolate. Freezer-friendly and ideal for make-ahead baking.
Ingredients
For the Dough
- 750 g – 6 cups all-purpose flour
- 14 g – 2 packets yeast
- 110 g – ½ cup + 1 tbsp sugar
- 70 ml – 5 tbsp milk
- 18 g – 1 tbsp + ½ tsp salt
- 53 g – 3 ¾ tbsp butter – at room temperature
- 23 g – 2 tbsp milk powder
- 300 ml – 1 ¼ cups water
For the Beurrage
- 490 g – 4 ⅓ stick butter – divided into two, at room temperature
For the Egg Wash
- 2 eggs
- 1 egg yolk
- 1 pinch of salt
- dark chocolate sticks
Instructions
Dough Preparation
-
Sift the flour into the bowl of an electric mixer fitted with a hook attachment, then add the salt, 110 g – ½ cup sugar, milk powder, milk, and 53 g – 3 ¾ tbsp of soft butter.
-
Dissolve the yeast in half of the water and make sure it is lukewarm, together with the 2 tsp of sugar. Set it aside to activate, then add it to the bowl with the other ingredients once frothy.
-
Knead the dough only until all the ingredients are just combined (do not overwork it, as you do not want to develop the gluten in the flour), adding the remaining water as needed to obtain a smooth dough.
-
Shape the dough into a ball, place it in a bowl, cover with cling wrap, and let it rise for 1 to 1 ½ hours, or until doubled in size.
-
Punch down the dough to return it to its initial size, cover again with cling wrap, and refrigerate for 1 hour to 1 hour and 15 minutes.
-
Punch the dough down once more to its initial size.
Preparing for Lamination
-
At this point, you can either continue with the recipe or store the dough in the refrigerator until the next day; in either case, first chill the dough in the freezer for 30 minutes.
-
Remove the dough from the fridge and roll it into a long rectangle shape, then cover it with cling wrap and return it to the fridge while you prepare the butter.
-
Cut two sheets of baking paper and measure them against the rolled dough. Each sheet should cover ⅔ of the dough.
-
Fold each sheet in half, then fold in about 2.5 cm – 1 inch along the three open edges to create sealed butter packets.
-
Divide the butter into two equal pieces and place them into the paper packets. Close the packets and roll from the outside until the butter fills each packet evenly, then refrigerate until firm.
Note: Both the butter and the dough must be very cold before proceeding with lamination, or the butter may leak during rolling.
Laminating the Dough
-
Remove the paper from one butter packet only, take the cold dough from the fridge, and place the butter rectangle over the lower two-thirds of the dough.
-
Give the dough a simple turn by folding the bottom third up (butter on butter), then folding the top third down over it; you should now see three layers.
-
Roll the dough into a long rectangle again and repeat the same simple three-fold turn, this time without adding any more butter.
-
Cover the folded dough with cling wrap and place it in the freezer for 30 minutes, then transfer it to the fridge for 1 hour.
-
Roll the dough out again into a long rectangle roughly the same size as before and repeat the simple three-fold turns, the first with the remaining butter and the next without.
-
Flour your work surface regularly to prevent sticking, and use a brush to remove excess flour before folding the dough each time.
-
At this stage, you should have completed four single turns in total. One turn with butter, one without, followed by a rest period, then one turn with the second butter packet and one without.
-
Cover the dough and refrigerate overnight to make shaping easier and keep the butter firm.
Shaping and Baking
-
The next day, roll the dough into a 2.5 mm – 0.1 inch thick sheet, returning it to the fridge if it starts to warm up.
-
Divide the dough into three portions and work with one at a time, keeping the remaining dough covered and chilled.
-
Cut rectangles measuring 20 cm – 8 inches long and 10 cm – 4 inches wide. Place a chocolate stick measuring 10 cm – 4 inches at the base of each rectangle and roll up from the bottom. Arrange the pains au chocolat seam-side down on a baking tray lined with baking paper, leaving 5 cm – 2 inches of space between each one.
-
Let them rise for 1 ½ to 2 hours at room temperature, loosely covered with cling wrap so the surface does not dry out.
-
Brush with egg wash and bake for 20 minutes in an oven preheated to 220°C – 430°F. Lower the temperature to 190°C – 375°F immediately after placing the pastries in the oven.
-
Continue baking until the pains au chocolat are deeply golden. Full baking gives a soft and airy interior.
-
Allow them to cool for at least 10 minutes before serving.
Recipe Notes
If you want to make these ahead, pain au chocolat can be frozen after shaping, before proofing. Wrap each one individually in cling wrap and store in a zip-top freezer bag. When ready to bake, allow them to thaw, proof, and bake as directed.


That chocolate peeking out like a tease!!!
Julie & Alesah
Gourmet Getaways xx
I’m already thanking you. They look so lovely and flaky… and chocolaty.