Manu’s Menu

Authentic Italian Home Cooking & More

  • Home
  • About
    • About me
    • About this site
    • About my photography
    • Privacy and Disclosure Policy
  • Recipes
    • Visual Archive
    • Regional Italian Recipes
  • Books
    • The Cool Side of Summer
    • Manu’s Christmas Menus
    • MsM’s Mobile App
  • Work With Me
    • Affiliate Sign-Up
    • Featured On
  • Out & About
    • Africa
      • South Africa 2019
    • Americas
      • Mexico, Guatemala, Honduras and Belize
      • CHILE AND ARGENTINA 2018
    • Asia
      • India
      • Japan 2015
      • Japan 2017
      • Japan 2018
      • Singapore
    • Europe
      • Slovenia and Croatia 2019
      • Italy 2019
    • Oceania
      • French Polynesia (Tahiti) 2017
      • French Polynesia (Tahiti)
      • New Caledonia
      • New Zealand
      • South Island – New Zealand Guide
  • Blogging Tips
    • Blogging Platform
    • Web Hosting
    • Technology Tips
    • Food Photography
    • Increasing Traffic to your Blog
    • Links
      • MsM in Your Kitchen
      • Events
        • 150 years of the Unification of Italy
        • Olio, Erbe e Fantasia – LILT
  • Tips
    • Techniques
      • Pasta and Gnocchi
      • Pizza and Other Doughs
      • Sauces and Other Basics
      • Decorations
    • Cake and Cookie decoration
      • Cake & Marshmallow Pops
        • Flowery Cake Pops
        • Hello Kitty Cake Pops
        • Dorothy the Dinosaur Cake Pops
        • Christmas Tree Cake Pops
        • Sea Marshmallow Pops
      • Fondant Cakes
        • Moo Cake
        • South Pole Cake
        • Lola Cake
        • Hello Kitty Yogurt Cake
        • Dorothy the Dinosaur Cake
        • The Little Mermaid Yogurt Cake
        • The Little Mermaid Fondant Cake
        • Sweet Sushi Mini Fondant Cakes
        • Peppa Pig Cake
        • Tinkerbell Cake
        • Miffy Cake
        • Olaf Yogurt Cake
        • Frozen Cake
      • Sugar Cookies
        • Heart Sugar Cookies
        • Dorothy the Dinosaur Sugar Cookies
        • Christmas Tree Ornament Sugar Cookies
      • Eggless Sugar Cookies
        • Chinese New Year Cookies
        • St. Patrick’s Day Cookies
      • Shortbread Cookies
        • Shortbread and Chocolate Hearts
        • Baby Shower Shortbread Cookies
        • Flounder Shortbread Cookie Pops
      • Easy Chocolate Cookies
    • Conversion Tables
    • Gift Ideas
      • Christmas 2010
      • Christmas 2011
      • Christmas 2012
      • Christmas 2013
      • Christmas 2014
      • Christmas 2015
    • Ingredients
    • Where I Shop for Italian Food in Sydney
  • Contact
You are here: Home / Recipes / Baking / Rapunzel Cake

Rapunzel Cake

December 9, 2015 By Manu Leave a Comment

Rapunzel Cake

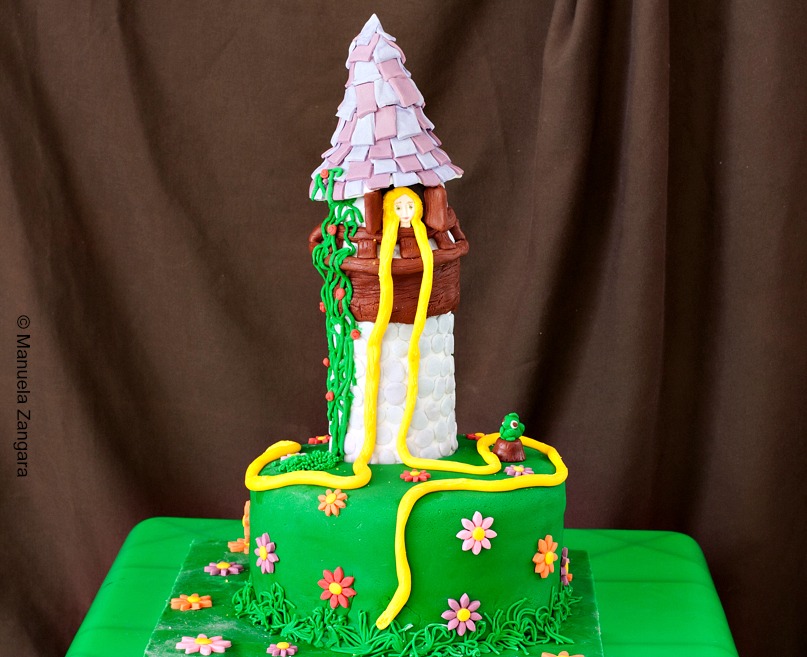
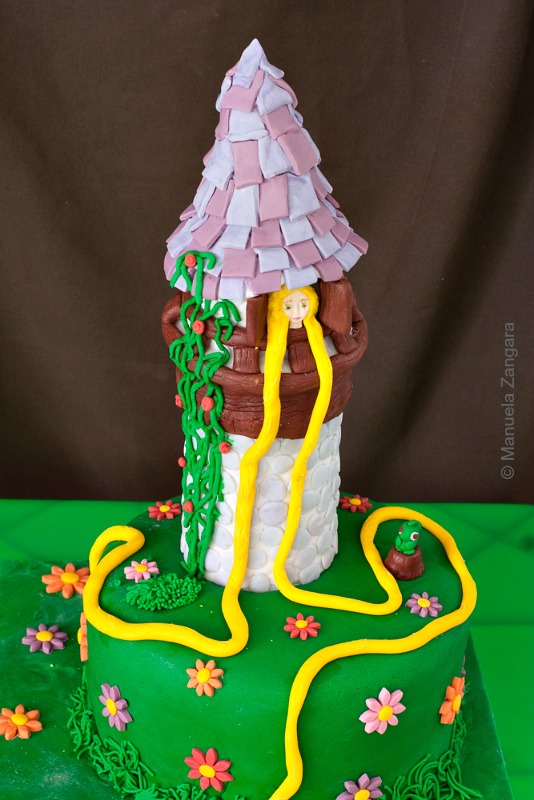
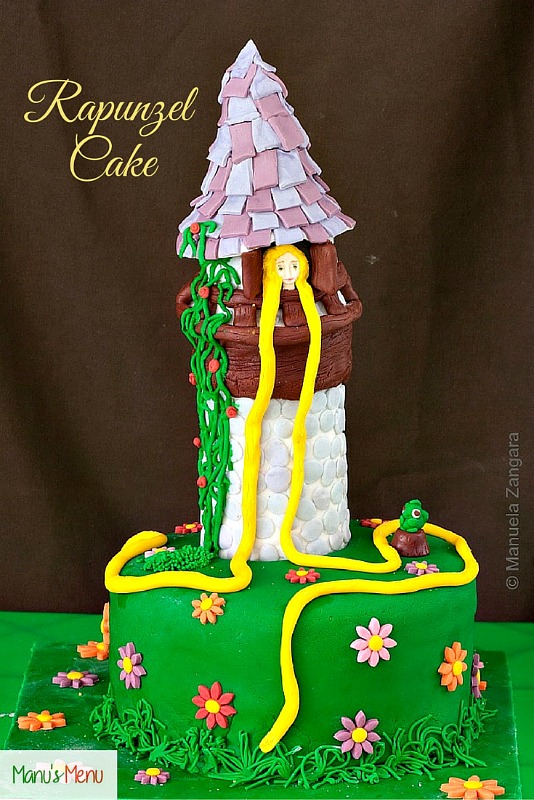
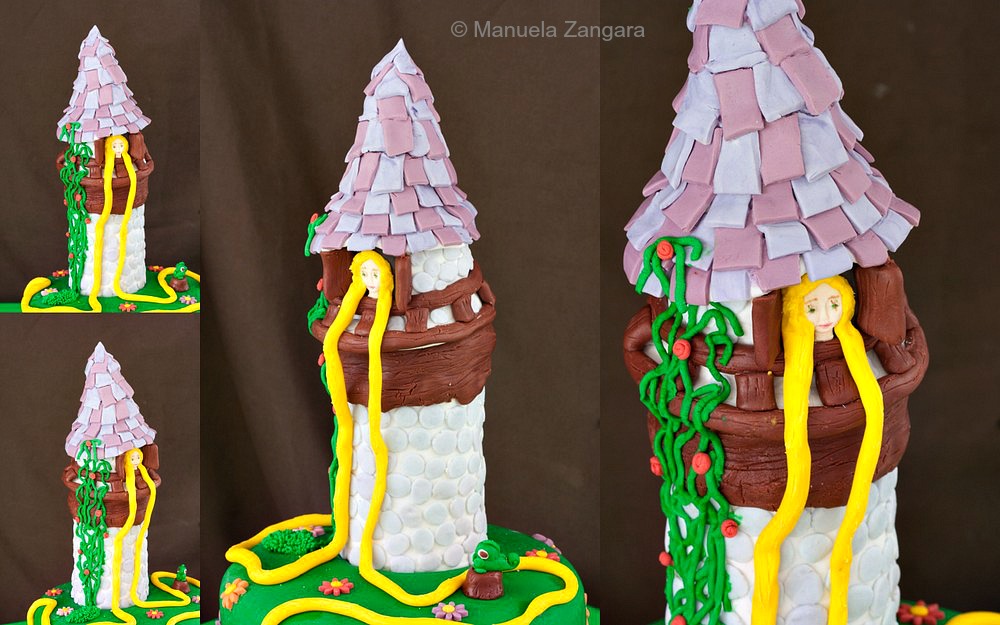
My youngest daughter Georgia just turned 6. I usually organise a party at our place, but this year she asked for something different. She wanted to celebrate her birthday at the bowling and invite some of her friends. And so we did. All I had to do was to make the birthday cake. Like all little girls her age, Georgia has a fascination with princess stories and Rapunzel has always been one of her favourites, so when she asked for a Rapunzel Cake, I had to oblige. I must admit that I was a bit worried about the stability of the tower, as I had to transport the cake by car to the party venue. Luckily it all went fine and it arrived in one piece.  The kids loved the cake and we had no leftovers, so it was a success!  The base of the cake was, as always when I work with fondant, my Yogurt Cake… it never fails me: soft, moist but sturdy enough to withstand the weight of the decorations.  Read on to find out how to make the cake!
Rapunzel Cake

Rapunzel Cake

Rapunzel Cake

Rapunzel Cake
Print

Rapunzel Cake

A tutorial on how to make a Rapunzel Cake with fondant for your kid's birthday party!

Course Dessert
Cook Time 1 hour
Total Time 1 hour
Servings 12 -15
Author Manuela Zangara

Ingredients

  • 2 Yogurt Cakes baked in 1x23 cm – 9 inches and 2x10 cm – 4 inches round pans
  • Coloured Fondant
  • Edible glue
  • Gel colours
  • Icing for crumb coating
  • Icing Sugar/corn starch
  • Plastic Tube to make the tower
  • Cardboard to make the cone
  • Small round plastic container for the “house”

Instructions

  1. Start by baking the cake. I made 2 yogurt cakes and froze them.
  2. Then colour all the fondant you are going to need. Dip a toothpick in the gel colour and then rub it onto the piece of fondant you want to colour. Then knead until uniformily combined. Alternatively, you can purchase coloured fondant and just use what you need.

Tower

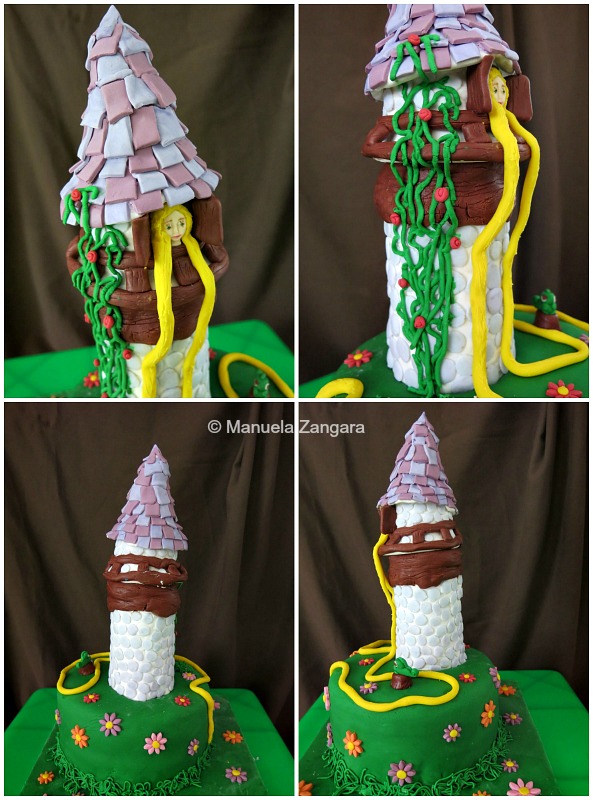
  1. I started by making the tower. I used a plastic tube as the base and then I covered it with a sheet of white fondant. Then I made some small balls with grey fondant, I flattened them with my finger and I stuck them to the tower with edible glue. Then I left the piece to dry.
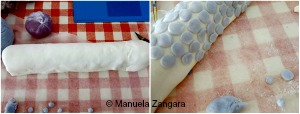
  2. To make the house, I used a small round take-away container and I I covered it with a sheet of white fondant. Then I left it to dry.
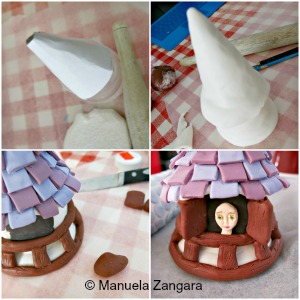
  3. To make the roof, I made a cone with cardboard and I covered it with a sheet of white fondant. Then I left it to dry.
  4. I then attached all the pieces with edible glue. When stuck, I continued to decorate them.
  5. I made the wood pieces with brown fondant and stuck them to the tower.
  6. I made some “tiles” using 2 different colours of fondant and attached them to the roof with edible glue.
  7. I used a thin piece of black fondant to make the window and then I made the shutters with brown fondant. Then I left it to dry.
  8. Now you can make Rapunzel’s head by rolling a small ball. Pinch the nose out, and form the eye sockets, forehead, and cheekbones. Then, shape the chin and the mouth. Handle it with care so you don’t deform the head and stick it to the window. Do not make the hair now!! Let it dry and then “paint” the face with food colours.
Flowers and Pascal

  1. Make the flowers using a cookie cutter and keep aside.
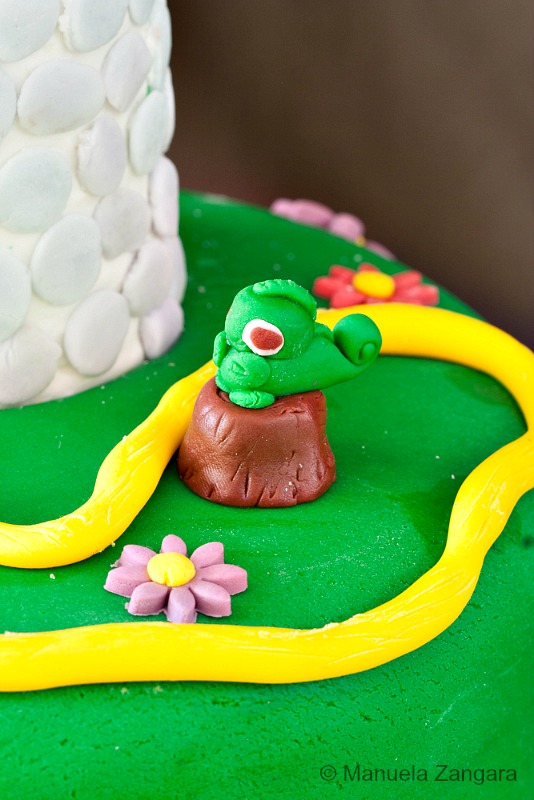
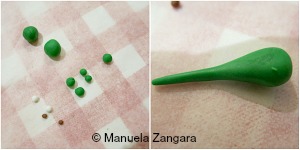
  2. Make Pascal by rolling green, white and black balls of fondant of different sizes. To make the body, make one of the biggest balls into a tear drop shape, then roll out one end until it gets really long and roll it on itself to make the tail.
  3. Make the head, attach the eyes and attach the head to the body.
  4. Make the hands and feet using the smaller green balls and attach them to the body.
  5. To make the spine, roll out the last small ball into a thin serpent. Attach it to the body and make indents using a knife. Let it dry out. I then attached Pascal to a piece of brown fondant shaped like a tree log.
Assembling

  1. The day before the party I assembled the cake. I made some icing for the crumb coating (you can use your favourite icing recipe, just make sure that it is a little less dense as it needs to be smooth and you should be able to apply it easily). I took the 2 yogurt cakes out of the freezer and levelled them while still frozen with a sharp serrated knife.
  2. I took a cake board, put some icing in the centre and put one cake on it Then I put a layer of icing on it and topped it with the other cake. Make sure to choose the smoothest and flattest of the cake surfaces for the cake top (it is very likely going to be the bottom of one of the cakes), this will make it easier to ice and decorate the cake. Then I crumb coated it with icing. Start from the top, then do the sides. Use a cake spatula to make sure the surface of the cake is as smooth as possible. Then put it in the fridge to harden. (You can also crumb coat it first and then transfer it to the cake board). This coating will make the fondant top look smooth and it will ensure that no crumbs will be visible through it.
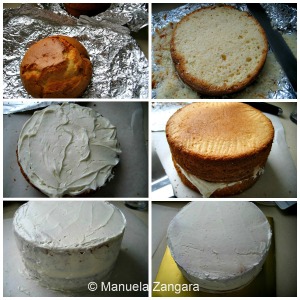
  3. When the icing has dried, make a hole with a sharp knife the same size as the tower. Make sure the hole is not bigger than the tower, or the tower will not stand properly.
  4. Then roll out the green fondant and cover the cake with it. Remember to make a hole for the tower! Smooth it with a fondant smoother and cut out the excess.
  5. Now carefully position the tower in the hole.
  6. Then apply all the decorations on the cake securing them with some fresh fondant and/or edible glue/toothpicks.
  7. I also made Rapanzul’s hair rolling out long strips of yellow fondant.
  8. I made some “grass” using a clean garlic press and a vine rolling out thin strips of green fondant.
  9. And there you have your Rapunzel Cake!

Rapunzel Cake

Rapunzel Cake

Rapunzel Cake

Rapunzel Cake

Share

Related Posts:

  • Frozen Cake
  • Indian Cake
  • Doraemon Cake
  • Playful Kitten Cake
  • Victoria’s 7th Birthday

Filed Under: Baking, Birthday, Cake and Cookie Decorating, Cakes, Desserts, Italian, Special Occasions, Tea Time Tagged With: birthday, cake, dessert, Disney, fondant, food, kids, party, party food, Rapunzel, recipes, sweets, tea time

« Amaretti
Sticky Chinese 5 Spice Wings »

Leave a Reply Cancel reply

Your email address will not be published. Required fields are marked *

Recipe Rating


Welcome to Manu’s Menu!

Hi! I am Manu, the author of Manu's Menu. I was born and brought up in Italy and my blog can show you how to create authentic Italian food in your own home! Read More…

  • Email
  • Facebook
  • Flickr
  • Instagram
  • LinkedIn
  • Pinterest
  • RSS
  • Twitter
  • YouTube

HOMEMADE PASTA MADE SIMPLE – THE BOOK. CLICK TO BUY IT FROM AMAZON NOW!

Homemade Pasta Made Simple

Archives

Categories

  • Email
  • Facebook
  • Flickr
  • Instagram
  • LinkedIn
  • Pinterest
  • RSS
  • Twitter

Video Recipe: Orecchiette with Crudaiola Sauce

https://www.youtube.com/watch?v=QqSyzFElbRY
foodgawker bowls-150x150
tastespotting150
Tasteologie badge
Pasta & Gnocchi

The Cool Side of Summer e-Book – Click to buy it now! On SALE for only $9.99!

The Cool Side of Summer e-Book

MsM’S EBOOK – CLICK TO BUY IT NOW!

MsM’S EBOOK – CLICK TO BUY IT NOW!
Genesis Theme Framework for WordPress
Community Table Contributor Badge
Sunday Supper Movement

manusmenu

manusmenu
Now on the blog - Low Fodmap Vanilla and Miso Cara Now on the blog - Low Fodmap Vanilla and Miso Caramel Cheesecake Slice.  Clickable recipe link in my profile.

#recipes #manusmenu #manusmenucom #instafood #instayum #foodbloggers #foodstyling #baking #lowfodmap #lowfodmapdiet #miso #cheesecake #cake #dessert #japan
Now on the blog - Low Fodmap Ragù Bianco. A tradi Now on the blog - Low Fodmap Ragù Bianco. A traditional pasta sauce from central Italy. Clickable recipe link in my profile.

#recipes #manusmenu #manusmenucom #instafood #instayum #foodbloggers #foodstyling #Italian #italy #italianfoodbloggers #italianfood #pasta #pastasauce #ragu
Now on the blog - Trieste, Italy Guide. A surprisi Now on the blog - Trieste, Italy Guide. A surprising city. Come check it out. Clickable link in my profile.

#manusmenu #manusmenucom #travel #travelblogger #italy #tourism #Europe #trieste #holidays #beautifuldestinations #history #food
Now on the blog - Sausage and Potato Sourdough Cre Now on the blog - Sausage and Potato Sourdough Crespelle. The best comfort food. Clickable recipe link in my profile.

#recipes #manusmenu #manusmenucom #instafood #instayum #foodbloggers #foodstyling #baking #sourdough #sourdoughstarter #crepes #crespelle #food #foodgram #italianfoodbloggers #italianfood
Now on the blog - WWI, Italy Guide. A guide about Now on the blog - WWI, Italy Guide. A guide about some of the most important landmarks of the Great War. Clickable link in my profile.

#manusmenu #manusmenucom #travel #travelblogger #italy #tourism #Europe #cividale #friuliveneziagiulia #beautifuldestinations #war #history
Now on the blog - Sourdough Crêpes. So good. Use Now on the blog - Sourdough Crêpes. So good. Use up some of your #sourdough discard to make these delicious sweet or savoury crêpes. Clickable recipe link in my profile.

#recipes #manusmenu #manusmenucom #instafood #instayum #foodbloggers #foodstyling #baking #sourdough #sourdoughstarter #crepes #crespelle #food
Now on the blog - Cividale del Friuli, Italy Guide Now on the blog - Cividale del Friuli, Italy Guide. Clickable link in my profile.

#manusmenu #manusmenucom #instafood #instayum #foodbloggers #travel #travelblogger #italy #tourism #Europe #cividale #friuliveneziagiulia #beautifuldestinations #history #food #italianfood
Now on the blog - Hugo. A refreshing Italian cockt Now on the blog - Hugo. A refreshing Italian cocktail and an alternative to your everyday spritz. Clickable recipe link in my profile.

#recipes #manusmenu #manusmenucom #instafood #instayum #foodbloggers #foodstyling #Italian #hugo #spritz #prosecco #drinks #cocktails #elderflower
Now on the blog - Low Fodmap Pork Meatball Satay S Now on the blog - Low Fodmap Pork Meatball Satay Stir Fry. So good. Clickable recipe link in my profile.

#recipes #manusmenu #manusmenucom #instafood #instayum #foodbloggers #foodstyling #lowfodmap #lowfodmapdiet #satay #stirfry #pork #meatballs
Now on the blog - Quick Pickled Cucumbers. So crun Now on the blog - Quick Pickled Cucumbers. So crunchy and refreshing. Clickable recipe link in my profile.

#recipes #manusmenu #manusmenucom #instafood #instayum #foodbloggers #foodstyling #picklingcucumbers #pickles #pickling #garden #cucumber #vegetarian #vegan #video
Now on the blog - Coffee Panna Cotta. Wobbly and d Now on the blog - Coffee Panna Cotta. Wobbly and delicious. Clickable link in my profile.

#recipes #manusmenu #manusmenucom #instafood #instayum #foodbloggers #foodstyling #Italian #pudding #italy #italianfoodbloggers #italianfood #coffee #pannacotta
Now on the blog - Sourdough Cinnamon Rolls. Recipe Now on the blog - Sourdough Cinnamon Rolls. Recipe adapted from the wonderful @jennifer_rodda. The best way to use up some of your Sourdough discard. Clickable recipe link on my profile.

#recipes #manusmenu #manusmenucom #instafood #instayum #foodbloggers #foodstyling #baking #sourdough #sourdoughstarter #pastry #cinnamonrolls #teatime #breakfast
Load More... Follow on Instagram

Privacy Policy

Copyright © 2011-2020 - Manu's Menu and Manuela Zangara. All rights reserved.