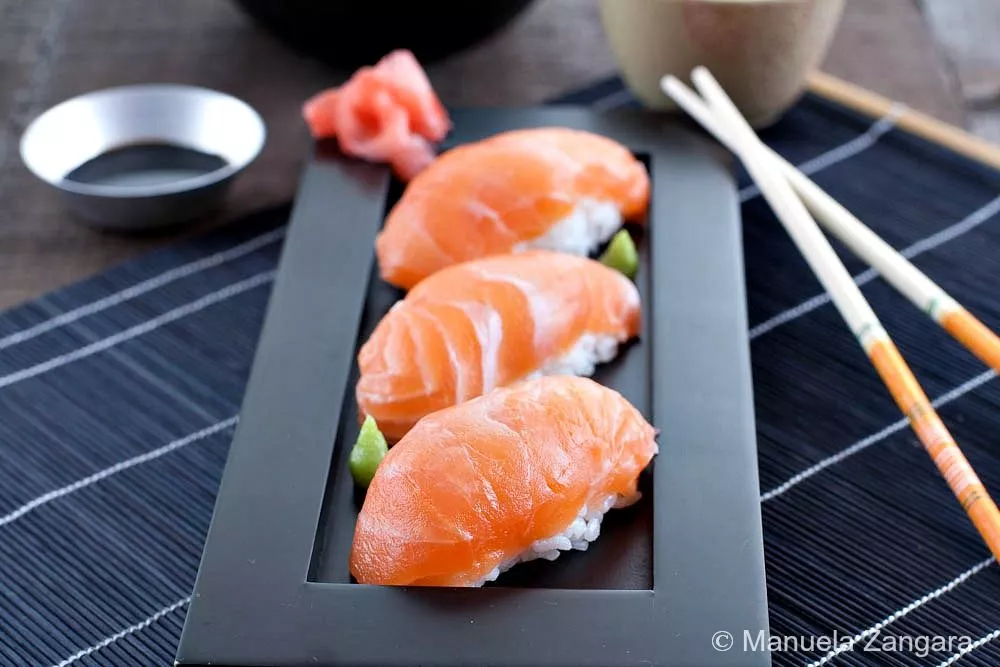
Homemade Salmon Nigiri brings the taste of Japan to your kitchen. With only three main ingredients, it’s an easy way to enjoy sushi without leaving home.
I only started enjoying sushi a few years ago. When I was growing up in Italy, it wasn’t something I grew up eating. These days, Japanese cuisine, especially sushi, is very popular there, although it can be quite expensive. In Australia, it’s a completely different story. Sushi has become part of everyday life, and it’s easy to find a sushi bar on almost every corner.
If you’ve followed me for a while, you’ll know that whenever I fall in love with a dish, I try to recreate it in my own kitchen. I enjoy learning new techniques and exploring flavours from different cuisines. Some time ago, I prepared my first batch of sushi rice and shared my Spicy Tuna Salad Sushi Roll recipe, which turned out wonderfully. That experience inspired me to keep experimenting, so I decided to make one of my personal favourites, Salmon Nigiri.
What People Love About This Sushi Classic
- Works well for light lunches, elegant dinners, or shared appetisers.
- Focuses on quality ingredients instead of heavy sauces or spices.
- Brings the pure taste of Japanese cuisine to the comfort of home.
Key Ingredients for Salmon Nigiri
Sushi Rice
Use short-grain Japanese rice, which becomes sticky once seasoned with vinegar, sugar, and salt. This helps it hold its shape when pressed.
Sushi Grade Salmon
Always choose sushi or sashimi-grade salmon from a trusted source. It must be extremely fresh as it is eaten raw. Slice it against the grain into thin, even pieces for smooth texture and flavour.
Wasabi
A small amount adds subtle heat and balances the richness of the salmon. It also helps “glue” the fish to the rice.
Find the complete list with measurements in the recipe card below.
How to Make Salmon Nigiri
Step 1: Start by preparing sushi rice. You can find my detailed recipe on How to Make Sushi Rice.
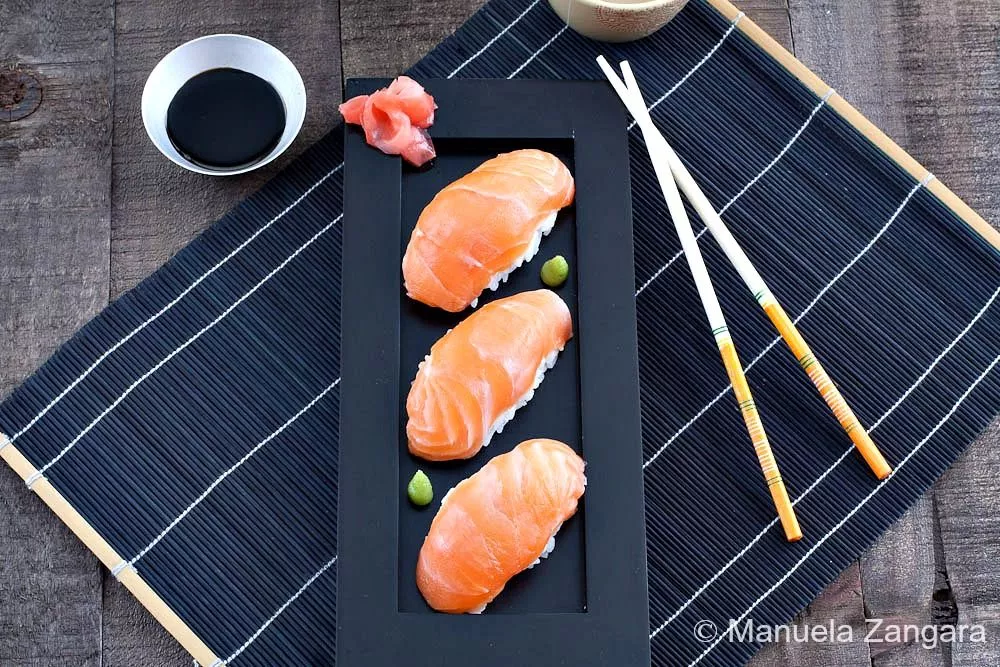
Step 2: Wet your hands and shape the seasoned rice into 10 quenelles (oval mounds).
Step 3: Put a little wasabi on each slice of salmon and then put them on top of the shaped rice so that the wasabi “sticks” to the rice.
Step 4: Press well with your hands to shape it.
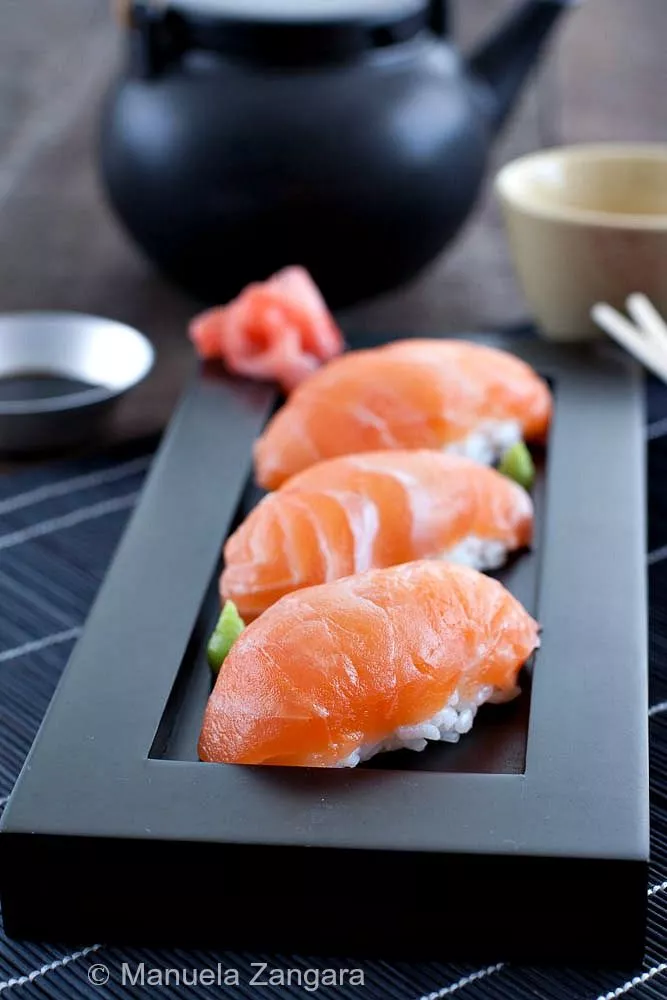
Step 5: Serve immediately with soy sauce and pickled ginger on the side.
Frequently Asked Questions
It’s best to prepare it fresh, as the rice can dry out and lose its soft texture. If needed, assemble shortly before serving for the best flavour and presentation.
Use a sharp knife and cut against the grain into thin, even slices about 2–3 mm thick. This helps the salmon sit neatly on the rice and gives a tender bite.
Yes. Tuna, yellowtail, or shrimp can replace salmon using the same method. Each fish offers a unique texture and flavour, so choose sushi-grade options for the best results.
Extra Help from the Kitchen
Keep Your Hands Damp – Wet your hands frequently while shaping the rice to stop it from sticking. Lightly damp palms make it easier to form neat portions without crushing the grains.
Use Seasoned Sushi Rice – Flavouring the rice with rice vinegar, sugar, and salt adds balance and helps the grains stay together. Always mix gently with a wooden spatula to preserve texture.
Press Gently – Apply light pressure when forming each nigiri so the rice holds its shape while staying soft and airy. Too much pressure will make it dense and less pleasant to eat.
Chill the Salmon Before Slicing – Cold salmon is easier to slice cleanly and evenly. Briefly chill it in the fridge before cutting to achieve neat, thin pieces with a smooth surface.
Work in Small Batches – Keep the unused rice covered with a damp cloth to prevent it from drying out. Shape only a few pieces at a time for the best texture.
Variations and Twists
Salmon Aburi Nigiri (Seared Salmon Nigiri) – Lightly torch the top of the salmon for a smoky, caramelised finish while keeping the inside tender and silky.
Seasoned Salmon Nigiri – Sprinkle the salmon with toasted sesame seeds or a few drops of yuzu for a bright, citrus fragrance.
Salmon Sake Nigiri – Briefly marinate the salmon in sake before slicing to add depth and a hint of sweetness that complements the rice.
Salmon Toro Nigiri – Use the fatty belly section of the salmon for an ultra-soft, melt-in-the-mouth texture similar to tuna toro.
Salmon Egg Nigiri – Add a small spoon of salmon roe on top for a delicate, salty contrast and elegant appearance.
Storage and Shelf Life
Salmon Nigiri is best eaten fresh soon after preparation. If you need to keep it for later, store the pieces in a single layer inside an airtight container and refrigerate for up to 12 hours. Keep the container tightly sealed to prevent the rice from drying and the salmon from absorbing other odours.
Avoid freezing, as the texture of both rice and fish will change once thawed. Always use sushi-grade salmon and handle it carefully for the best and safest results.
Other Homemade Japanese Recipes You’ll Love
Salmon Nigiri
Homemade Salmon Nigiri brings the taste of Japan to your kitchen. With only three main ingredients, it’s an easy way to enjoy sushi without leaving home.
Ingredients
- 2 cups cooked sushi rice – seasoned
- Sushi-grade salmon – sliced into 10 thin pieces
- Wasabi
- Soy sauce – to serve
- Pickled ginger – to serve
Instructions
-
Start by preparing sushi rice. You can find my detailed recipe on How to Make Sushi Rice.
-
Wet your hands and shape the seasoned rice into 10 quenelles (oval mounds).
-
Put a little wasabi on each slice of salmon and then put them on top of the shaped rice so that the wasabi “sticks” to the rice.
-
Press well with your hands to shape it.

-
Serve immediately with soy sauce and pickled ginger on the side.
Recipe Notes
- Always buy sushi or sashimi-grade salmon when eating it raw. Raw fish can carry a risk of foodborne illness, especially for those with medical conditions. Proceed with care.
- Ask your fishmonger to slice the salmon for the best results.


Oh gorgeous! I can make maki – and love to – but just can’t get a beautiful nigiri like yours. Funny, I took a sushi class with my son a couple of years ago and he was the only one that could make these. I am in awe of yours…. I have to try now.