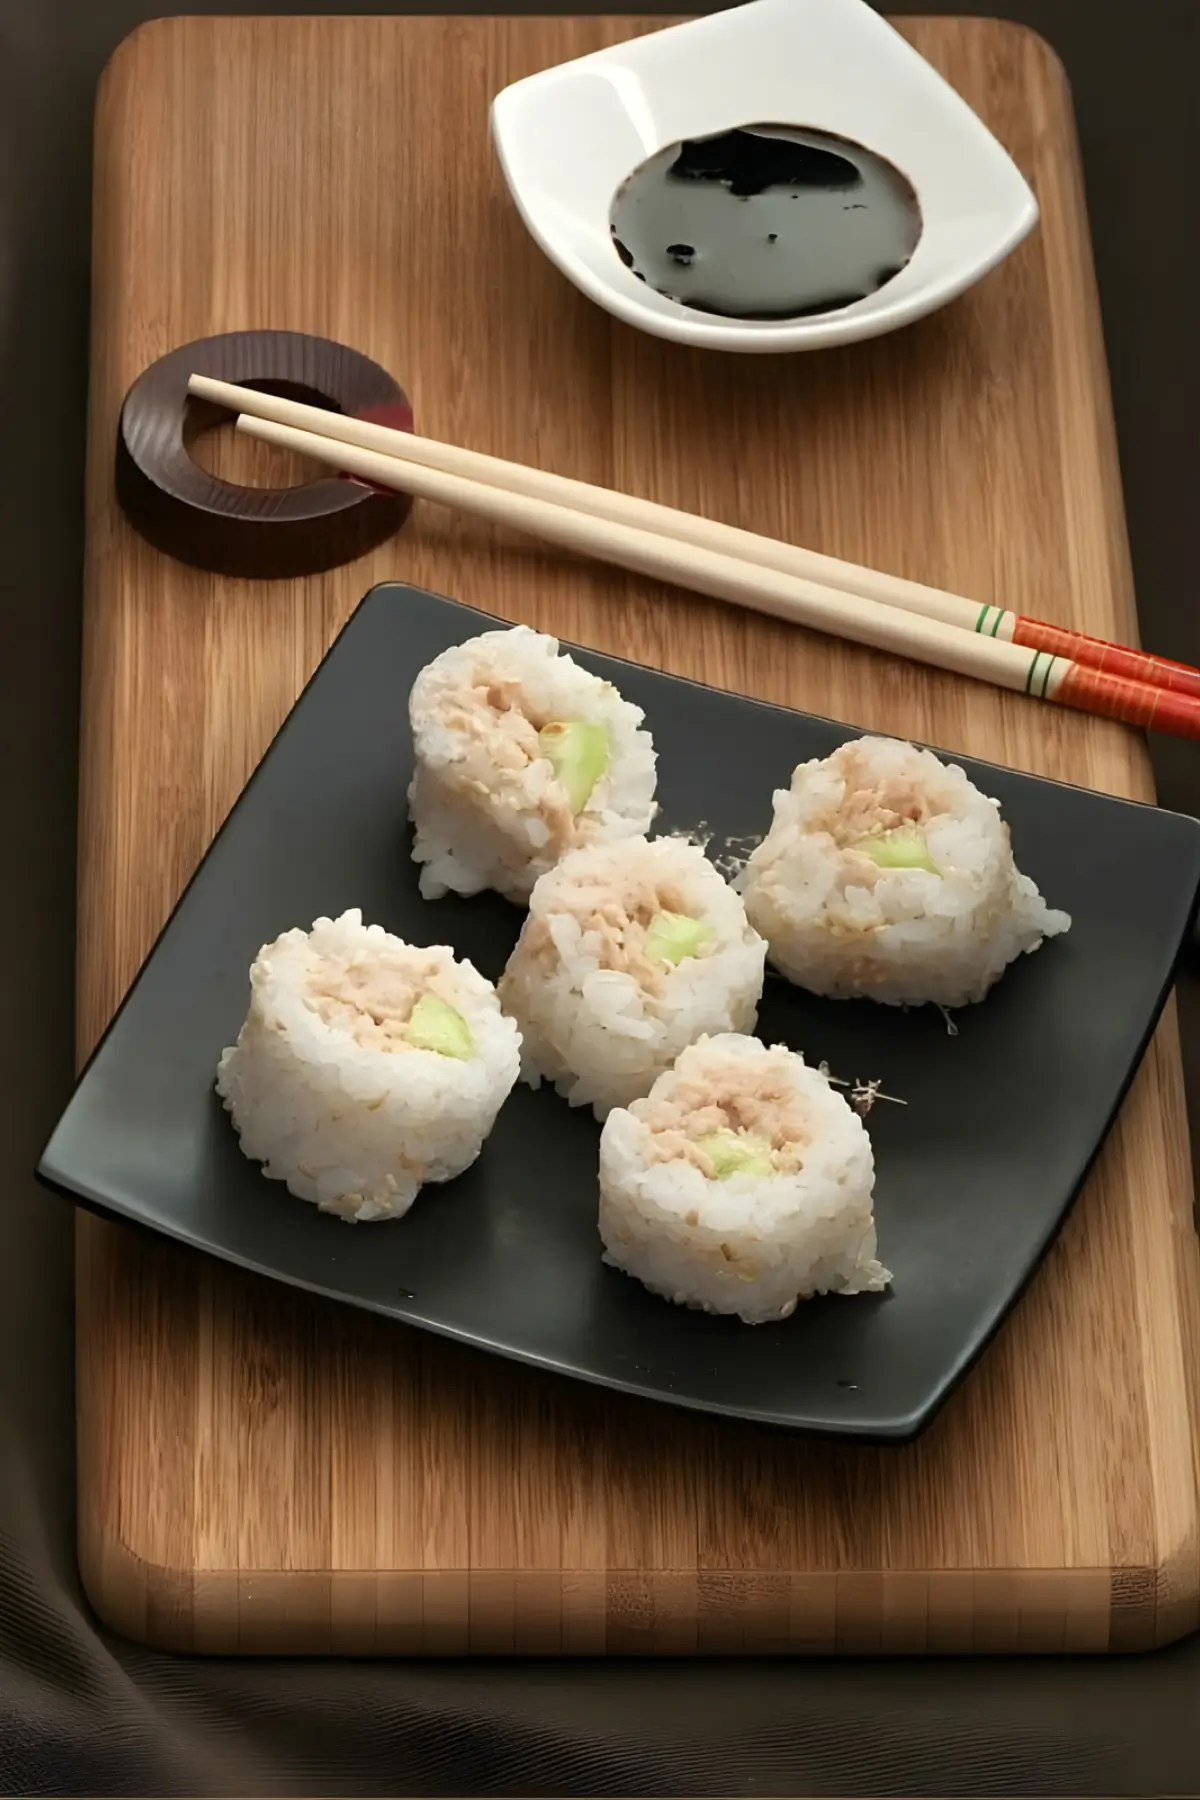
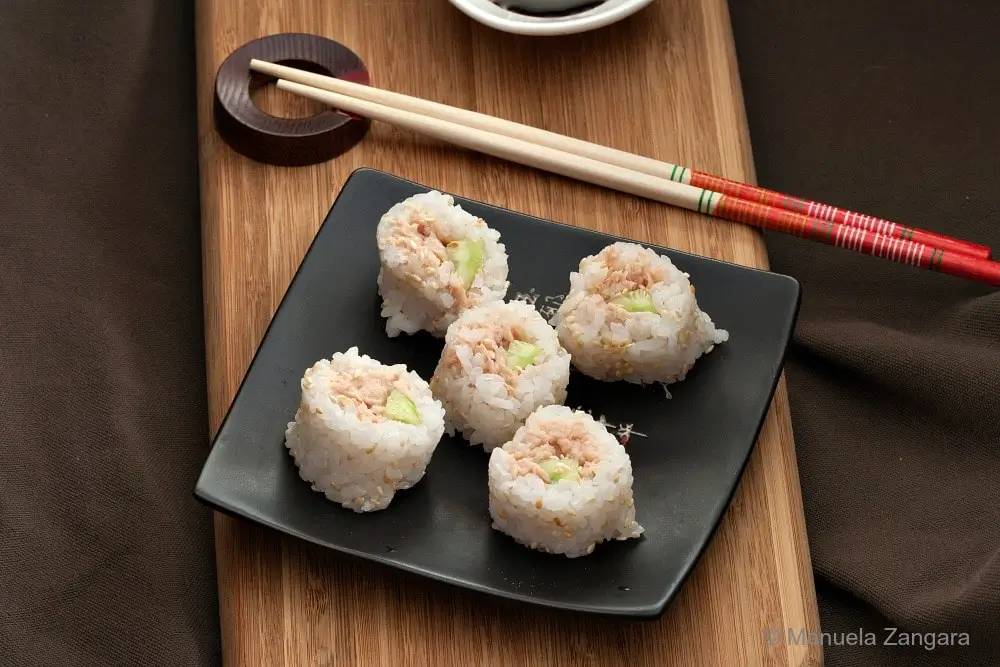
Homemade sushi night made simple with a Skinny Tuna Sushi Roll full of lean tuna, creamy mayo, and fresh cucumber crunch.

When I was waiting for my gallbladder surgery, I had to follow a strict low-fat diet. This Skinny Tuna Sushi Roll was my dinner for almost a full month.
I kept making it because it tasted good, even though it was very low in fat. It also came together quickly, which helped on days when I was tired or not in the mood to cook much.
It satisfied my sushi cravings and still felt light. All you need for a low-fat version is tuna canned in spring water instead of oil. Use fat-free mayo instead of normal or Japanese mayo.
This is a great recipe for people who enjoy sushi and want to keep things light. Enjoy!
Reasons to Make This Tuna Sushi Roll
- Packs neatly for lunches, staying firm and tidy when wrapped well and chilled.
- Comes together quickly, giving you a fresh meal without spending much time in the kitchen.
- Pairs smoothly with miso soup, seaweed salad, or a small bowl of steamed edamame.
Key Ingredients for Skinny Tuna Sushi Roll
Cooked Sushi Rice
Needs to be lightly seasoned and sticky enough to hold together when rolled. Short-grain sushi rice works best because the grains cling naturally and slice cleanly.
Tuna in Spring-Water
Offers a mild flavour that mixes well with the mayonnaise and soy sauce. Draining it well and flaking it with a fork gives a smooth, even filling. Choosing tuna in spring-water keeps the mixture light.
Fat-Free Mayonnaise
Gives creaminess to the tuna mixture without making it heavy. A small amount is enough to bring the filling together.
Soy Sauce
Adds savoury depth and seasons the mixture. A little goes a long way, especially with mild tuna.
Find the complete list with measurements in the recipe card below.
How to Make Skinny Tuna Sushi Roll
Step 1: Mix the tuna, mayonnaise, and soy sauce in a bowl until well-combined.
Step 2: To roll the sushi, cover a bamboo sushi rolling mat with plastic wrap and sprinkle toasted sesame seeds over the surface.
Step 3: With wet fingers, press a thick, even layer of seasoned sushi rice over the plastic-covered mat.
Step 4: Place the cucumber in a line along the bottom edge of the rice, then spread a line of the tuna mixture alongside the cucumber.
Step 5: Lift the edge of the bamboo rolling mat and fold the bottom edge of the rice up and over the filling. Roll firmly to form a tight cylinder.
Step 6: After rolling, gently squeeze along the length of the sushi to compact it well.
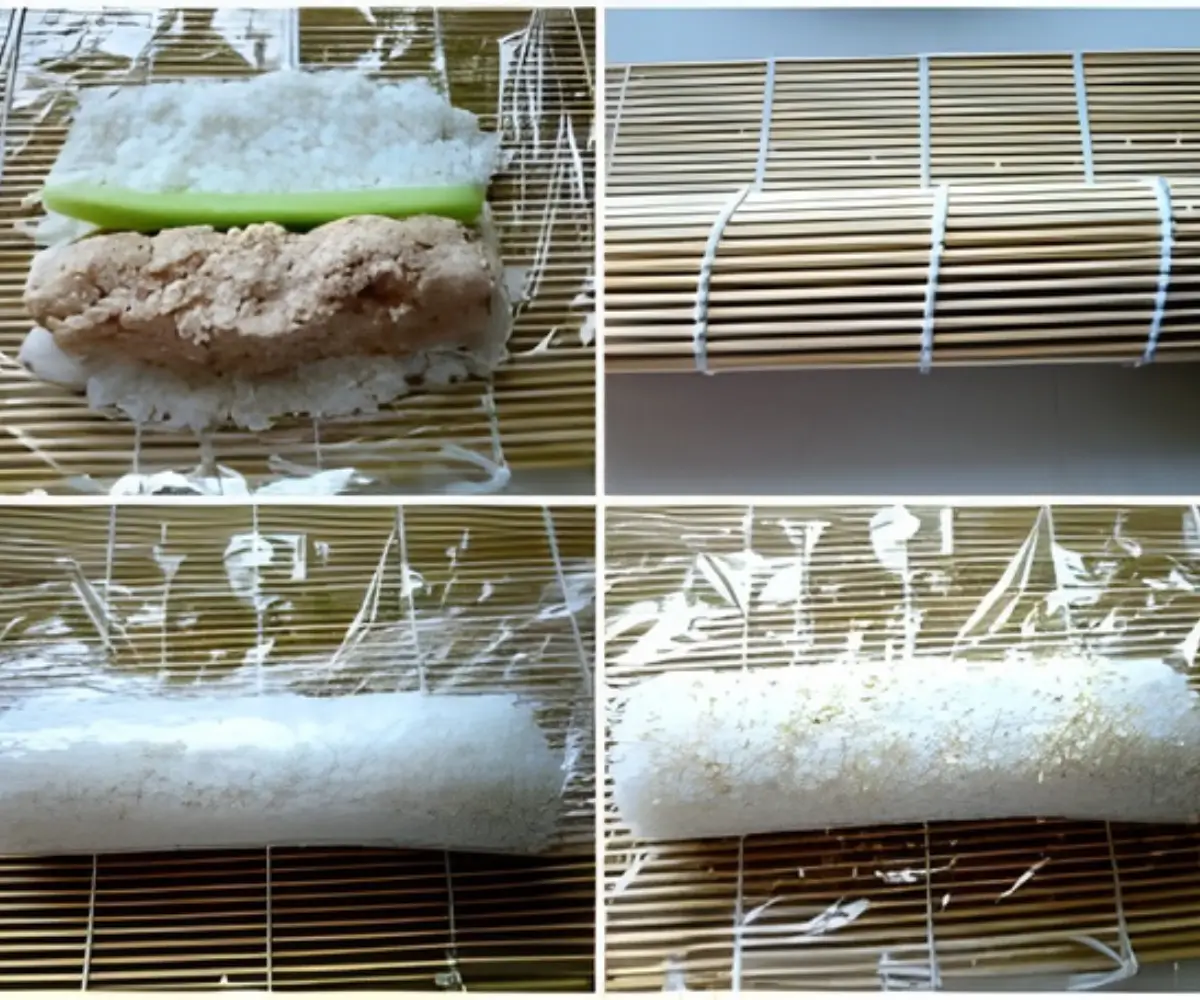
Step 7: Repeat to make a second roll. Slice each roll into 5 or 6 pieces using a very sharp knife.
Step 8: Serve with soy sauce, pickled ginger, and wasabi on the side.
Frequently Asked Questions
Yes. Brown rice can be used, but it stays firmer and is less sticky, so the roll may need a bit more pressure to hold together when shaping and slicing.
Avocado, carrot matchsticks, or a small amount of imitation crab blend well with the tuna mixture and keep the roll easy to shape and slice.
Yes. Make the rolls a couple of hours ahead, keep them tightly wrapped, and store them in the fridge so the rice stays moist and the filling remains fresh.
Use a very sharp knife and wipe the blade between cuts. A clean edge moves through the rice more easily and keeps the pieces even.
Moisten your fingertips with a little water before pressing the rice. This helps keep the rice from sticking to your hands and makes it easier to spread it into an even layer.
Extra Help from the Kitchen
Dry the Cucumber Lightly – Pat the strips with a paper towel to remove surface moisture, which helps prevent the roll from becoming wet inside.
Avoid Overfilling – Leave space at the top edge of the rice layer so the roll can close cleanly without gaps, and keep the filling in a narrow line to prevent it from pushing out as you roll.
Chill the Tuna Mixture Briefly – Place the tuna mixture in the fridge for about 10 minutes to firm it slightly, which makes it easier to spread and roll.
Wipe the Mat Between Rolls – Keep the mat dry between each roll to improve grip and reduce slipping, especially when preparing multiple batches.
Let the Rice Cool Slightly – Allow the rice to reach room temperature, as warm grains mash easily. Cooler rice gives you better control when spreading and rolling.
Variations and Twists
Spicy Skinny Tuna Sushi Roll – Mix a small amount of sriracha into the tuna–mayo–soy blend to add gentle heat that complements the seasoned rice.
Add Avocado and Cucumber – Place thin avocado slices beside the cucumber to add creaminess that pairs well with the light tuna mixture.
Use Imitation Crab with Tuna – Stir in ¼ to ½ cup of finely chopped or shredded imitation crab meat with the tuna mixture to introduce a milder flavor profile and different texture.
Create a Cucumber and Avocado Roll – Replace the tuna mixture with cucumber strips and avocado slices for a vegetarian option that uses the same rolling technique.
Storage and Shelf Life
Store the Skinny Tuna Sushi Roll in the fridge for up to 24 hours. Keep each roll tightly wrapped in plastic wrap. This prevents the rice from drying out and helps it hold its shape. Slice the rolls only when ready to serve, as cut pieces dry faster and lose their texture.
Freezing is not recommended because chilled cucumber becomes soft once thawed, and the rice turns grainy.
Easy Japanese Dishes to Try Next
Skinny Tuna Sushi Roll Recipe
Homemade sushi night made simple with a Skinny Tuna Sushi Roll full of lean tuna, creamy mayo, and fresh cucumber crunch.
Ingredients
- 160 g cooked sushi rice
- 95 g tuna in spring-water
- 1 tbsp fat-free mayo
- 1 tsp soy sauce
- cucumber strips
- toasted sesame seeds
Instructions
-
Mix the tuna, mayonnaise, and soy sauce in a bowl until well-combined.
-
To roll the sushi, cover a bamboo sushi rolling mat with plastic wrap and sprinkle toasted sesame seeds over the surface.
-
With wet fingers, press a thick, even layer of seasoned sushi rice over the plastic-covered mat.
-
Place the cucumber in a line along the bottom edge of the rice, then spread a line of the tuna mixture alongside the cucumber.
-
Lift the edge of the bamboo rolling mat and fold the bottom edge of the rice up and over the filling. Roll firmly to form a tight cylinder.
-
After rolling, gently squeeze along the length of the sushi to compact it well.
-
Repeat to make a second roll. Slice each roll into 5 or 6 pieces using a very sharp knife.
-
Serve with soy sauce, pickled ginger, and wasabi on the side.
Recipe Notes
For clean, even slices, use a very sharp knife and lightly moisten the blade before each cut.


Leave a Reply