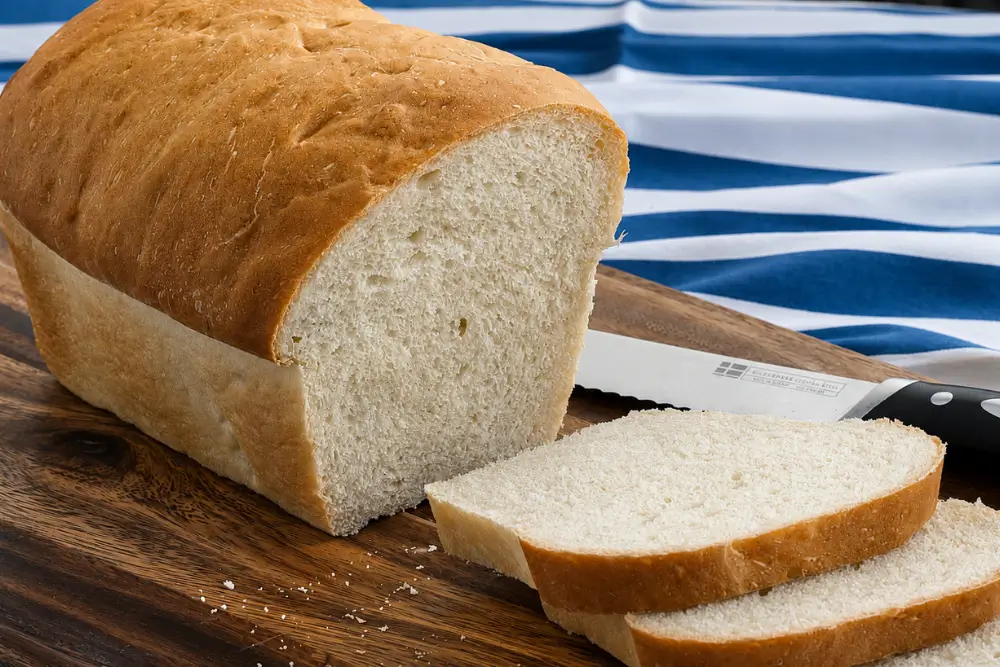
Freshly baked White Sandwich Bread makes the best toast and sandwiches. Made with simple pantry ingredients, this homemade bread creates a soft, fluffy loaf with bakery-style slices.
I absolutely adore homemade bread, and I try to bake some as often as I can. There’s something incredibly satisfying about pulling a fresh loaf out of the oven, especially when it’s as soft and fluffy as this White Sandwich Bread.
It has everything I want in a sandwich loaf with a light texture, a tender crumb, and a delicate golden crust.
My go-to crusty bread recipe is still my easy Ciabatta, but I also love having a softer loaf ready for sandwiches and toast. Up until now, my favourite has been my Whole Wheat Bread. However, it contains milk, which made me want to create a dairy-free version.
This White Sandwich Bread turned out even better than I hoped. It’s airy, spongy, fluffy, light, pillowy, and above all, very tasty.
I honestly don’t think I’ll need another White Sandwich Bread recipe after this one. The fact that it’s dairy-free makes it even more useful for everyday baking.
My house smells heavenly whenever I bake this loaf, which is always a bonus. I use it for sandwiches at lunch or toast slices for breakfast with jam. It also freezes very well, which means you can bake an extra loaf of bread and keep it for later.
The best thing about this bread is how easy it is to make. The ingredients are simple pantry staples, with no need to search for anything complicated.
So, what’s your favourite type of bread? Enjoy, and don’t forget to check out my video recipe and leave a comment to let me know how you like it!
Why We Love This Homemade Sandwich Bread
- Freezing individual slices makes quick breakfasts much more convenient during busy mornings.
- Everyday ingredients make this recipe practical without needing specialty flour or equipment.
- This versatile loaf works especially well with everything from peanut butter and jam to cheese or deli meats.
Key Ingredients for White Sandwich Bread
All-Purpose Flour
All-purpose flour gives the loaf structure while keeping the crumb soft and light. Plain flour works well because it creates a gentler texture than strong bread flour that can make sandwich bread slightly chewier. Unbleached flour also gives a more natural flavour and colour.
Dry Yeast
Dry yeast helps the dough rise and creates the airy texture inside the loaf. Activated yeast also develops flavour during the proofing stages. Always check the expiry date before using it, as older yeast may not rise properly.
Sugar
Sugar lightly sweetens the bread and feeds the yeast during activation. Small amounts also help the crust develop an even golden colour without making the loaf taste sweet.
Find the complete list with measurements in the recipe card below.
How to Make White Sandwich Bread
Preparing the Dough
Step 1: Mix the yeast with the warm water and half of the sugar. Leave it aside until activated.

Step 2: In the bowl of an electric mixer fitted with the dough hook, combine half the flour, salt, oil, the yeast mixture, and the remaining sugar. Mix until combined.
Step 3: With the mixer running, gradually add the remaining flour until you get a smooth dough that clears the bottom and sides of the bowl while still feeling slightly tacky.
Note: The dough should still feel slightly tacky and leave only a small amount of doughy residue on your fingers when touched, without becoming over-floured or dense. Start checking the dough texture at 410 g – 3 ¼ cups of flour, then add more only if needed.
Step 4: Knead for about 2 minutes, until the dough becomes smooth, supple, and elastic.
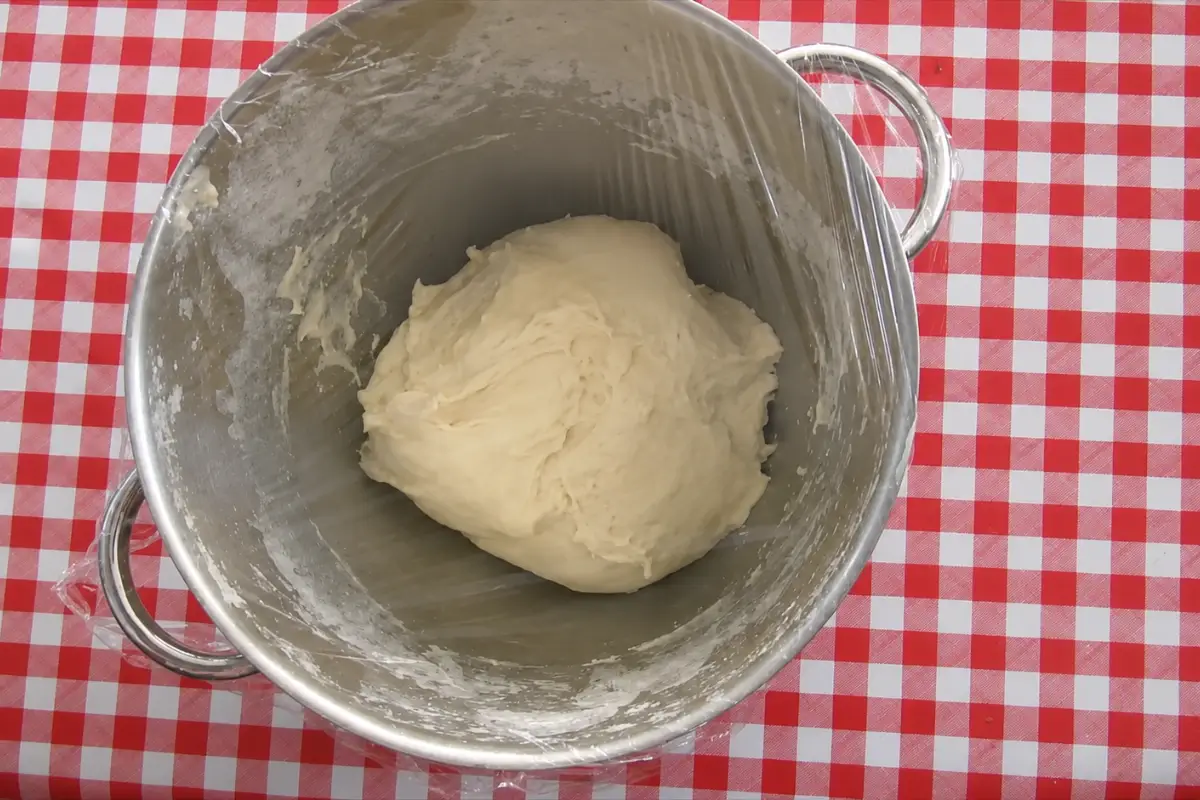
First Rise
Step 1: Shape the dough into a ball, cover with plastic wrap, and leave it to rise in a warm place until doubled in size, about 1 hour, depending on the temperature of your kitchen.
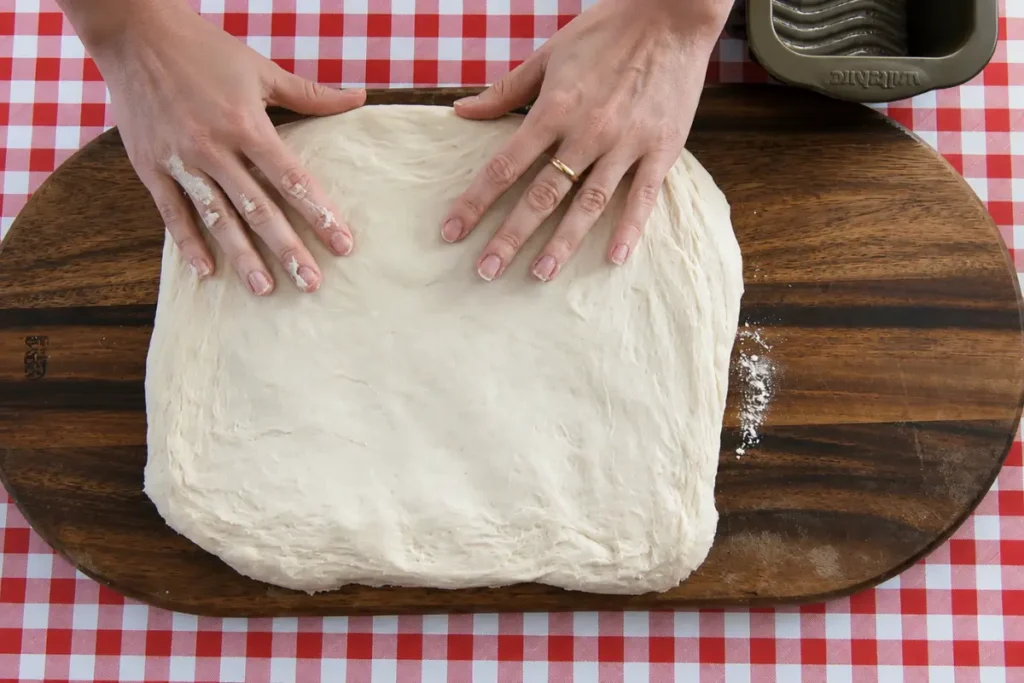
Shaping the Loaf
Step 1: Grease and flour a 23 × 12.5 cm – 9 × 5 inch loaf pan.
Step 2: Lightly punch down the dough and press it into a thick rectangle about 20 cm – 8 inches long.
Step 3: Fold the bottom third of the dough over itself like a letter. Fold the top down to overlap the layers, then pinch the seams closed with your fingers on all sides.
Step 4: Turn the loaf over with the seam underneath, then tuck the 2 sides under. Gently place the loaf into the pan with the seams on the bottom and the smooth surface facing up.
Second Rise
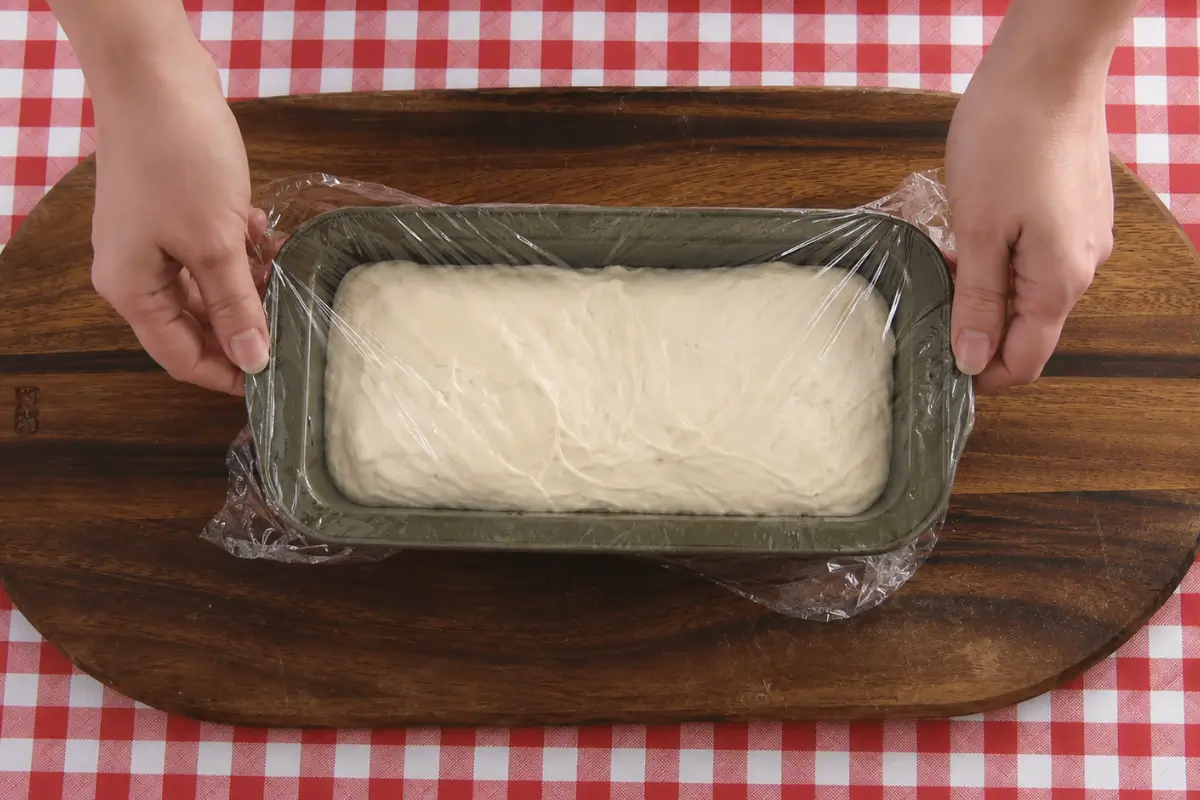
Step 1: Cover with lightly greased plastic wrap and leave the dough to rise until doubled in size and about 2.5 cm – 1 inch above the rim of the pan. This should take about 1 hour, depending on the warmth of your kitchen.
Baking the Bread
Step 1: Bake in a preheated oven at 180°C – 350°F for 30–35 minutes, until golden and baked through.
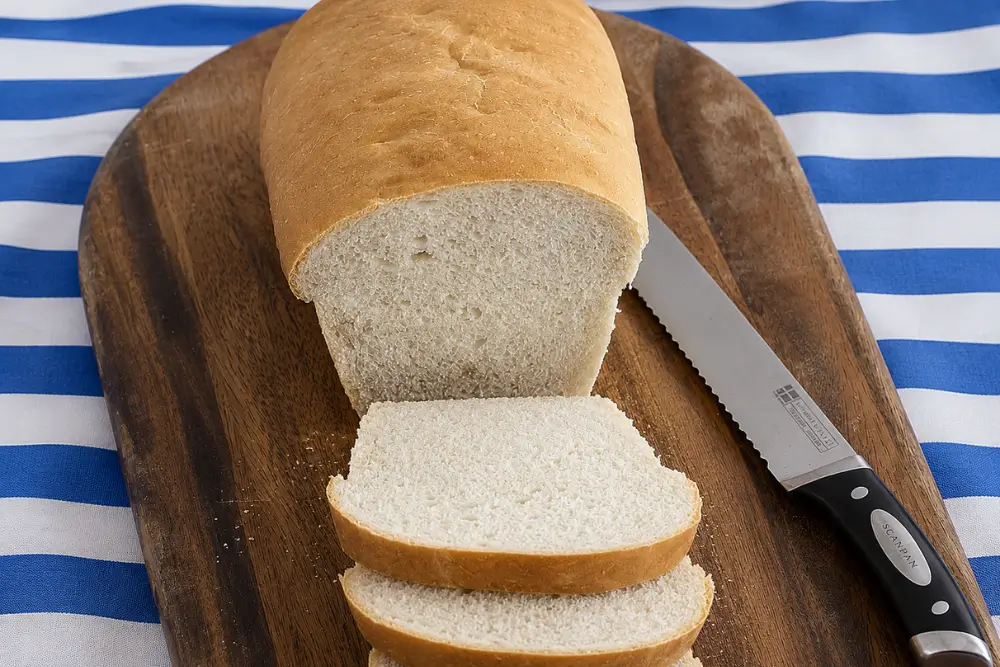
Step 2: Remove the bread from the oven and turn it out onto a wire rack. Leave it to cool completely before slicing.
Frequently Asked Questions
Yes, absolutely. Knead the dough by hand on a lightly floured surface for about 8 to 10 minutes until smooth and elastic.
The loaf should be golden brown on top and sound hollow when tapped underneath. If you have a thermometer, the centre should reach around 88°C to 93°C – 190°F to 200°F.
Yes. Let the loaf cool completely, then slice and freeze it in an airtight container or freezer bag for up to 3 months.
Use the correct amount of flour and allow the dough enough time to rise properly. The dough should feel soft and slightly tacky before proofing, or the bread can turn out dense.
Whole milk can be used for a softer and slightly richer loaf, although the bread will no longer be dairy-free. Unsweetened plant-based milk such as oat or soy milk also works well and keeps the crumb soft.
Extra Help from the Kitchen
Use a Kitchen Scale – Weigh the flour for a more consistent dough texture and softer bread. Measuring cups can easily add extra flour, making the loaf denser.
Let the Dough Rise in a Warm Spot – Place the covered dough in a slightly warm, draft-free area to help the yeast rise more evenly. Cooler kitchens may need extra proofing time.
Use the Windowpane Test – Stretch a small piece of dough gently after kneading. If the dough stretches thin without tearing quickly, the gluten has developed enough for a softer, airier loaf.
Rotate the Loaf Halfway Through Baking – Turn the loaf tin halfway through baking if your oven heats unevenly. This helps the crust brown more evenly on all sides.
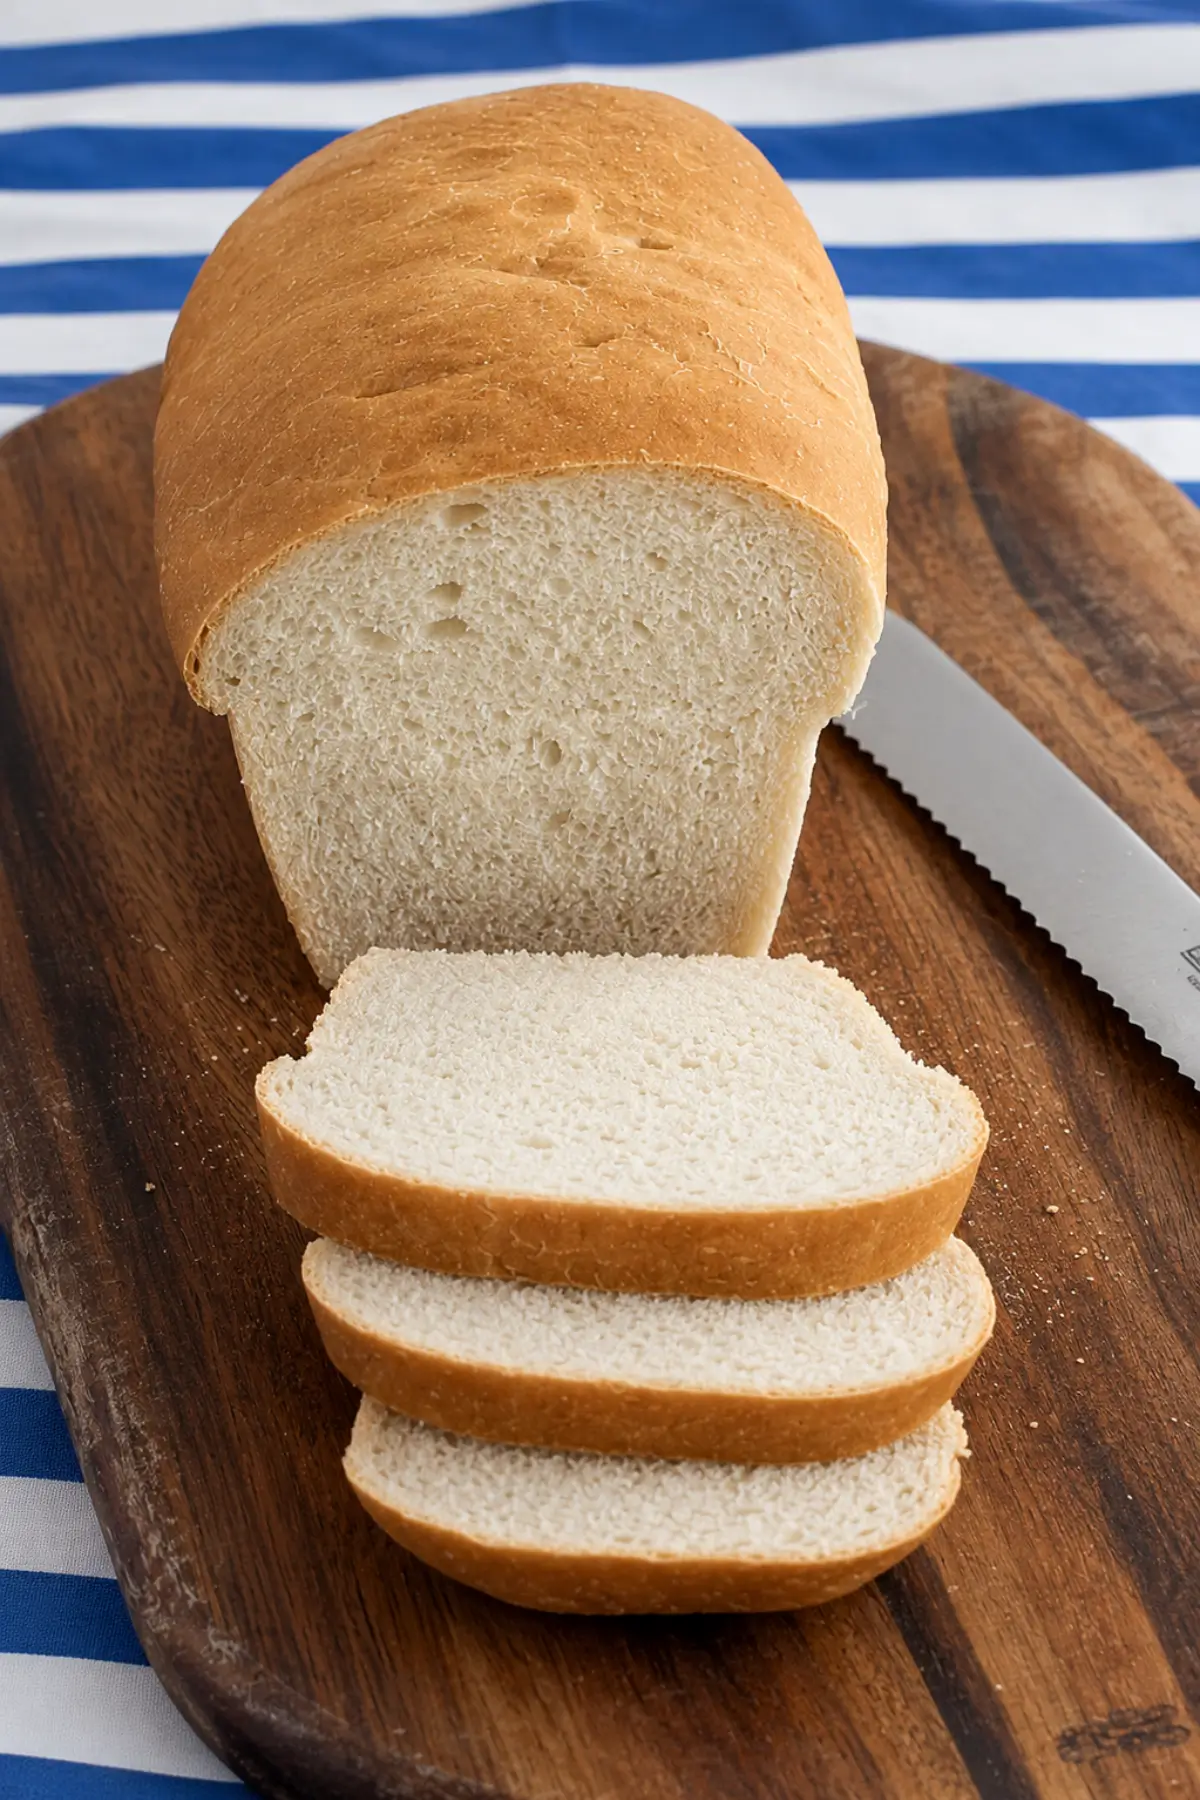
Slice with a Serrated Knife – Let the bread cool completely before slicing, then use gentle sawing motions with a serrated bread knife to avoid squashing the soft crumb.
Variations and Twists
Use Bread Flour – Replace all-purpose flour with bread flour for a slightly chewier texture and a taller loaf with more structure. Bread flour absorbs more liquid. The dough may need slightly less flour to keep the texture soft and lightly tacky.
Swap Oil for Olive Oil – Replace the vegetable oil with light olive oil for a slightly richer flavour and a softer crumb. Extra virgin olive oil gives the loaf a more pronounced savoury flavour.
Mix in Potato Flakes – Add 2 to 3 tablespoons of instant potato flakes along with the flour and salt to help the bread stay softer for longer. The dough may need an extra splash of water if it starts feeling too dry during mixing.
Add Sesame Seeds – Brush the top of the loaf lightly with water before baking, then sprinkle over sesame seeds for extra texture and a nuttier flavour.
Mix in Dried Herbs – Add dried oregano or rosemary to the dough for a savoury loaf that works well with soups and sandwiches.
Favourite Ways to Use This White Sandwich Bread
French Toast – Thick slices soak up the custard mixture well while staying soft in the centre with lightly crisp edges after cooking. This perfect White Sandwich Bread works especially well for French toast because the fluffy crumb absorbs flavour without falling apart.
Grilled Cheese Sandwiches – Bread slices turn crisp and golden in the pan while the inside stays soft around the melted cheese. The thin crust also keeps the sandwich easy to bite into.
Breakfast Toast – Lightly toasted slices pair well with butter, jam, honey, or peanut butter for a simple breakfast. The soft texture and thin crust make it especially good for everyday toast.
Garlic Toast – Toasted slices spread with garlic butter make an easy side for soups, salads, or pasta dishes. The bread crisps nicely while still staying soft through the middle.
Storage and Shelf Life
Store White Sandwich Bread leftovers in an airtight container, bread bag, or wrapped well at room temperature for up to 3 days.
Avoid refrigerating the loaf, as cold temperatures can make bread stale more quickly. Freeze sliced bread in freezer-safe bags or containers for up to 1 month. Thaw slices at room temperature or toast them directly from frozen.
Larger portions can be warmed in the oven at 160 degrees C – 320 degrees F for several minutes until softened and heated through.
Favourite Homemade Bread and Roll Recipes
- Cookie-Cutter Sourdough Rolls
- Walnut Ciabatta Bread
- Pumpkin Bread
- Italian Garlic Croissants
- Olive Breadsticks
White Sandwich Bread Recipe
Equipment
Ingredients
- 410 to 465 g – 3 ¼ to 3 ¾ cups all-purpose flour
- 1 ¼ teaspoon salt
- 7 g – 2 ¼ tsp dry yeast
- 25 g – 2 tbsp sugar
- 325 ml – 1 ⅓ cups warm water
- 30 ml – 2 tbsp vegetable oil
Instructions
Preparing the Dough
- Mix the yeast with the warm water and half of the sugar. Leave it aside until activated.
- In the bowl of an electric mixer fitted with the dough hook, combine half the flour, salt, oil, the yeast mixture, and the remaining sugar. Mix until combined.
- With the mixer running, gradually add the remaining flour until you get a smooth dough that clears the bottom and sides of the bowl while still feeling slightly tacky.Note: The dough should still feel slightly tacky and leave only a small amount of doughy residue on your fingers when touched, without becoming over-floured or dense. Start checking the dough texture at 410 g – 3 ¼ cups of flour, then add more only if needed.
- Knead for about 2 minutes, until the dough becomes smooth, supple, and elastic.
First Rise
- Shape the dough into a ball, cover with plastic wrap, and leave it to rise in a warm place until doubled in size, about 1 hour, depending on the temperature of your kitchen.
Shaping the Loaf
- Grease and flour a 23 × 12.5 cm – 9 × 5 inch loaf pan.
- Lightly punch down the dough and press it into a thick rectangle about 20 cm – 8 inches long.
- Fold the bottom third of the dough over itself like a letter. Fold the top down to overlap the layers, then pinch the seams closed with your fingers on all sides.
- Turn the loaf over with the seam underneath, then tuck the 2 sides under. Gently place the loaf into the pan with the seams on the bottom and the smooth surface facing up.
Second Rise
- Cover with lightly greased plastic wrap and leave the dough to rise until doubled in size and about 2.5 cm – 1 inch above the rim of the pan. This should take about 1 hour, depending on the warmth of your kitchen.
Baking the Bread
- Bake in a preheated oven at 180°C – 350°F for 30–35 minutes, until golden and baked through.
- Remove the bread from the oven and turn it out onto a wire rack. Leave it to cool completely before slicing.
Notes
- The leftover bread can be stored at room temperature in a bread bag or an airtight container for 2 to 3 days, or frozen for up to 1 month.
- Use the flour amount in the recipe as a guide rather than an exact measurement. The total amount can vary depending on how the flour is measured, along with the temperature and humidity in your kitchen. Add the flour gradually until the dough feels soft, smooth, and slightly tacky without becoming dry or dense.
This post may contain affiliate links. If you make a purchase through these links, I may earn a small commission at no extra cost to you.


First time making sandwich and SUCCESS! It did rise faster than I expected so overproofed on the second rise. But it knocked it back down and reshaped it without further issues. Great taste and made terrific tomato sandwiches with the beefsteak tomatoes I had from Saturday’s farmers market.
I am so glad you liked it! Your tomato sandwiches sound delicious!! 🙂