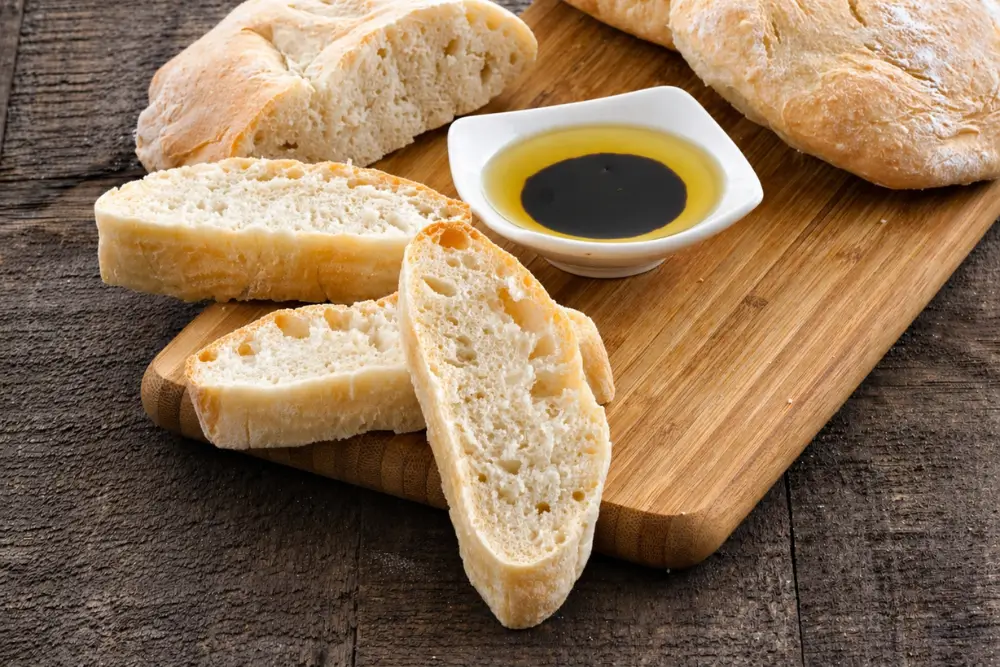
A crisp crust and light open crumb give this Homemade No Knead Ciabatta Bread a rustic texture, making it perfect for sandwiches, soups, and olive oil dipping.
Quick no-knead Ciabatta bread has become one of my favourite homemade breads because it’s simple, fast, and gives excellent results without much effort.
Unlike traditional no-knead bread recipes, this version doesn’t require an overnight proof or hours of waiting. In about 2 hours, you can have fresh homemade Ciabatta with a crisp crust and soft, airy centre straight from the oven.

The flavour is slightly different from long-proof breads since the dough doesn’t rest for quite as long, but I honestly love it this way. It’s practical, affordable, and perfect for everyday baking.

I often make a double batch because it disappears quickly in our house, and the extra loaves freeze very well too. Ciabatta has always been one of my favourite Italian breads, and I’m very happy to share this easy version with all of you. Enjoy!
Reasons to Make Quick No Knead Ciabatta Bread
- No kneading means less mess on the bench and much less hands-on work compared to traditional bread recipes.
- Soft interior and thin crust make this bread easy to serve alongside soups and pasta dishes.
- Quick baking time makes it easier to prepare fresh bread for lunch or dinner.
Key Ingredients for Homemade No Knead Ciabatta Bread
All-Purpose Flour
All-purpose flour gives the Ciabatta its chewy crumb and delicate crisp crust. A moderate-protein flour keeps the inside light and airy while still holding the loaf’s signature uneven holes.
Dry Yeast
Gives the bread its soft, airy texture and classic bakery-style aroma. The flavour stays mild and slightly savoury without becoming too rich.
Salt
Salt brings out the savoury flavour of the dough and balances the subtle sweetness from the honey. It also gives the crust a slightly chewier texture and deeper flavour once baked.
Honey
Honey adds a light sweetness and helps the crust turn a deeper golden brown during baking. It gives the bread a slightly rounder flavour and softer finish.
Find the complete list with measurements in the recipe card below.
How to Make Homemade No Knead Ciabatta Bread
Preparing the Dough
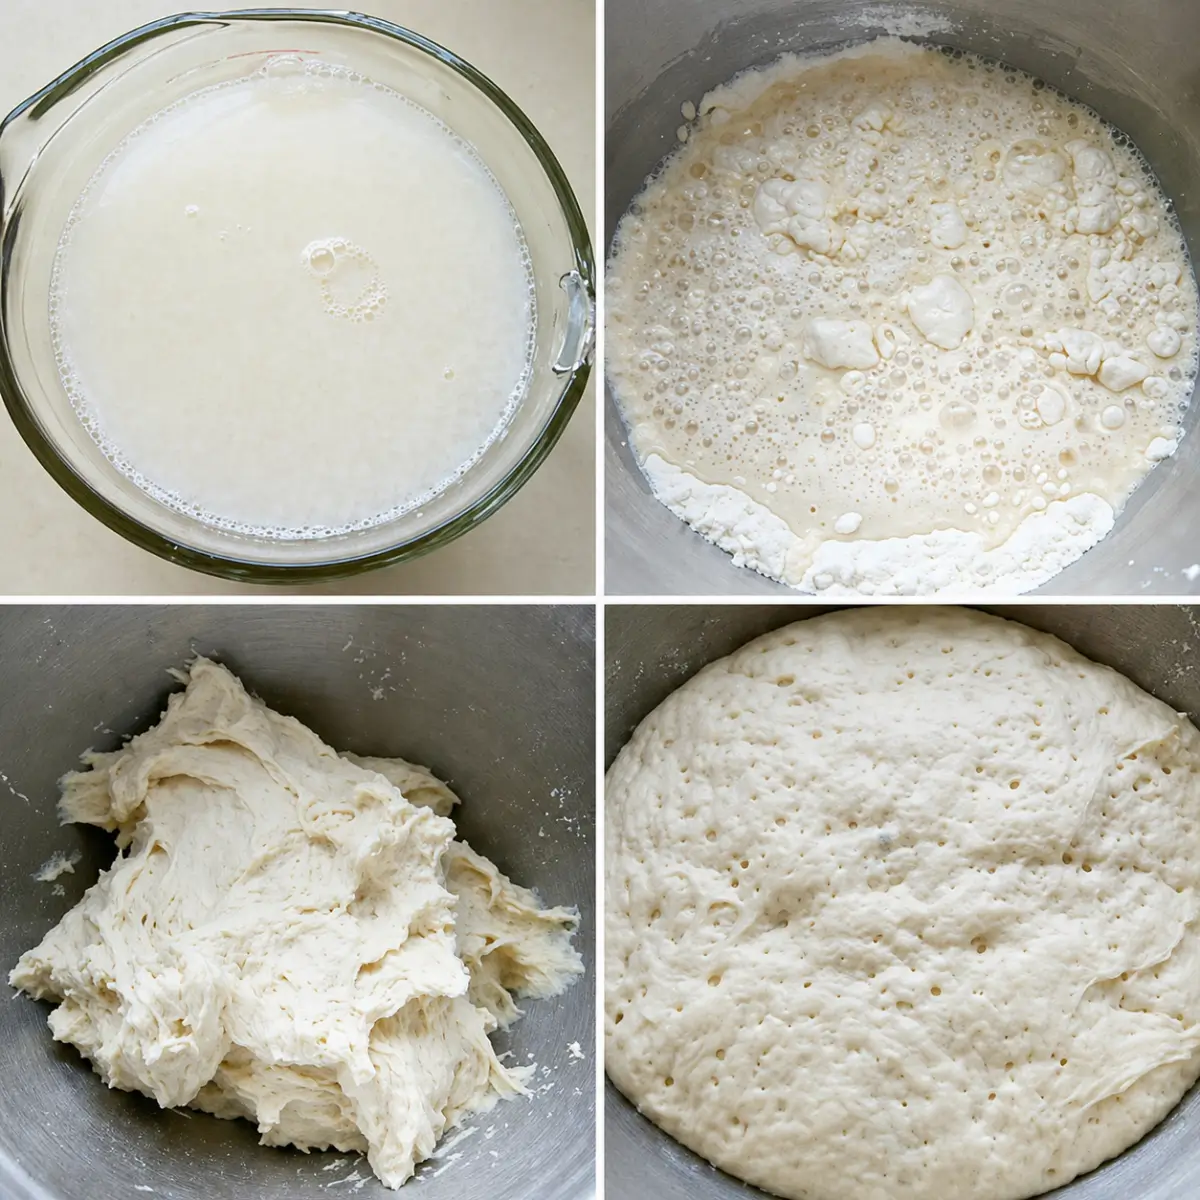
Step 1: Dissolve the yeast and honey in the lukewarm water. Mix well and let it sit for 5 minutes or until frothy.
Step 2: In the bowl of an electric mixer fitted with the whisk attachment, add ¾ of the flour and the salt. Mix briefly, then pour in the yeast and water mixture.
Step 3: Whisk well, then add the remaining flour and whisk until just combined.
Note: You can also whisk everything by hand without using an electric mixer.
Step 4: Cover and let the dough rise in a warm place for 1 hour or until doubled in size.
Shaping and Baking the Ciabatta
Step 1: Sprinkle a little water on the benchtop or work surface. Place 4 pieces of plastic wrap on the wet surface and dust them lightly with flour.
Step 2: Divide the dough evenly and place one portion onto each piece of plastic wrap. Gently press down each portion to remove some of the excess air.
Step 3: Shape each portion into a ciabatta about 2.5 cm – 1 inch thick. Avoid tugging or overworking the dough too much, or it will become too firm.
Step 4: Pick up one piece of plastic wrap and flip it onto a baking tray lined with baking paper, leaving the floured side facing upwards.

Step 5: Bake in a preheated oven at 200°C – 390°F for 30–35 minutes. Place a small pot of hot water in the oven for the first 15 minutes to create humidity. Remove it and continue baking for the remaining 15–20 minutes.
Step 6: Remove the ciabatta from the oven and let it cool on a wire rack.
Step 7: Slice the ciabatta and serve once completely cooled.

Frequently Asked Questions
Yes. A whisk, wooden spoon, or sturdy spatula all work well for mixing this dough by hand. Since the recipe doesn’t require kneading, the dough comes together quite easily without special equipment.
Dried rosemary, oregano, thyme, or Italian herb blends all work well in this recipe. Add them directly to the flour before mixing the dough.
Yes. Let the bread cool completely before freezing it in airtight bags or containers for up to 3 months. Reheating it in the oven helps bring back some of the crust texture.
Cool the bread fully on a wire rack before storing it. Trapped steam softens the crust quickly, especially if the bread is covered while still warm.
Yes. Bread flour gives the Ciabatta a slightly chewier texture and stronger structure. The dough may feel a little firmer, but the bread still develops a light, airy crumb.
Extra Help from the Kitchen
Use Wet Hands When Handling the Dough – Damp hands handle wet dough more easily and help prevent extra flour from drying out the crust.
Leave Enough Space Between the Loaves – Leave room between each loaf on the tray because the dough spreads as it bakes.
Check the Bottom Before Removing from the Oven – Turn one loaf over carefully and tap the base lightly. A hollow sound usually means the inside has finished baking properly.
Wait Before Cutting Into the Bread – Freshly baked Ciabatta has a light, airy crumb and crisp crust once fully cooled. Slicing too early can make the centre slightly sticky.
Use a Bench Scraper for Sticky Dough – A bench scraper makes it easier to divide and lift the wet dough without pulling too much air out of it.
Variations and Twists
Whole Wheat Ciabatta – Replace up to ½ cup of the all-purpose flour with whole wheat flour for a nuttier flavour and slightly darker crumb. Keeping most of the flour white still helps maintain the airy texture.
Olive Oil Ciabatta – Add 1 tablespoon olive oil to the dough for a softer crumb and slightly richer flavour. The crust also becomes a little more tender after baking.
Ciabatta Rolls – Divide the dough into smaller portions and shape them into rustic rolls instead of larger loaves. Reduce the baking time slightly and check the bottoms for a hollow sound.
Bread Flour Ciabatta – Replace the all-purpose flour with bread flour for a chewier crumb and slightly stronger structure.
Garlic Herb Ciabatta – Add dried Italian herbs and finely minced garlic to the dough for a more savoury flavour. Rosemary, oregano, and thyme all work well with the crisp crust and airy centre.
Storage and Shelf Life
Store the Ciabatta at room temperature in a paper bag or loosely wrapped in a clean tea towel for up to 2 days. Avoid storing it in the fridge because the bread can become stale more quickly.
This bread freezes very well once fully cooled and stored in airtight bags or containers, including Ziploc bags. Freeze the loaves for up to 3 months for the best texture and flavour.
Thaw the bread at room temperature, then place it in a hot oven at 180°C – 350°F for about 5 minutes, or until the crust becomes crisp again.
Delicious Bread Recipes to Try Next
- White Sandwich Bread
- Papaya Banana Bread
- Olive Oil Snail Bread Rolls
- Walnut Ciabatta Bread
- Durum Wheat Italian Bread Rolls
Homemade No Knead Ciabatta Bread Recipe
Equipment
Ingredients
- 700 g – 5 ½ cups all-purpose flour
- 520 g – 2 ¼ cups water – lukewarm
- 7 g – 2 ¼ tsp dry yeast
- 17 g – 3 tsp salt
- 1 ½ tsp honey
Instructions
Preparing the Dough
- Dissolve the yeast and honey in the lukewarm water. Mix well and let it sit for 5 minutes or until frothy.
- In the bowl of an electric mixer fitted with the whisk attachment, add ¾ of the flour and the salt. Mix briefly, then pour in the yeast and water mixture.
- Whisk well, then add the remaining flour and whisk until just combined.Note: You can also whisk everything by hand without using an electric mixer.
- Cover and let the dough rise in a warm place for 1 hour or until doubled in size.
Shaping and Baking the Ciabatta
- Sprinkle a little water on the benchtop or work surface. Place 4 pieces of plastic wrap on the wet surface and dust them lightly with flour.
- Divide the dough evenly and place one portion onto each piece of plastic wrap. Gently press down each portion to remove some of the excess air.
- Shape each portion into a ciabatta about 2.5 cm – 1 inch thick. Avoid tugging or overworking the dough too much, or it will become too firm.
- Pick up one piece of plastic wrap and flip it onto a baking tray lined with baking paper, leaving the floured side facing upwards.
- Bake in a preheated oven at 200°C – 390°F for 30–35 minutes. Place a small pot of hot water in the oven for the first 15 minutes to create humidity. Remove it and continue baking for the remaining 15–20 minutes.
- Remove the ciabatta from the oven and let it cool on a wire rack.
- Slice the ciabatta and serve once completely cooled.
Notes
This post may contain affiliate links. If you make a purchase through these links, I may earn a small commission at no extra cost to you.


Love ciabatta with olive oil, yum it looks!
Hello from Greece!
Thank you fot this wonderful recipe! I’ve been making it for the last 3 months and never failed!
Have a nice day!
Hi Anastasia! THANK YOU so much for stopping by and letting me know! I am so glad you like it! It is my go-to recipe for bread! Cheers! <3
Made the easy ( yes) Ciabatta. 4 loves looking beautiful. Followed the recipe. Small pan of water in the oven etc…. Density more then the airy type bread I had expected. Where have I gone wrong? Keep in mind, I live in the “Mile high city of Colorado + 200 feet more in my location. Thank you for your consideration of different altitudes.
It may have something to do with the altitude. I have found this interesting article about bread baking: http://www.wikihow.com/Adjust-Bread-Recipes-for-High-Altitude You may want to try adding an additional rising cycle and/or add a bit more water to the dough. Let me know if it works. 🙂
Thank you!! Consideration in high altitude areas is a huge ” thank you”. Definitely will try those different “measures”, & continue following your inspirational recipes .
I made this recipe last week and the bread only lasted two days in my house. It was a instant hit with my boys and my husband is asking for more! I’ll have to double the recipe this time.
It was super quick and easy to make. After crunching the numbers, it comes out to about 2 calories per gram of baked bread. This bread is totally worth the calories!
Rating this is a no brainer…. As EASY 5 stars! Incredibly easy AND delicious!!
I tried this recipe (halved) earlier this week, putting the ingredients in the bread maker on the dough cycle, then ran out the door to meet a friend at the gym. When I got home I had perfectly raised dough which I then shaped and baked. For those of us who don’t have a bench top, I used my (cold) glass stove top to put the plastic wrap on. I just have to say that this is one of the best breads I have ever baked or eaten! The texture was perfect, the crust was perfect, the taste was perfect! I was especially impressed that this was achieved without starting a day ahead to make the poolish (or biga). This will now be my go-to recipe for a crunchy, Italian-style bread! Thank you for sharing this!
Is there anything better than really good olive oil and a touch of balsamic scooped up with a bite of that ciabatta? I think not!
This sounds so delicious! Can’t wait to try it:)