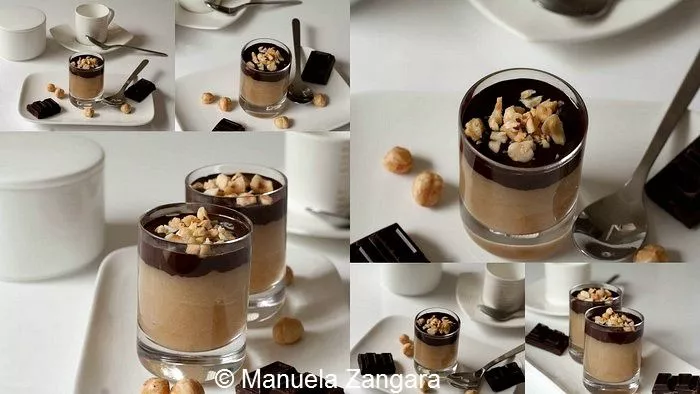
A smooth Pear Mousse Recipe made with ripe pears, maple syrup, dark chocolate, and hazelnuts. Light and flavourful, it’s an easy gluten-free dessert that suits every season.

I love serving desserts in small shooter glasses. They look pretty on the table, and you can enjoy them even after a big meal without feeling too full. This Pear Mousse Recipe came from a few ripe pears I had sitting in the fruit bowl. I baked them with a little maple syrup and turned them into a smooth, light mousse.
Instead of using sugar, I chose maple syrup for its caramel flavour and slight bitterness, which balance the natural sweetness of the pears.
To finish, I spooned over some melted dark chocolate since pears and chocolate are such a perfect match. I sprinkled crushed toasted hazelnuts on top for extra crunch.
Reasons to Try This Pear and Chocolate Treat
- Easy to scale up for dinner parties or to make a few portions for the week.
- Everyday ingredients make it simple to prepare any day of the week.
- This easy pear dessert recipe is lighter than most desserts yet satisfying enough to close a meal.
- Ripe pears blend into a creamy mousse with natural sweetness and a soft finish.
Key Ingredients for Pear Mousse Recipe
Pears
Choose ripe, sweet pears such as Williams or Packham. Baking them first deepens their flavour and gives the mousse a smooth texture. Slightly overripe pears work well too, as they blend easily.
Maple Syrup
This natural sweetener adds a warm caramel note and a faint hint of bitterness that balances the sweetness of the pears. It also helps the mousse hold a soft, silky texture once chilled.
Dark Chocolate
A small amount of melted dark chocolate adds richness and contrast to the light pear base. Aim for around 70% cocoa to achieve the right balance between sweetness and depth.
Find the complete list with measurements in the recipe card below.
How to Make Chocolate Pear Mousse Recipe
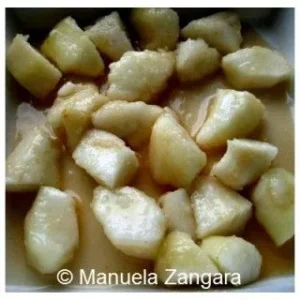
Step 1: Put the chopped pears and the maple syrup in an oven-proof dish and bake in a preheated oven at 200°C – 390°F for 30 minutes or until caramelised (You can place the pears under the broiler for 5 minutes if you prefer them more caramelised).
Step 2: When ready, blend the pears and put the mousse in the shooter glasses. Keep in the fridge until ready to serve.
Step 3: When you want to serve the mousse, crush the toasted hazelnuts and melt the dark chocolate. Divide the melted chocolate among the shooters and top with the crushed hazelnuts.
Step 4: Serve immediately.

Frequently Asked Questions
Apples or peaches work well and follow the same baking and blending process, though the flavour and texture will differ slightly. Pears create a lighter, smoother result that balances well with dark chocolate.
Use dark chocolate with around 70% cocoa for a balanced flavour that complements the sweetness of the pears and maple syrup. It melts evenly and adds depth to the mousse.
Yes, peeling is recommended. The skin can make the mousse grainy and affect the smooth finish once blended. Removing it helps achieve a consistent, creamy texture.
Extra Help from the Kitchen
Ripen Pears Naturally – If the pears are still firm, place them in a paper bag with a banana for a day or two before baking. The ethylene gas from the banana helps them soften and develop a sweeter flavour.
Bake Until Caramelised – The pears should turn golden and release some syrup in the dish; that’s when they develop their best flavour.
Blend While Warm – Warm pears create a velvety consistency and help the maple syrup mix evenly into the mousse.
Chill Before Topping – Cooling the mousse lets it set lightly so the melted chocolate doesn’t sink or mix into the fruit base.
Avoid Over-Blending – Blend the pears only until smooth. Over-blending can make the texture thin instead of creamy.
Variations and Twists
Add a Hint of Spice – Mix a pinch of cinnamon or nutmeg into the baked pears for a cosy, autumn-inspired flavour.
Swap the Nuts – Replace hazelnuts with almonds or walnuts for a slightly different texture and aroma.
Add Creaminess – Blend a spoonful of coconut cream into the mousse for a creamier, tropical variation.
Chocolate Base Variation – Stir some melted dark chocolate directly into the mousse before chilling for a richer version, similar to a Pear and Chocolate Mousse.
Citrus Twist – Add a few drops of lemon juice before baking to lift the flavour and keep the fruit bright.
Storage and Shelf Life
Keep the mousse covered with cling film or in airtight glasses in the fridge for up to 2 days. Add the melted chocolate and hazelnuts only before serving so the topping stays crisp.
I don’t recommend freezing this dessert, as it tends to lose its smooth texture once thawed.
What to Serve with This Pear Mousse Recipe
Serve these Pear Mousse Shooters at the end of a meal for a light and refreshing finish. They pair well with coffee, espresso, or a small glass of dessert wine.
For a special occasion, arrange them on a tray alongside mini panna cottas or chocolate truffles for a simple yet refined dessert selection. Their individual portions make them ideal for entertaining and easy to serve.
Sweet Treats You’ll Want to Make Next
Pear Mousse Recipe
A smooth Pear Mousse Recipe made with ripe pears, maple syrup, dark chocolate, and hazelnuts. Light and flavourful, it’s an easy gluten-free dessert that suits every season.
Ingredients
- 2 medium-sized pears – peeled, cored, and chopped
- 50 ml – 1.7 oz. maple syrup
- 100 g – 3.5 oz. dark chocolate – melted
- 15 toasted hazelnuts – crushed
Instructions
-
Put the chopped pears and the maple syrup in an oven-proof dish and bake in a preheated oven at 200°C – 390°F for 30 minutes or until caramelised (You can place the pears under the broiler for 5 minutes if you prefer them more caramelised).
-
When ready, blend the pears and put the mousse in the shooter glasses. Keep in the fridge until ready to serve.
-
When you want to serve the mousse, crush the toasted hazelnuts and melt the dark chocolate. Divide the melted chocolate among the shooters and top with the crushed hazelnuts.

-
Serve immediately.
Recipe Notes
If you plan to make the mousse in advance, use Nutella or chocolate sauce instead of melted chocolate, as it tends to firm up again in the fridge.


I love the new look, and the pear dessert looks amazing!! I think I would really like it! I just love your recipes and your blog! xx
I like the look of the new design and the recipe format – it’s very clean and easy to use. And love these shooters – I’ve never had pear and chocolate before, but it sounds wonderful. I’m featuring this post in today’s Food Fetish Friday (with a link-back and attribution as always). Thanks for continuing to inspire me with your creations…
This is a perfect dessert!
Your blog looks great, Manu. Your photos are so clear and beautiful. What camera do you use?
Oh my gosh, these are divine. So pretty Manu. Love that last shot.
I remember your key lime mousse shooters. I’m made them 3 or 4 times and they’ve always been a huge hit! I bet these will be loved just as much. The pear mousse is quite clever. BTW – your new look looks great!
great simple delicious Manu’s Menu!!
Love it Manuela
xox Karin