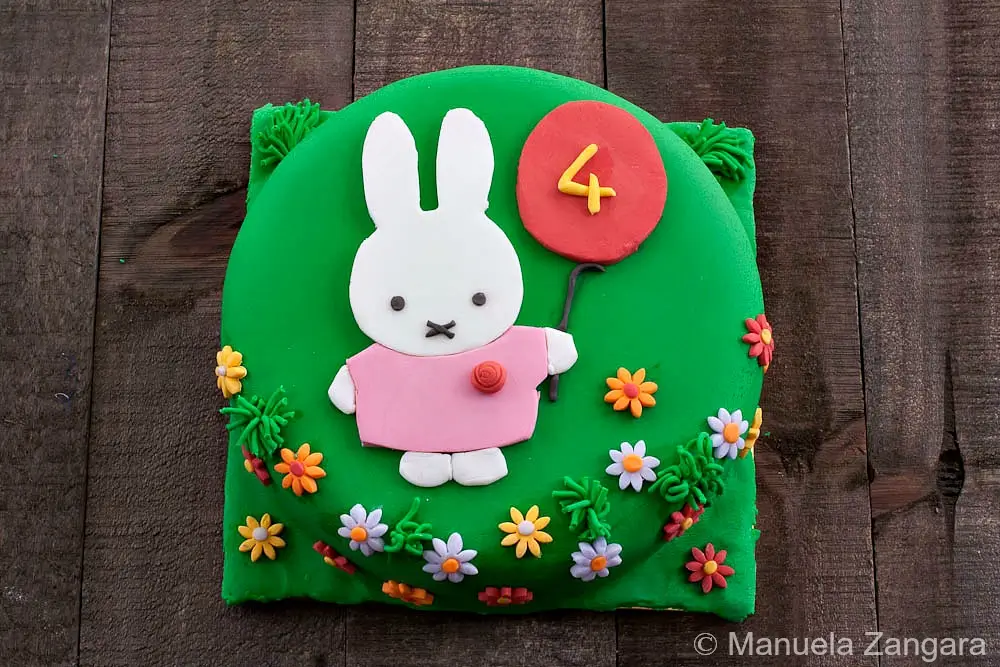
Miffy Cake cuteness is hard to resist and easier to make than it looks. Bake it for your next party and enjoy the smiles it brings to everyone around.
My little Georgia loves Miffy. She has had a Miffy doll since she was very little and has never separated from it. She sleeps with it and takes it everywhere she goes. It even came with us to Tahiti.
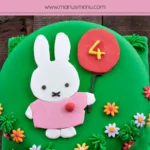
So when I asked her what cake she wanted for her 4th birthday party, she had no doubts at all: “I want a Miffy cake!” And so it was.
I decided to make a fondant cake with an image of Miffy on the top, just like the Peppa Pig cake I made for her last year, which turned out to be very popular. I tend to prefer flat images over figurines, as the final result feels much more realistic, and they are also easier and quicker to make.
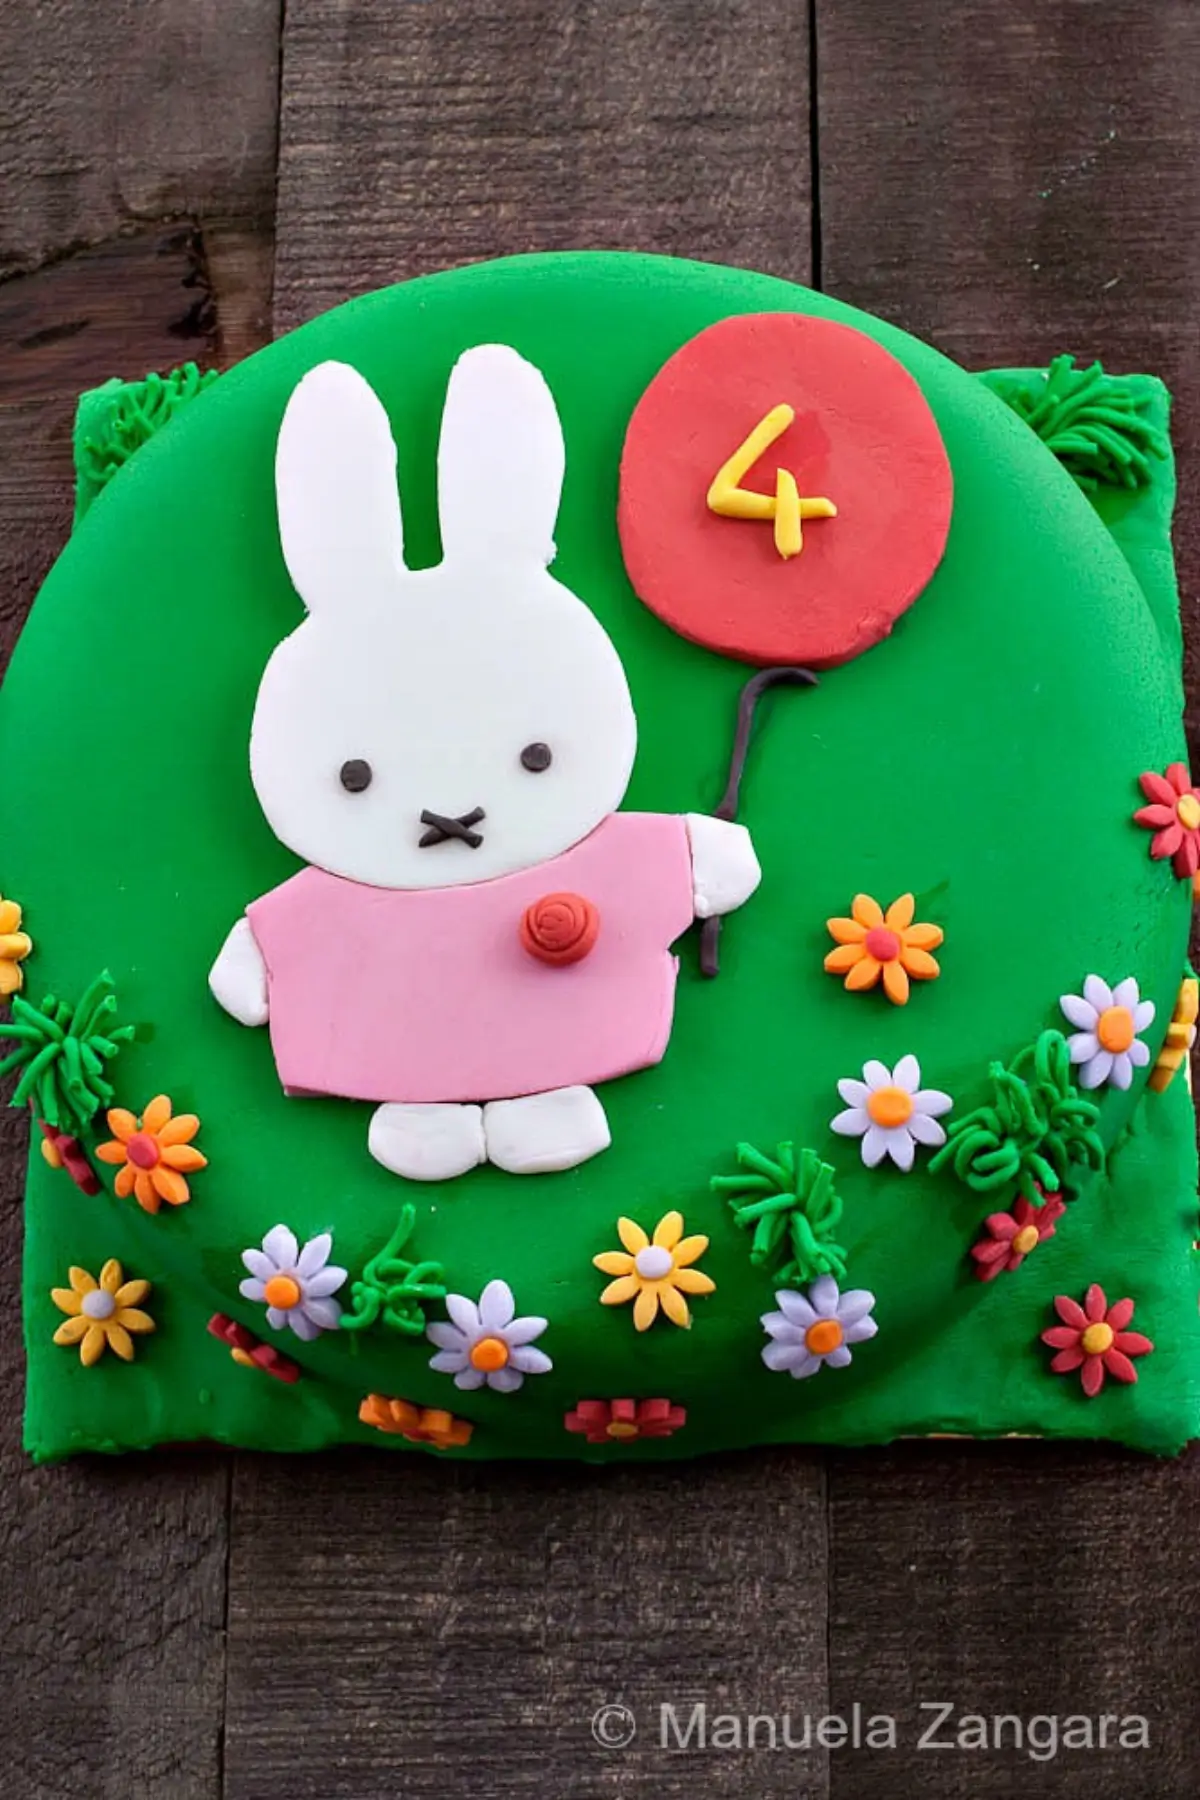
In the end, I was very happy with how it turned out. I added some flowers and grass, but really, you can add anything you like. So have fun and be creative!
Why Make a Miffy Cake for Your Next Party
- Cute character design makes the cake stand out straight away on a birthday table.
- Leftover slices stay enjoyable later in the day or the next morning with tea or milk.
- Cake does not crumble too much, which helps when children are eating on their own.
Key Ingredients for Miffy Cake
Yoghurt Cake
Gives the cake a soft crumb that stays easy to slice once layered and covered. A full-fat plain yoghurt works best, as it keeps the sponge moist and tender without making it heavy.
Coloured Fondant
Used both to cover the cake and to shape the decorations. Ready-to-roll fondant is easiest to work with, especially for flat designs. Gel food colours blend smoothly and help the fondant stay pliable while you knead and shape it.
Icing for Crumb Coating
Helps even out the surface before the fondant goes on. A buttercream with a slightly looser texture spreads more easily and glides over the cake without pulling crumbs into the icing.
Find the complete list with measurements in the recipe card below.
How to Make Miffy Cake
Cake Preparation
Step 1: Bake the yoghurt cake. This can be done in advance, and the cake can be frozen until ready to assemble.
Fondant Preparation
Step 1: Colour all the fondant needed for the decorations. Dip a toothpick into the gel colour, rub it onto the fondant, then knead until the colour is evenly combined.
Step 2: Prepare the fondant decorations about 3 to 4 days before the party. Keep the fondant well wrapped and stored in a dry place to prevent it from hardening.
Making the Stencils
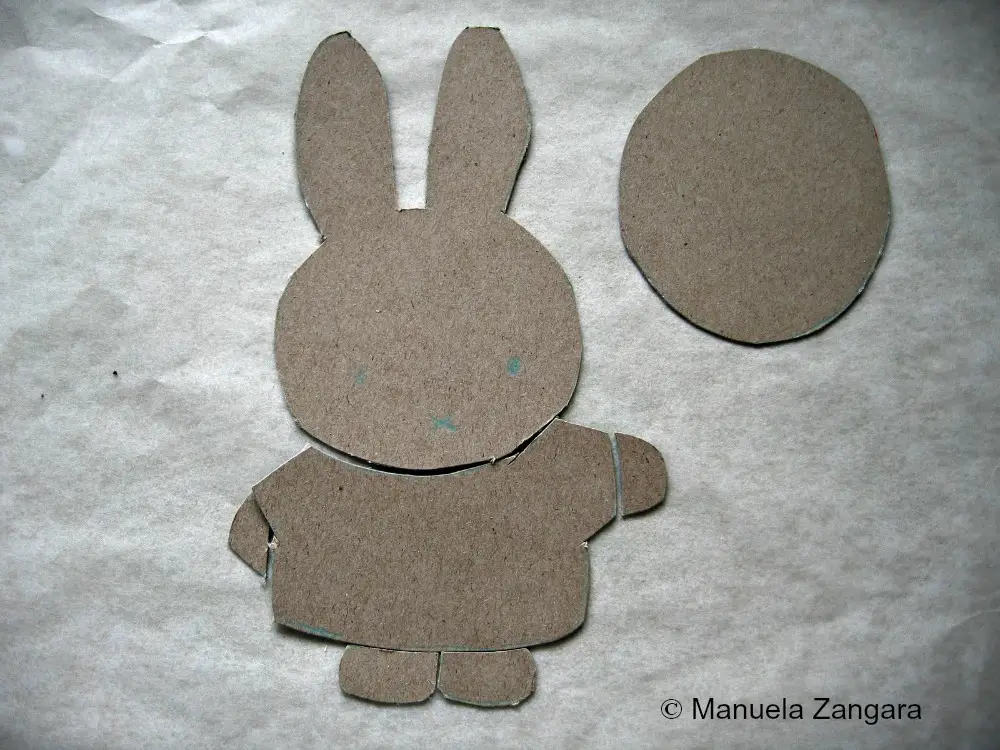
Step 1: To create Miffy, prepare custom stencils. Print the desired image and gather clean cardboard, transfer paper, a pen, and a sharp craft knife or precision blade.
Step 2: Place the transfer paper between the image and the cardboard, then trace the outline with a pen to transfer the design. Cut out all the individual pieces. This method can also be used for making cookie stencils.
Cake Assembly and Decoration
Step 1: Assemble the cake the day before the party. Prepare icing for the crumb coat, using an icing recipe that is slightly less dense, so it spreads smoothly and is easy to apply.
Step 2: Remove the two yoghurt cakes from the freezer and level them while still frozen, using a sharp serrated knife.
Step 3: Spread a layer of icing on one cake and place the second cake on top. Choose the smoothest and flattest surface for the top of the cake, often the bottom of one of the cakes, as this makes icing and decorating easier.
Step 4: Apply the crumb coat while the cakes are still frozen, starting from the top and then moving to the sides. Use a cake spatula to smooth the surface as much as possible. Once fully covered, place the cake in the fridge to set. This helps the fondant look smooth and prevents crumbs from showing through.

Step 5: Once the icing has dried, transfer the cake onto a cake board and secure it to the base with a small amount of icing.
Step 6: Roll out the green fondant and cover the cake. Smooth it with a fondant smoother, then trim away the excess.
Step 7: Using a small amount of water, attach the prepared decorations and create Miffy using the stencils.
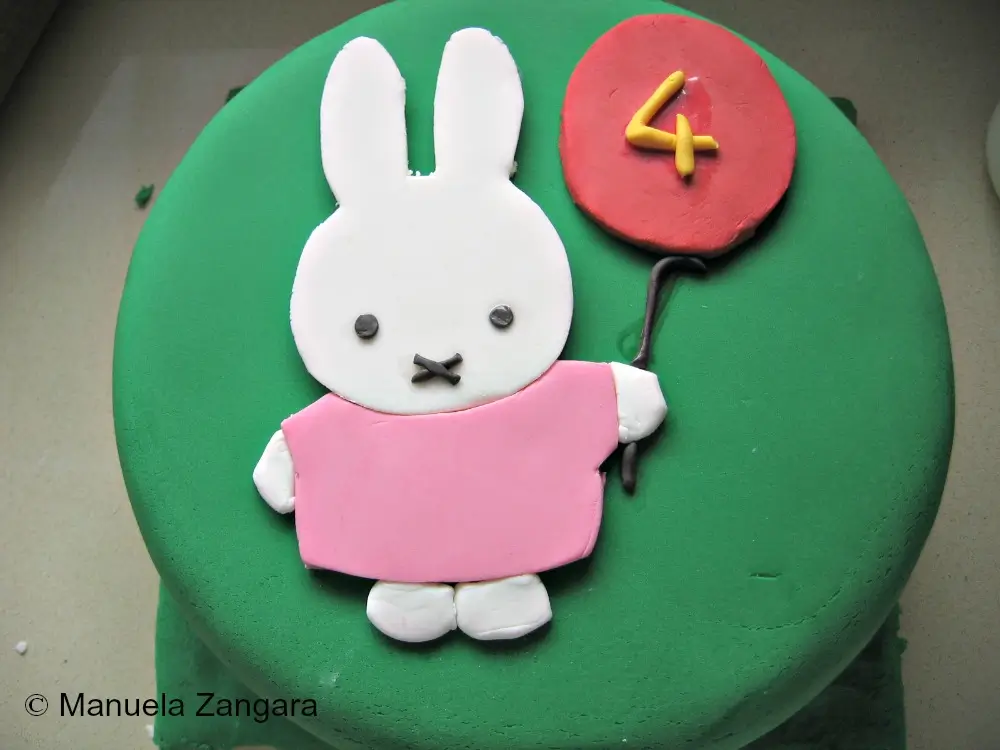
Step 8: Use a clean garlic press to create the grass, then shape the flowers with cookie cutters and attach them to the cake to finish the decoration.

Frequently Asked Questions
No special tools are required. A printed image, cardboard, transfer paper, and a sharp craft knife work well for making the stencil.
Buttercream works for covering the cake, but fondant gives a clearer finish for flat character designs like Miffy.
Liquid colouring can be used in small amounts, but it may soften the fondant. Add it gradually and allow the fondant to rest before shaping.
Lightly knead it again with clean hands to warm it slightly. If needed, a tiny amount of vegetable shortening can help restore flexibility.
Extra Help From the Kitchen
Match Fondant Thickness to Cake Height – Rolling the fondant slightly thicker than usual helps it drape more easily over straight sides without tearing, which is especially useful for taller layered cakes.
Let Coloured Fondant Rest Before Cutting – Letting coloured fondant sit wrapped for 20–30 minutes gives it time to relax, making stencil cuts cleaner and edges more defined.
Use a Dry Brush for Fine Details – A small, clean, dry brush makes it easier to move tiny fondant pieces into place without stretching them or leaving marks behind.
Check Cake Temperature Before Covering – The cake should feel cool to the touch, not cold. Very cold surfaces can cause moisture to form under the fondant once it settles.
Test Decoration Placement First – Arranging fondant shapes on baking paper before attaching them helps with spacing and alignment, and avoids having to lift and reposition pieces on the cake.
Variations and Twists
Miffy Cake With Simple Fondant Topper – Keep the cake surface plain and place a flat fondant Miffy topper in the centre, focusing on clean shapes and minimal decoration for a softer party look.
Rainbow Layer Cake With Fondant Miffy – Tint the yoghurt cake batter in different colours before baking, then stack the layers as usual and finish with the same fondant Miffy design on top.
Minimalist Miffy Birthday Cake Design – Cover the cake in a single colour of fondant and limit decorations to the Miffy image alone, allowing the character to stand out without added elements.
Miffy Theme Cake for All Occasions – Adjust background colours and small fondant details to suit birthdays, baby showers, or family gatherings while keeping the same stencil and assembly method.
Storage and Shelf Life
Store the fully assembled Miffy Cake at room temperature in a cool, dry place, away from direct sunlight, for up to 24 hours.
Fondant-covered cakes keep best outside the fridge, as refrigeration can cause condensation and soften the fondant. In very warm or humid conditions, the cake can be refrigerated for up to 48 hours in a cake box or airtight container. Bring it back to room temperature before serving.
Fondant decorations should be stored separately at room temperature in an airtight container, kept away from heat and humidity. Add them only once the cake is ready to be finished to keep edges neat and colours even.
Other Themed Cakes from the Kitchen
Miffy Cake Recipe
Miffy Cake cuteness is hard to resist and easier to make than it looks. Bake it for your next party and enjoy the smiles it brings to everyone around.
Ingredients
- yoghurt cake
- coloured fondant
- icing – for crumb coating
- icing sugar/cornstarch
Instructions
Cake Preparation
-
Bake the yoghurt cake. This can be done in advance, and the cake can be frozen until ready to assemble.
Fondant Preparation
-
Colour all the fondant needed for the decorations. Dip a toothpick into the gel colour, rub it onto the fondant, then knead until the colour is evenly combined.
-
Prepare the fondant decorations about 3 to 4 days before the party. Keep the fondant well wrapped and stored in a dry place to prevent it from hardening.
Making the Stencils
-
To create Miffy, prepare custom stencils. Print the desired image and gather clean cardboard, transfer paper, a pen, and a sharp craft knife or precision blade.
-
Place the transfer paper between the image and the cardboard, then trace the outline with a pen to transfer the design. Cut out all the individual pieces. This method can also be used for making cookie stencils.
Cake Assembly and Decoration
-
Assemble the cake the day before the party. Prepare icing for the crumb coat, using an icing recipe that is slightly less dense, so it spreads smoothly and is easy to apply.
-
Remove the two yoghurt cakes from the freezer and level them while still frozen, using a sharp serrated knife.
-
Spread a layer of icing on one cake and place the second cake on top. Choose the smoothest and flattest surface for the top of the cake, often the bottom of one of the cakes, as this makes icing and decorating easier.
-
Apply the crumb coat while the cakes are still frozen, starting from the top and then moving to the sides. Use a cake spatula to smooth the surface as much as possible. Once fully covered, place the cake in the fridge to set. This helps the fondant look smooth and prevents crumbs from showing through.
-
Once the icing has dried, transfer the cake onto a cake board and secure it to the base with a small amount of icing.
-
Roll out the green fondant and cover the cake. Smooth it with a fondant smoother, then trim away the excess.
-
Using a small amount of water, attach the prepared decorations and create Miffy using the stencils.
-
Use a clean garlic press to create the grass, then shape the flowers with cookie cutters and attach them to the cake to finish the decoration.


I LOVED your work and photography is excellent and so are the recipes and the presentation!