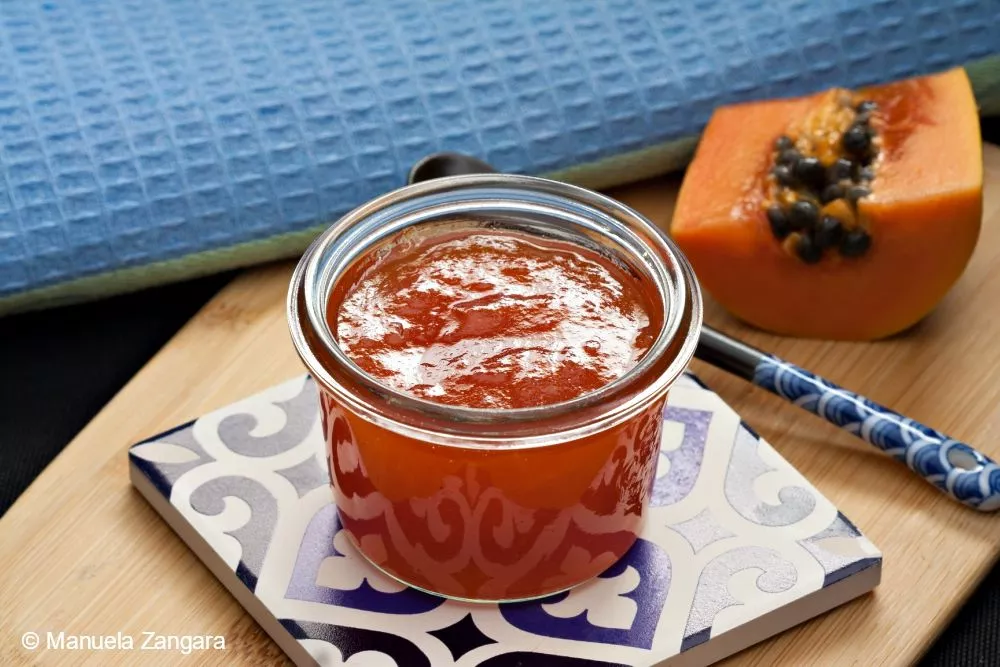
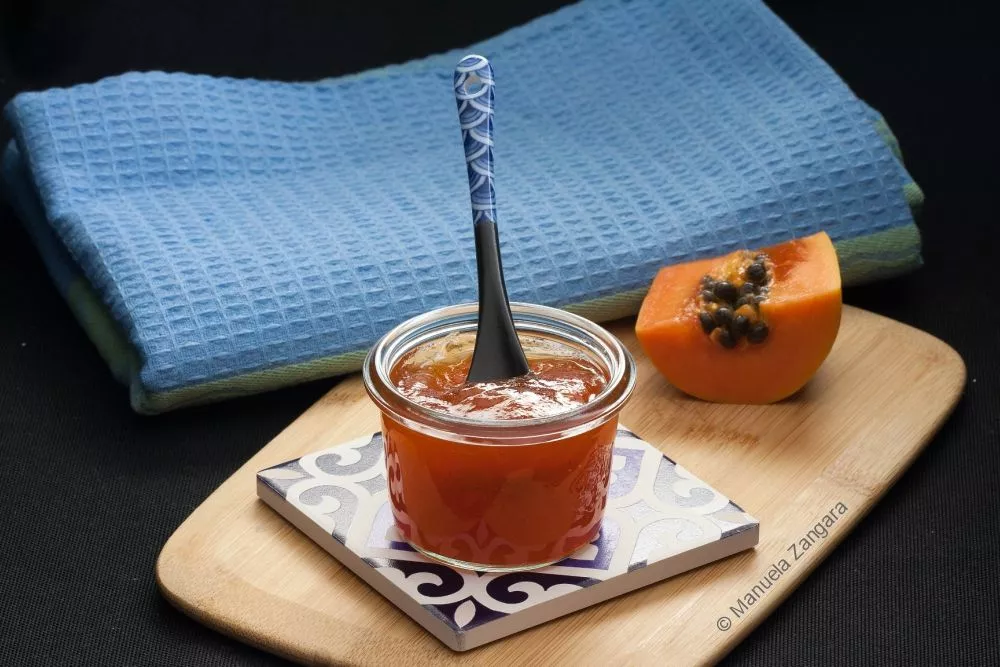
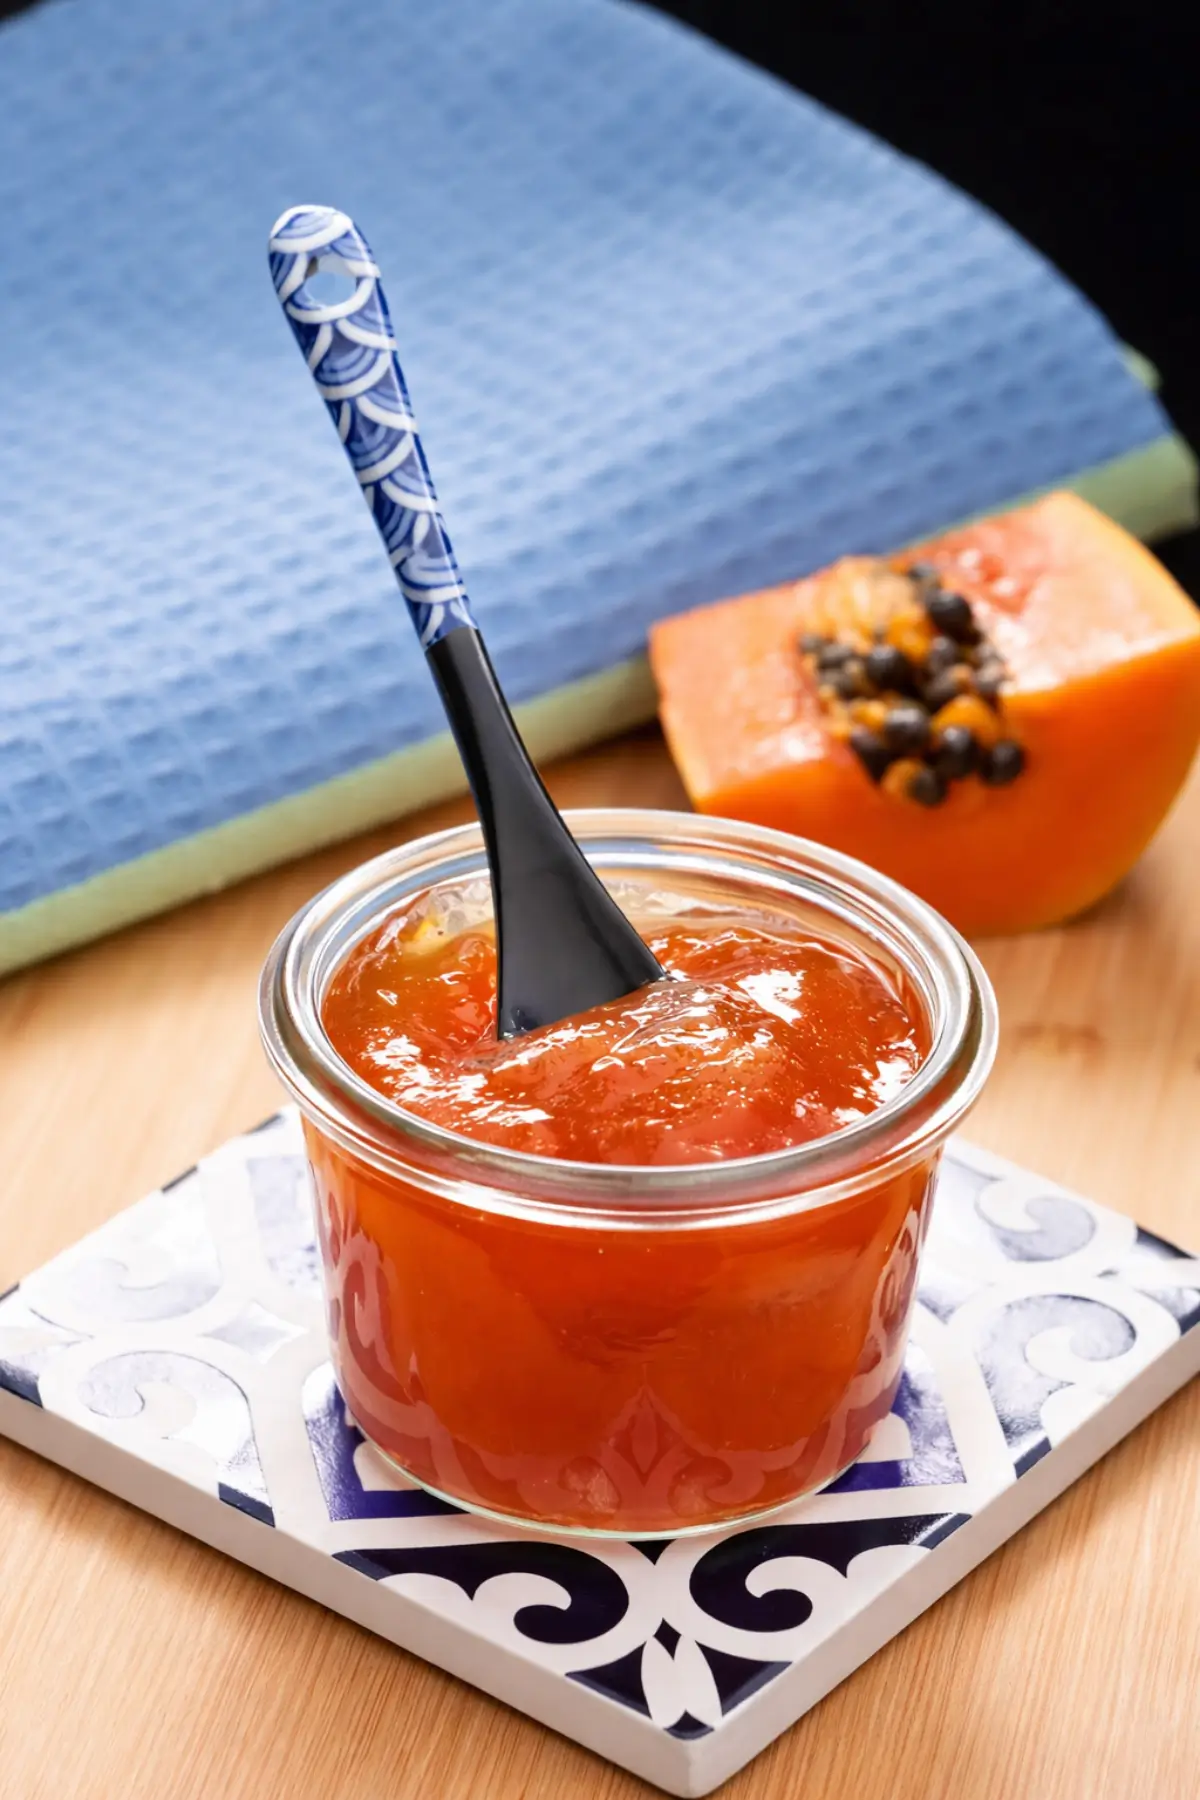
Few things feel as rewarding as making your own Papaya Jam. It’s smooth, golden, and perfect for spreading on toast with a cup of tea.
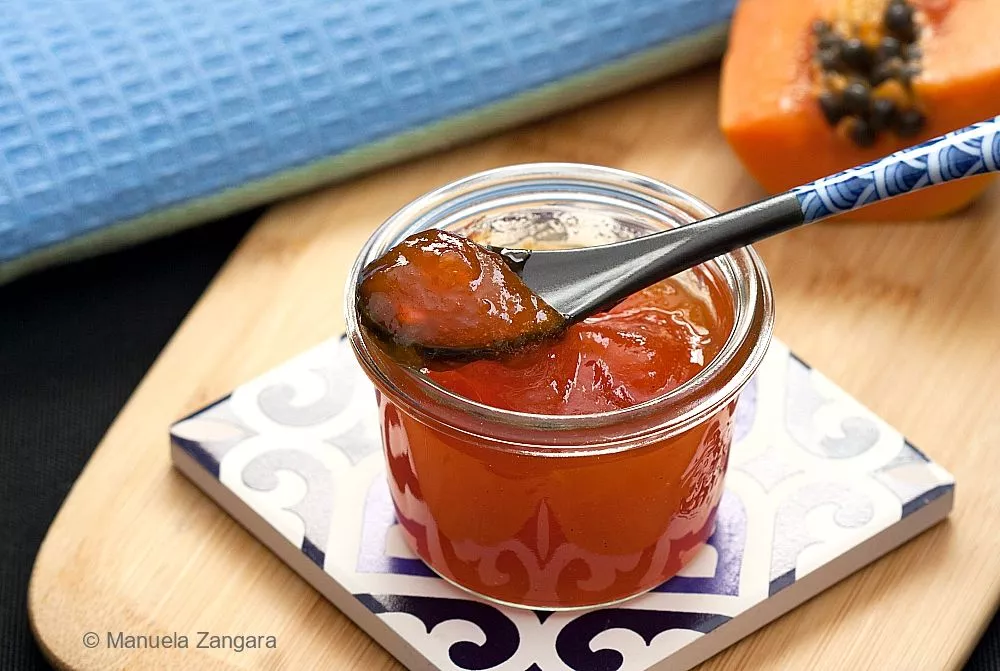
I have a confession to share. My fridge is full of homemade jam jars, and one of my favourites is this Papaya Jam. I like having a choice at breakfast, so every morning feels a bit different. Sometimes Peach, sometimes Strawberry, and sometimes something tropical like this tropical jam.
At our local green grocer’s, I often find papayas that are perfectly ripe and sold at a lower price. I can never walk past them without taking a few home.
When I saw some recently, I immediately thought of the papaya jams I used to enjoy in Tahiti. They were sweet, slightly peppery, and full of sunshine.
That memory gave me the idea to make my own homemade papaya jam. I used a little lemon to lift the flavour and a hint of vanilla for warmth. This easy papaya jam recipe is simple enough for anyone to make, even on a quiet weekend morning.
What’s your favourite jam flavour to make at home?
Why Everyone Enjoys This Homemade Jam
- This easy papaya jam recipe can be adjusted for sweetness or thickness to match preference.
- Perfect for anyone making jam for the first time and wanting a simple recipe.
- The batch size can be increased or reduced easily based on the fruit available.
Key Ingredients for Papaya Jam
Papaya
Use ripe papayas for their natural sweetness and bright colour. The softer the fruit, the smoother the jam will be. Overripe papayas work perfectly too.
Granulated Sugar
Balances the papaya’s flavour and helps the jam thicken naturally as it cooks. It also preserves the fruit, so the jam keeps well for months.
Lemon Juice
Adds a light citrus lift that enhances the fruit’s flavour and helps the mixture set without pectin. It keeps the jam tasting fresh.
Find the complete list with measurements in the recipe card below.
How to Make Papaya Jam
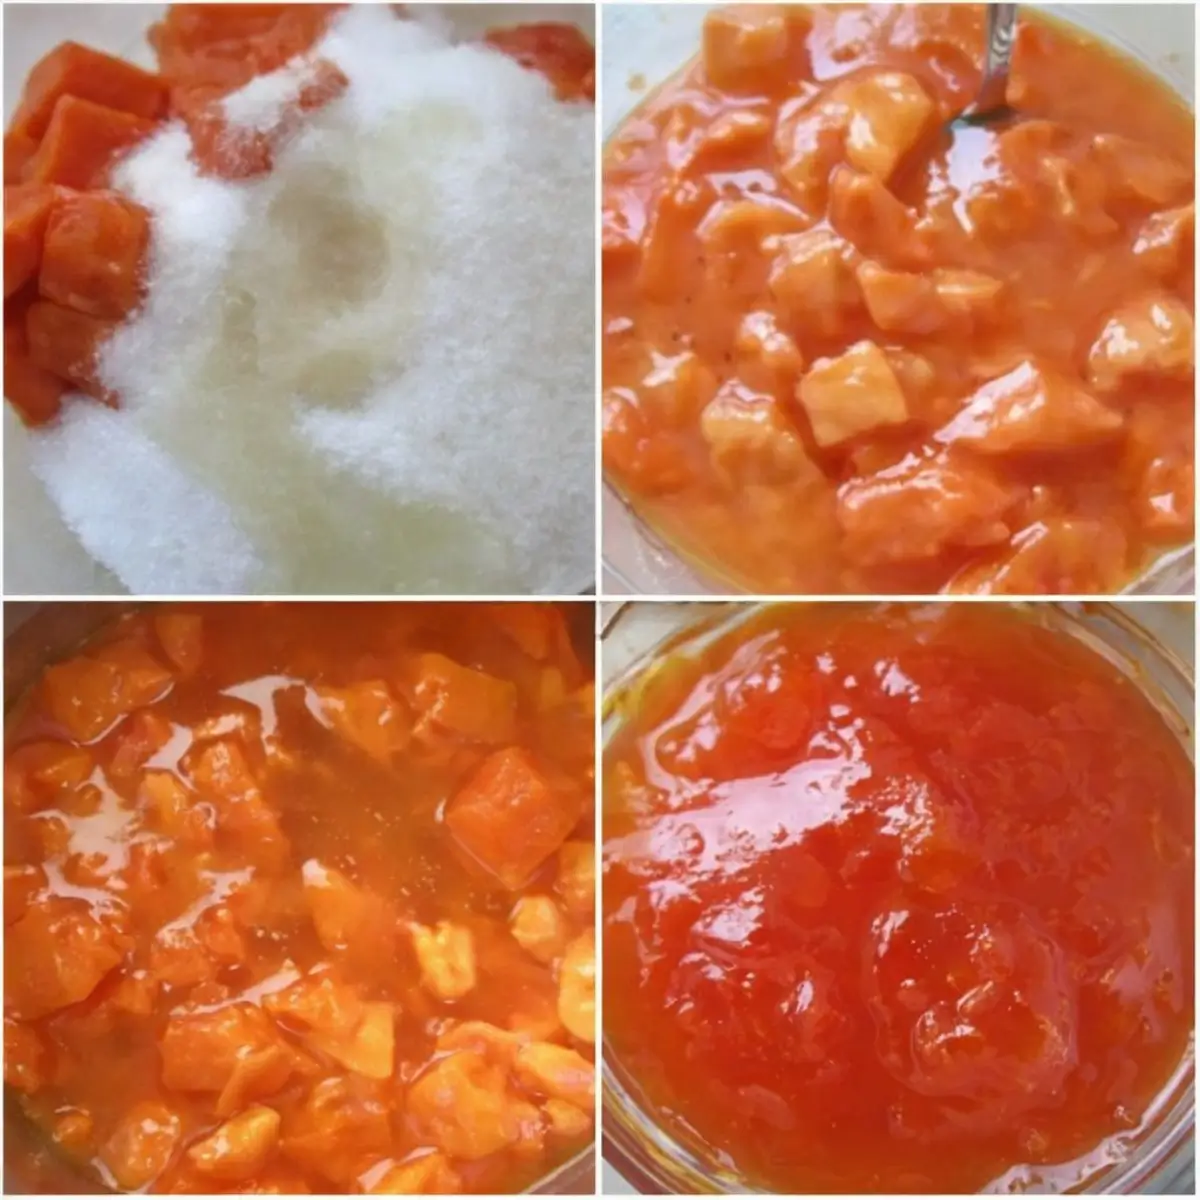
Step 1: Cube the papaya and place it in a bowl. Add the sugar and lemon juice, mix well, then refrigerate for 3 hours.
Step 2: Transfer the mixture to a pot and cook over medium heat, stirring occasionally, for 20 to 30 minutes or until thick.
Step 3: After about 15 minutes of cooking, add the vanilla extract and stir to combine.
Step 4: Meanwhile, place a small plate in the freezer.
Step 5: After about 20 minutes, when the jam looks like it is beginning to gel, turn off the heat.
Step 6: Spoon a small amount onto the frozen plate and return it to the freezer for a few minutes. If it wrinkles when you nudge it, it’s ready. If it doesn’t, cook it a little longer and test again.
Step 7: Blend the jam with a hand blender until smooth.
Step 8: Store it in sterilised jars.
Frequently Asked Questions
I wouldn’t recommend it. Unripe papaya lacks both the sweetness and the soft texture needed for a smooth, glossy jam. Ripe fruit gives the best colour, flavour, and natural richness, so it’s always worth waiting for.
You can add vanilla, cinnamon, or ginger to give the jam a gentle warmth and a more complex flavour.
You can reduce it a little, but keep in mind that sugar helps the jam set and last longer. If you use less, store it in the fridge and enjoy it sooner.
Yes, lime juice adds tang that pairs well with papaya. It gives the jam a slightly sharper and more tropical flavour.
Extra Help from the Kitchen
Soak the Fruit Long Enough – Keep the papaya, sugar, and lemon juice mixture in the fridge for the full 3 hours. This helps draw out the natural juices and shortens the cooking time later.
Use a Wide Pot – Choose a wide, heavy-bottomed pot to allow even heat and faster evaporation. The jam will thicken more evenly without sticking.
Stir Frequently – Keep the mixture moving as it cooks, especially toward the end. This prevents it from catching on the bottom of the pan and gives a smooth, consistent texture.
Test for Setting Early – Begin checking the jam’s consistency around the 15-minute mark. Soft, ripe papaya thickens quickly and may reach the setting point sooner than expected.
Rest Before Jarring – Allow the cooked jam to rest for 5 minutes before filling jars. It reduces air bubbles and helps distribute the fruit evenly inside the jars.
Seal While Hot – Fill sterilised jars with hot jam and close them immediately. The heat creates a natural vacuum seal that preserves freshness.

Variations and Twists
Pineapple Papaya Jam – Add chopped pineapple with the papaya before cooking. The pineapple gives a bright tang that enhances the sweetness and makes the jam taste more tropical. The cooking time stays the same, though the mixture may appear slightly lighter in colour.
Papaya Mango Jam – Mix ripe mango with papaya in equal amounts. The mango adds fragrance and a creamy texture that blends well as the jam thickens.
Spicy Papaya Jam – Add a pinch of ground ginger or a few chilli flakes once the mixture begins to simmer. It tastes wonderful with cheese or cold meats.
Papaya and Passion Fruit Jam – Add the pulp of two passion fruits toward the end of cooking. Their seeds give a light crunch, while the tangy flavour keeps the jam bright and tropical.
Storage and Shelf Life
Store sealed jars of Papaya Jam in a cool, dark cupboard for up to 6 months. Keep them away from direct sunlight and moisture to maintain colour and flavour.
Once opened, place the jar in the refrigerator and use it within 3 to 4 weeks. Always use a clean spoon to avoid introducing bacteria that can spoil the jam.
For longer storage, freeze the jam in small airtight containers for up to 3 months. Thaw it in the refrigerator overnight before serving. The texture may soften slightly after freezing, but the flavour remains the same.
Try These Delicious Homemade Fruit Jams Next
Papaya Jam
Ingredients
- 1 kg – 2 ¼ lbs papaya – cleaned
- 600 g – 1 ⅓ lbs granulated sugar
- 2 tsp vanilla extract
- Juice of ½ lemon
Instructions
- Cube the papaya and place it in a bowl. Add the sugar and lemon juice, mix well, then refrigerate for 3 hours.
- Transfer the mixture to a pot and cook over medium heat, stirring occasionally, for 20 to 30 minutes or until thick.
- After about 15 minutes of cooking, add the vanilla extract and stir to combine.
- Meanwhile, place a small plate in the freezer.
- After about 20 minutes, when the jam looks like it is beginning to gel, turn off the heat.
- Spoon a small amount onto the frozen plate and return it to the freezer for a few minutes. If it wrinkles when you nudge it, it’s ready. If it doesn’t, cook it a little longer and test again.
- Blend the jam with a hand blender until smooth.
- Store it in sterilised jars.


Can anyone convert this to cups of sugar and papaya pieces?
Hi Sallie!
Yes, absolutely. Here are the cup measurements.
Papaya: 1 kg cleaned papaya equals about 5½ to 6 cups of peeled, diced papaya.
Sugar: 600 g granulated sugar equals 3 cups.
Papaya size and how finely it’s cut can change the volume slightly, so being close works perfectly for jam.
Happy jam-making!
Thanks so much!!!!!!!!
Love it! Left my papaya sugar mixture overnight. First time my jam set so easily and quickly!
Is the sugar concept applicable to other fruits as well. I have a bunch of nectarines that I want to jam (without pectin)
Can I substitute cane sugar with another type of sugar when making Jam & Pickles/Relish
Brilliant small batch recipe. I’m throwing mine in bread machine…. with, ahem, sauvignon blanc. 😉
Wow! That sounds interesting! How did it come out?
Hello Manu,
Interesting recipe. Although personally I don’t love papaya, but I’ll surely try this for my 8 month old baby girl. Hope she will love it as she don’t want to eat ripe papaya.
Hi, thanks for the recipe. I have just made my first Papaya jam and it is fantastic. The recipe is very simple, but the taste is stunning. Thanks
Hey Manu,
I”m so glad I found this. I am lucky enough to have papaya growing as well as lemons. So this recipe is just what I need to use the surplus and not let it go to waste.Like you I have bottles of conserves in the fridge. At the moment I have papaya green chutney and lemon marmalade that I’ve made. Nice to have something new to add to the list. The make good gift ideas also, as who doesn’t like homemade jams?! Will be adding this to my Pinterest board too.